THIS Woman Lines Saltines Along A Tray. But THIS Reason Is Unexpectedly GENIUS!
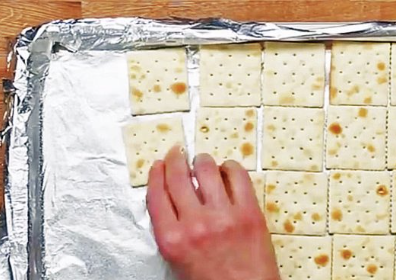
image via – youtube.com
I don’t know about you, but when I want to indulge in a dessert, there is nothing better than the combination of Sweet and Salty. Honestly it does something to the pleasure center in my brain that makes it a crazy addictive combo. Because I love this combination, I was drawn to this video that you are about to watch below.
I love making things from scratch if they are easy to follow, and have a really mouth-watering recipe, like the one presented by Lori Nolan of the Tasty YouTube channel. She and her mom tasted this at a party 20 years ago, and lucked out by getting the recipe. This “cracker candy” is a perfect dessert for any occasion, and people will be amazed at the secret ingredient…SALTINE CRACKERS!
The tutorial below will show you how to make a Caramel Sauce from Brown Sugar and Butter. Watch how she pours this over the Saltines and a final layer of Chocolate Chips and Pecans. Then see how she turns this into a delicious crunchy Bark. Have you ever seen anything look so tasty and delicious in your life?
I’ll be making this at some point this week! Will you be trying out this yum recipe? Let us know how it turns out!
Please SHARE This Delicious Recipe With Family and Friends
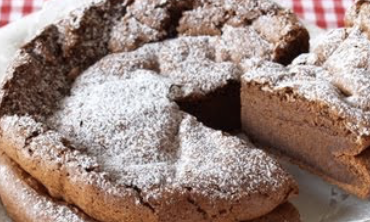
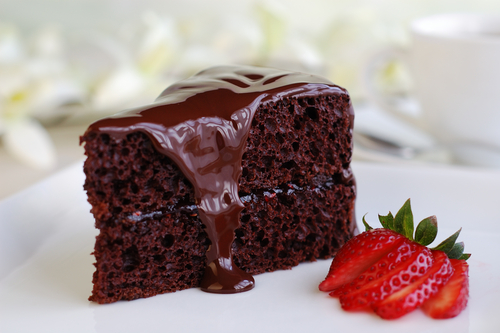
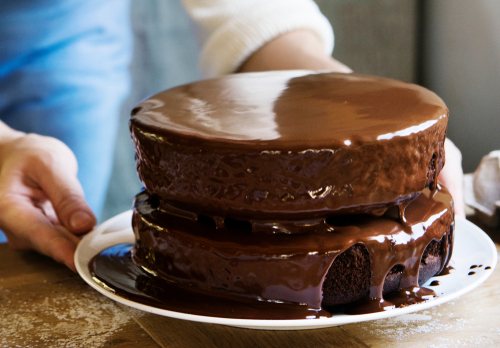
She Only Uses 2 Ingredients To Make This Chocolate Cake. But When She’s Done YUM!
Have you ever wanted to bake up something delicious but didn’t make it to the kitchen because you really did NOT want to clean up the mess afterwards? Baking often has messy side effects to it, with all the powdery flour and sugars, sticky butter coated bowls and blenders and spoons, and batter that too often ends up being whipped out of the bowl it was mixed in.
Set those unpleasant memories aside and replace them with thoughts of this incredibly simple and easy to make 2 ingredient chocolate cake. It’s a whipped, meringue-type of cake that ends up tasting rich and decadent yet also light and sweet. In other words, it’s basically perfect, and it will leave you with minimal mess to deal with.
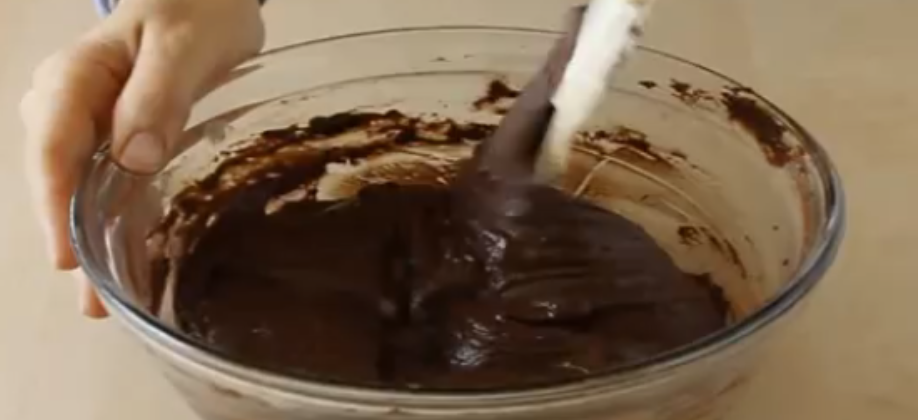
This recipe makes 6 servings and each one contains 200Kcal. It takes about an hour total to prepare and bake. You can serve this right away once it’s cooled off from being in the oven, chill it in the fridge for later, or keep it in the freezer for up to a week. The ingredients are easy to remember, 3 eggs and 3 bars of chocolate, or enough to total 165 grams or 5.8 ounces. Preheat your oven to 338 degrees Fahrenheit then separate the egg whites out into a large bowl.
Refrigerate them so that they’re cold for when you later use them, which will make the meringue much more stable. Break the chocolate into pieces and melt it in a large bowl using a double boiler over hot water, then allow the chocolate to cool and whisk in the egg yolks.
In a separate bowl whip the egg whites with an electric mixer until firm peaks form and you can turn the bowl upside down without any of it sliding out. Add about 1/3 of the meringue to the chocolate and blend it together well with a whisk. Add in half of the rest, mix well, and follow with what is left.
Take a round cake pan, line it with parchment paper, and pour the batter into it. Before you put it in the oven pick it up and lightly drop it on the counter to get any air bubbles out. Bake in the preheated oven for 30-40 minutes, remove and allow it to cool completely before serving.
To finish off the cake you may want to brush it with syrup. It’s highly recommended that syrups or liquors such as brandy, rum, or kirsch are used, along with a light dusting of powdered sugar. Serve a slice of it alongside ice cream, fresh fruit, or with a dollop of whipped cream and a cherry on top. Pass on this recipe with friends and family, so they too can enjoy the tastiness and joy that this cake can bring them.
I tried and made this myself and got rave reviews from everyone who tried a piece. It was worth the mess and the extra mile I’m going to walk tomorrow.
Please Share This Recipe With Family and Friends 🙂
This Woman Wraps Bubble Wrap Around This Cake. But When She’s Done STUNNING
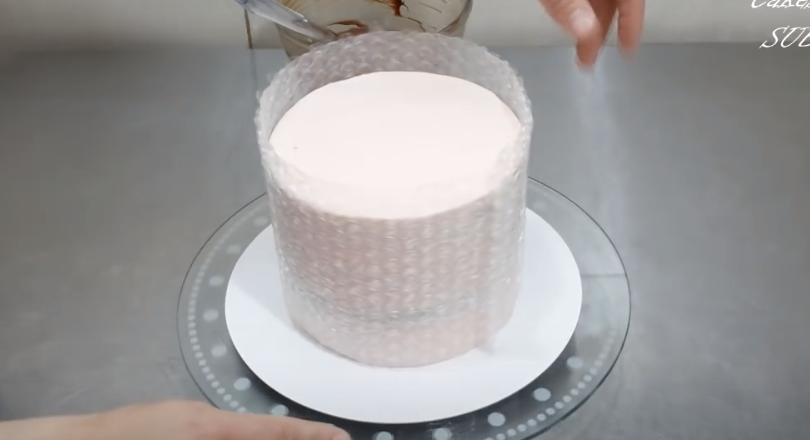
When you bake a cake at home it usually ends up being slathered in frosting and maybe some sprinkles, candy, or fruit gets thrown on top of it. The average home baker simply does not have the knowledge or specialized tools to make fancy cakes.
However, with this simple chocolate tempering decoration technique you can take a boring run of the mill cake and turn it into a work of art! All you need is a piece of clean bubble wrap, pastry chocolate, a microwave, and an already baked cake. Read on to see how you can take a cake from blah to WOW with a little finesse and patience, and be sure to check out the video to see how it’s done.
In a microwave safe bowl break up pastry chocolate into pieces, place it in the microwave, and cook for 1 minute on medium heat. Remove the bowl, stir the chocolate, and resume heating it for an additional minute. Depending on your microwave, you may have to keep heating it in short stages, and you can stop once the chocolate is completely melted and smooth.
Take a clean, washed piece of bubble wrap that has been fitted to match the size of the cake you’re decorating and wrap it around the cake. Leave about ½ an inch of the edge to overlap where it meets, as well as an inch that extends over the topside of the cake (see video). Lay the bubble wrap flat with the bubble-side facing up and pour the melted chocolate onto it.
Working quickly, smooth the chocolate evenly over the wrap with a flat knife or spatula, covering the piece to the edges as best you can. Allow the chocolate to dry and harden up a bit for about 10 minutes, at room temperature, before you go on to the next step.
Once it’s ready, carefully pick up the chocolate bubble wrap and apply it to the outside of the cake. Make sure the chocolate covered side faces in, touching and resting against the cake, then wrap it around while smoothing it on and pressing firmly against the cake. Pay careful attention to the seam where the edges meet and make sure it’s evenly aligned. Wait about 10 minutes while it sets, then you may remove the wrap.
Starting at the edge that overlaps at the seam begin to slowly peel back the bubble wrap away from the chocolate. Once you get started it should come off easily and you’ll be left with a honey-combed chocolate enveloped cake that looks amazing and super tasty!
The chocolate part that extends over the top edge of the cake makes an excellent holder for any additional topping you may wish to add on, like fruit, candies, cream, or whatever other creative things you come up with.
Please Share this with family and friends
This Lady Pours Milk Onto This Chocolate. The Results? My Mouth Is Dripping!
Fudge was first recorded in America by a student at Vassar College named Emelyn Battersby Hartridge. She wrote a hand written letter in 1886 to her friend in Baltimore, Maryland that the first Fudge was sold for 40 cents per pound. In 1888 Hartridge got her hands on the first fudge recipe and it become popular at her school immediately. Soon it spread like wildfire to other women’s colleges and then exploded into the rest of the population soon after.
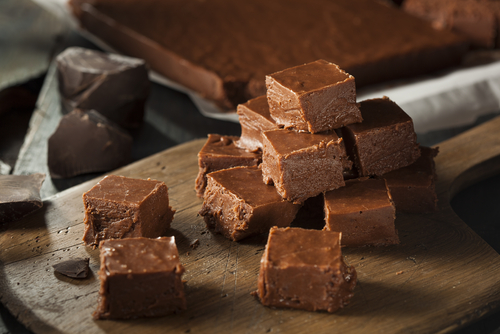
Fudge is usually rich, soft and sweet. It is usually made with a mix of milk, butter, and sugar. You then beat the mixture until it cools down and gets that special creamy, smooth consistency.

In the video below Elizabeth Labau will show you the simple steps to making your very own fudge at your house. You will need the following ingredients:
1. Prepare an 8×8 pan by lining it with aluminum foil and spraying the foil with nonstick cooking spray.
2. In a large microwave-safe bowl, combine the chocolate chips, condensed milk, and butter. Microwave in one-minute increments until melted, about 2-3 minutes.
3. Stir to ensure all the chocolate is melted, then add the vanilla and salt. Stir until the candy is smooth and well-mixed.
4. Pour the fudge into the prepared pan and smooth it into an even layer.
5. Place the fudge in the refrigerator to set for at least 2 hours. Once set, cut into 1-inch squares and serve at room temperature. Store excess fudge in an airtight container in the refrigerator.
Please Share This Recipe With Family and Friends
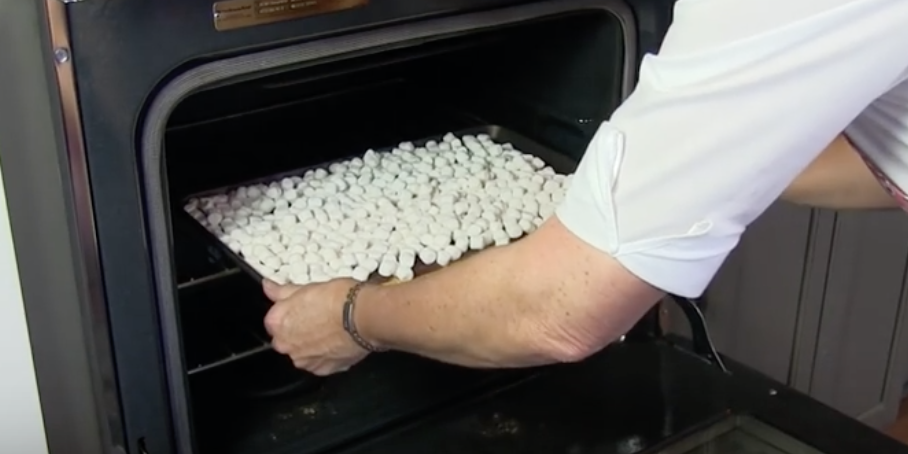
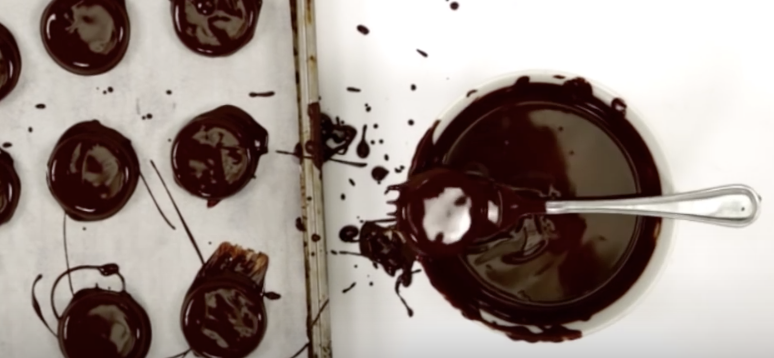
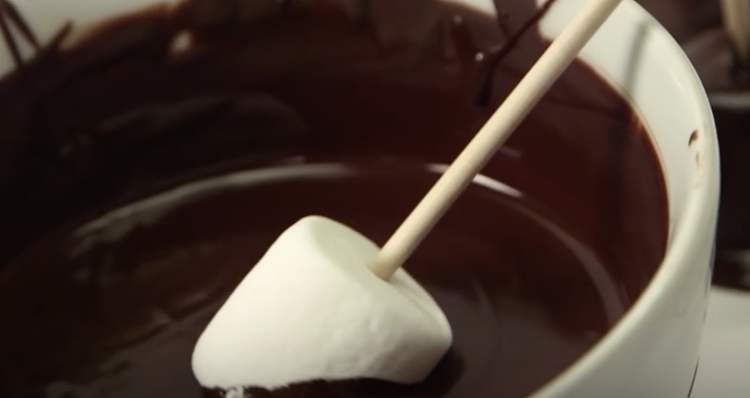
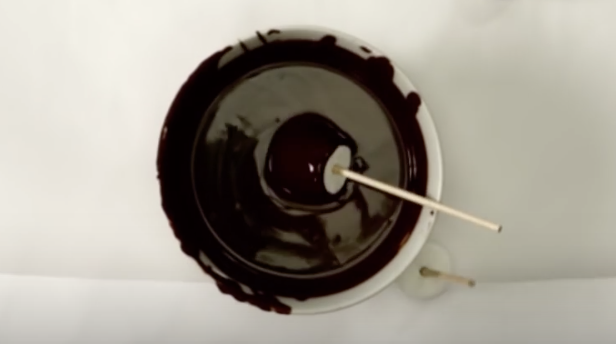
She Puts A Bunch Of Marshmallows On a Pan. When She Takes It Out Of The Oven YUM!

S’mores! Nothing evokes happy memories from childhood around a campfire like S’mores. Whether we camped with our families, or went away to summer camp, or hung out the beach, the making of S’mores and the moment of that first delectable taste are memories we just never forget.
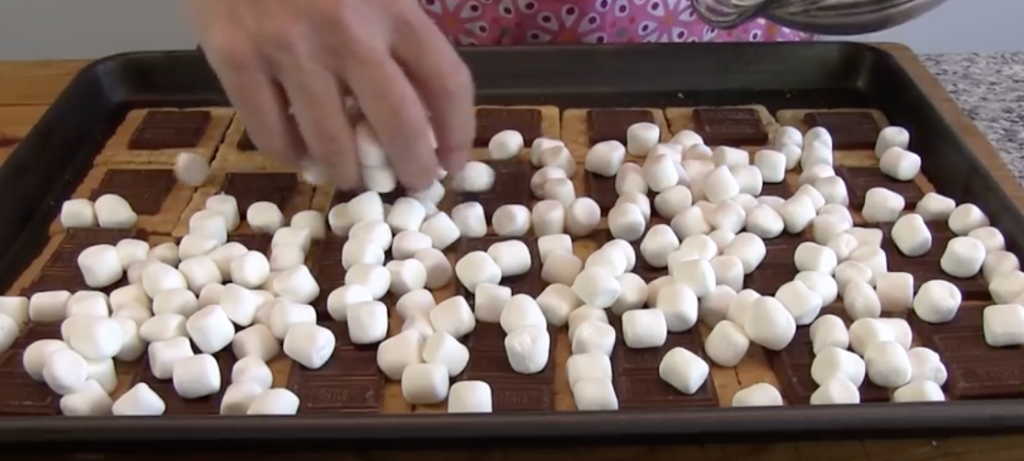
Putting them together and cooking them over the campfire take some time, and probably the anticipation of their readiness adds to the allure of the final product. What if you don’t care about all that campfire stuff and just want to have the luxury of getting to make them as a dessert at home?
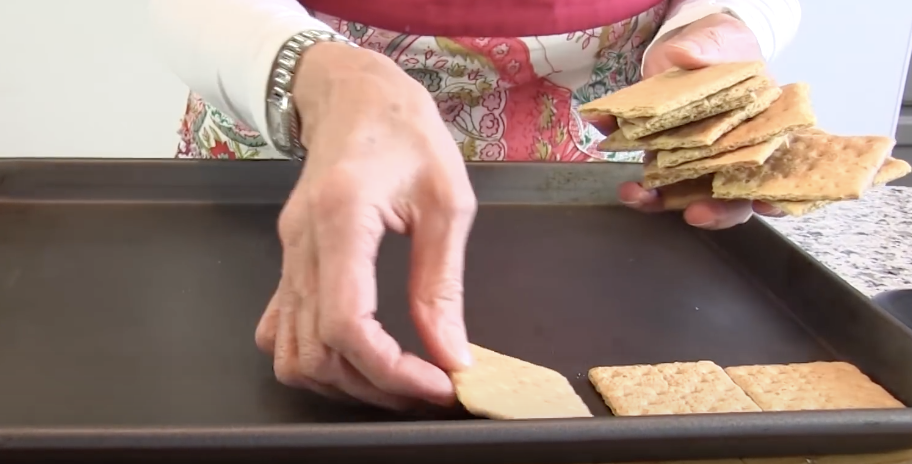
Well, Youtube’s Gooseberry Patch came up with a recipe for just such a homemade solution. The two women who show us the steps feel like they just stepped out of a Betty Crocker cookbook in the 1950’s, making the illustration all the more charming. Watch the easy steps for At Home S’mores and enjoy them for sleepovers, family and friends any time you want an extra special dessert that evokes such cozy memories.
Please SHARE These Indoor S’Mores With Family and Friends
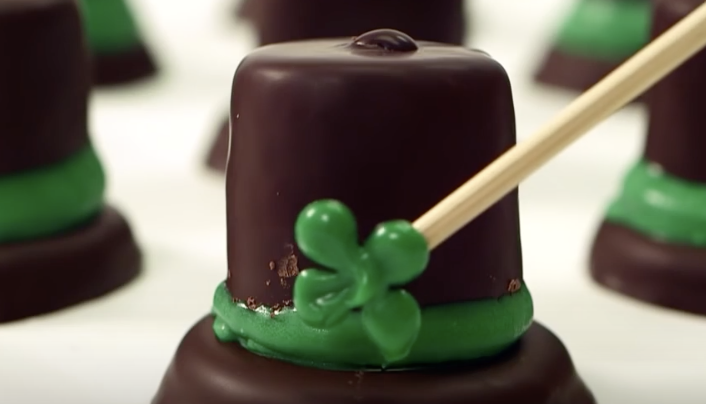
With Only 3 Ingredients You Can Make This St. Patty’s Day Dessert. The Result Is Magically Delicious!
The history of St. Patrick’s Day comes from the Declaration which was allegedly written by St. Patrick. Patrick was born into a wealthy family in Roman Britain during the fourth century. His dad was a deacon and his grandpa was a priest in the Christian church. When Pat was sixteen, Irish raiders kidnapped him and made him a slave in Gaelic Ireland. For six years he was a slave that worked as a shepherd. During these years Patrick ‘found God’. When he found God, God told him to escape to the coast, where a boat would be waiting to take him back to his family. He listened to God and sure enough, the boat was waiting on the coast to take him home. When Patrick got back he became a priest.
Legend says, Saint Patrick used a three-leaved shamrock to describe the holy trinity to the Irish pagans. He became Ireland’s greatest saint and was responsible for converting the Irish Pagans to Christianity. On March 17th St. Patrick died, however his legend steadily grew over the following centuries. We wear green to represent the shamrock that St. Patrick used to describe the Holy Trinity. Also, green has been associated with the country of Ireland since the mid 1600’s. Green flags, ribbons and shamrocks have all been recorded as early as the 1680s.
With St. Patty’s day right around the corner it is a perfect time to make a yummy dessert. In the video below we will learn how to make these adorable Leprechaun Hat Thin Mint S’mores. The best part about this St. Patty’s Day treat is that they are super easy to make. Follow the simple instructions in the video below, and those little leprechauns will be coming to eat your treats in no time!
Please SHARE This With Family and Friends