This Woman Starts Rubbing Baking Soda On Her Face The Reason Is An Unexpected Surprise!
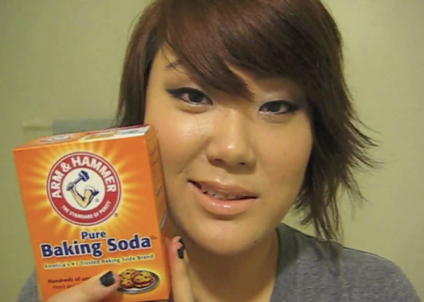
image via – youtube.com
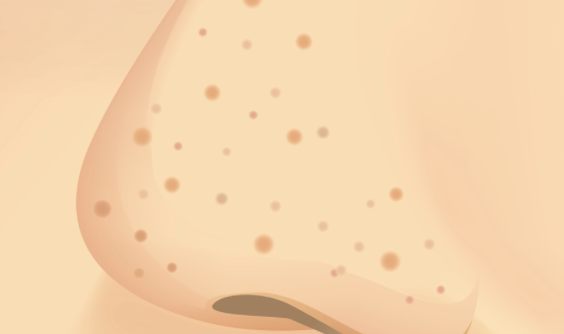
Many of us have enlarged pores around the nose area, and simply can’t stand how they look and how dirt gets trapped in them. While it is impossible to get rid of pores, they can be made smaller without spending an arm and a leg on expensive products.
People who have oily skin, or an oily “t-zone” tend to suffer more from large pores than those with drier skin. If you want a really inexpensive and sure-fire way to make your pores smaller, the following video is for you.
YouTuber Angela Minji Kim does a brave tutorial on how to use baking soda to reduce the appearance of enlarged pores. She notes that baking soda is most efficient at removing “the buildup of dead skin cells and dirt from the surface of your face.”
Watch how she does it and what other bonus uses of baking soda are thrown in!
Please SHARE This With Family and Friends 🙂
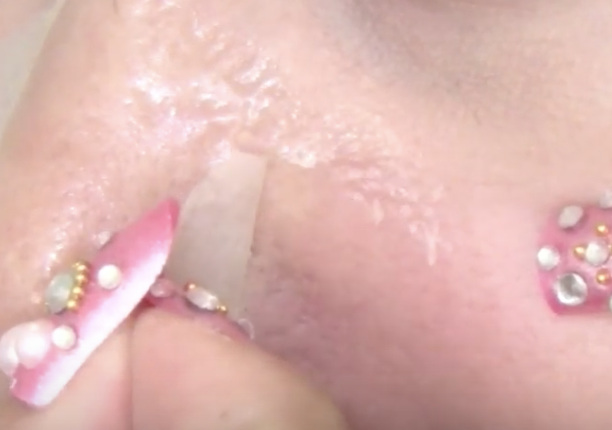
With Only 2 Ingredients She Reveals How You Can Make Your Own Blackhead Strips!
image via – shutterstock.com
If you are the kind of person who can’t stand having pimples or those dreaded blackheads on your face, this is the video for you. They usually appear on the oilier places on your face: on and around the nose, the chin area and forehead. For some reason using the pore strips and looking at all the blackheads coming out clean on the strip is just so satisfying!
Many of us squeeze them because they are so unsightly. However, not only does the area refill, often turning into a pimple, but it also stretches the pore. Stretched pores are more prone to getting further infection and they don’t shrink back! So, don’t pop them.
I am constantly on the lookout for natural remedies to get rid of blackheads, and have tried many. The one you are about to view on the footage below has yielded the best results. I literally could not believe what came out, when I peeled the mask off. It requires only two ingredients: milk and gelatin. Follow the steps on the video, and let us know what you think.
Please SHARE This With Family and Friends
She Realized That She Was Getting Chicken Skin On Her Arms. I Had No Idea This Is The Reason Why!
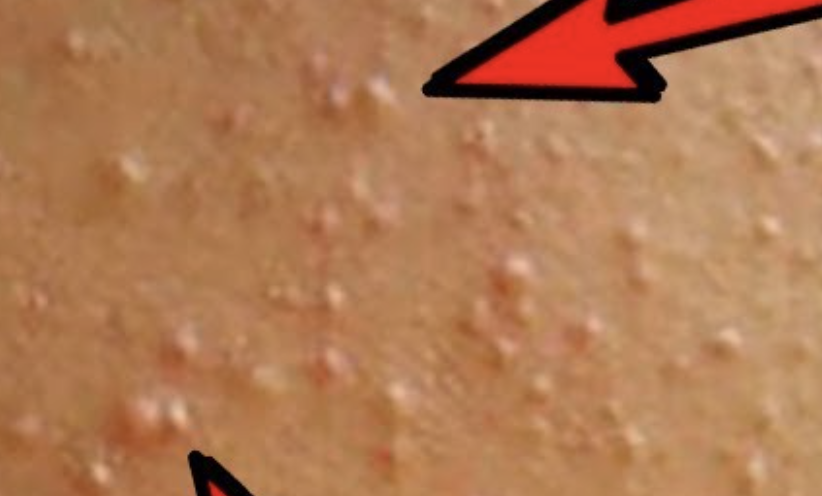
image via – youtube.com
If you have tiny, hard, whitish-red bumps that appear on the back of your arms, then you likely have chicken skin. It sounds a lot worse than what it actually is and the bumps are harmless. For most people, the worst part about having them is their appearance since they pop up randomly and look rash-like or similar to acne.
An estimated 40% of people suffer from the condition and you can easily self-diagnose yourself by checking for tiny bumps on the backs of your arms and legs. If you have it, chances are you’re already very much aware of it. However, many people don’t actually know what causes chicken skin or how they can combat it.
The medical term for the skin condition is keratosis pilaris. It’s named after the keratinization of hair follicles on the skin which happens when our bodies produce excess amounts of keratin, a skin protein. Basically, that extra keratin begins to clump together around hair follicles and causes a bump to form and raise up.
Eventually the hair follicles often become trapped underneath all of the excess keratin which blocks the pore and plugs it off. The hair keeps growing inside the closed off follicle, making it an ingrown hair, and if you look closely you can sometimes see it in the middle of the bump.
One of the main issues people have with chicken skin is that it’s notoriously hard to get rid of or control. It often appears worse in the winter when air temperatures are colder and moisture levels are lower. However, it also varies highly from person to person and one individual’s experience can be drastically different from another.
One product that gives visible results was Clearasil Ultra exfoliating scrub. It reduces the appearance and feeling of bumps and that it has worked to keep them at bay ever since she started using it. The active ingredient in the scrub is salicylic acid which is often a main ingredient in topical anti-acne treatments and creams.
It’s very important to always keep your skin moisturized and to apply lotion as soon as you get out of the shower or bath. Check out the video for more information and routines and remedies that can work for you. Maybe it can also work for you!
Please SHARE This With Your Family and Friends
She Begins Rubbing Tumeric Onto Her Cheeks. But When She Rubs It Off It’s AWESOME!
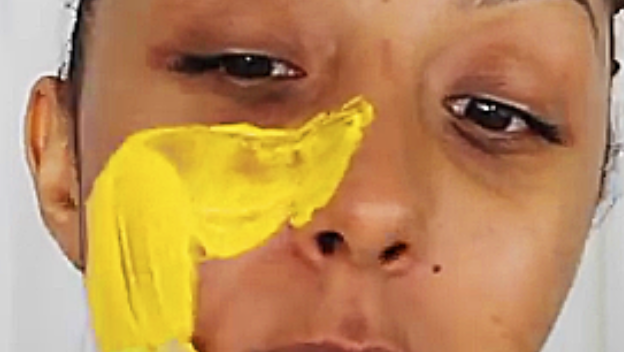
image via – youtube.com
Acne, eczema, redness, inflammation, dark spots or under eye circles, unwanted facial hair, wrinkles. If you have any one of the aforementioned facial and skin issues then this homemade mask is for you. It brightens skin and tightens pores as it works to clear up acne and eczema, and reduces any redness or inflammation.
It also helps fade those unsightly dark spots and under eye circles, while working to reduce unwanted facial hair. Plus, it’s anti-aging and fights wrinkles while leaving skin soft and smooth. This mask is the most beneficial one you’re likely to ever come across and it all comes down to a few simple, inexpensive, and easy to find ingredients, the main one being turmeric.
Turmeric is a very colorful, orange-yellow spice that comes in powder form. Most of the world’s supply is grown in India where the Turmeric plants roots are gathered, boiled, and then dried in super hot ovens. Once fully dry they’re ground down into a fine powder, which is very strong and easily stains whatever it comes into contact with.
That’s why it’s often used as a dye agent, even though it’s most widespread and common use is as a spice for flavoring foods. With that being said, make sure you wear clothes you don’t mind getting dirty or stained when making this facial treatment. You also want to wear gloves or your nails and skin will turn yellow, in the same way that yellow mustard stains hands and fingers.
Gather together a small bowl, a teaspoon, a tablespoon, flour, turmeric, almond oil, and regular milk. Place 2 tablespoons of flour and 1 teaspoon of turmeric in the bowl, then add 1 tablespoon of almond oil and as much milk as it takes to get a creamy consistency that’s not too runny or thick. For reference, she started out with 3 tablespoons and added a little more to get it just right.
Once those four ingredients are all mixed together it’s ready to be applied onto your face. Be extra careful when you go to apply this mask and avoid your eyes and eyebrows since it works to remove facial hair and can take your brows off. Also, be mindful of that fact when working around your hairline.
You can apply it under the under eye area but make sure you don’t get too close to your eyelashes! Leave the mask on for 20 minutes then wash it off with lukewarm water. Use a towel you don’t mind ruining or getting all yellow to wipe any remaining bits off your face.
During this part be careful to not get any of the turmeric on the counter top because it will stain that, and anything else it comes into contact with. After you get the mask off you may have slightly yellow skin. Wash your face again, this time with a gentle cleanser, to get rid of any remaining residue and follow that up with a light moisturizer.
The turmeric facial mask can and should be applied at least once every week. It’s all natural and won’t cost you more than a few dollars to make. For some of us out there this beauty tip could change our appearance, and lives, for the better. So rifle through your spice rack and grab the turmeric, mix it up and smear some on your face, and be amazed at how such an unlikely solution actually works!
Enjoy the Tutorial below! Let us know if it worked for you!
Please Share This With Family and Friends 🙂
When You See What Her Homemade Pore Strip Pulls Off Her Face You Won’t Buy One Ever Again!
Fact: Blackheads are gross and a pain in the butt to remove. That’s why people often turn to pore cleaning strips that promise to help pull dirt and oil out of pores. In reality, all the pricey strips ever seem to do is irritate and dry out the fragile skin on the nose area. Plus, they can be incredibly painful to remove and many a tear has been shed in the peeling process.
Instead of enduring more pain and wasting more money in search of a solution to this age old beauty problem, try a more gentle approach, like this 100% natural method. All that it requires is two simple ingredients that cost way less than $4 total, and since you don’t use a lot they can be used many times.
Chances are it’s much more effective than anything else you’ve tried so far at removing blackheads, and it’s incredibly cheap and easy to do in the comfort of your home.
YouTube beauty blogger Michelle Phan shows how to make a simple pore strip-like treatment and explains all the steps and details. The solution she whips up contains only 2 basic ingredients; unflavored gelatin and milk.
For the milk part any type or percentage will do so long as it’s a regular, plain type of milk. Skip the chocolate and strawberry flavored kinds and definitely don’t use any almond varieties. This also requires a microwave safe container, a glass cup works well, and a clean paint or makeup brush that you don’t mind potentially ruining.
Begin by measuring out one tablespoon of milk and one tablespoon of unflavored gelatin. Pour them into the container and mix it up until it’s chunky, then stick it in the microwave for 10 seconds. When it comes out it should look more liquid and oozy. Wait a few moments for the solution to cool off a bit and then dip the brush into it.
Before you apply any to the delicate skin on your face, test it out on the back of your hand, that way you know it’s safe to put on. Now all you have left to do is brush the mixture onto any areas you want to clean and make dirt or oil free. Sit back, relax, and wait until it dries on your skin, which takes about 10 minutes or so.
To remove, simply peel it off when it has dried enough to easily do so. Finally, you may want to apply moisturizer afterwards, or whatever acne/zit cream or serum that you prefer to use, because the pores will be open and the skin will absorb the product much better.
Check the strip if you want to see what it actually picks up off your skin and out of your pores. All the dirt, oil, blackheads, old dead skin cells and grime will have peeled off along with the dried strip. It’s kind of nasty but it definitely puts into perspective how effective this easy DIY topical solution works. Plus, you’ll be happy to know all of that gunk is off your face.
The next time your skin needs a little revitalizing, try this out, your skin will thank you!
Please Share This With Family and Friends 🙂
The Easiest Way To Remove Those Gross Blackheads For Good Overnight!
Everyone hates having Blackheads which are an inevitable part of having pores in our skin. Dirt gets clogged which causes our pores to stretch. Blackheads can have underlying puss and sebum. Many people squeeze them to get rid of the unsightly black marks which usually occur on the oiliest parts of our face; the t-zone. Squeezing further enlarges the pores making them more prone to be refilled.
Thus the best solution is to prevent the problem from getting worse, and occurring less often. The following footage offers an at home remedy that can be used with different masks made from natural foods which are fantastic in resolving blackhead and large pore problems.
Gentle exfoliation, not scrubbing, is key to good skin care. The solutions that will be discussed in this article and illustrated in the video below provide remedies, that will help to maintain clear skin and will preclude the need for constant exfoliation, which can be irritating.
The first fantastic at-home mask, which you will see illustrated in the footage below is an EGG WHITE MASK. Egg whites can be combined with a small amount of coconut or olive oil, or it can be used by itself. Watch the tutorial, that shows you a great method for application that can be used for these other home remedies.
MILK AND HONEY is the next combo that is amazing at battling those hideous blackheads and providing you with glowing skin. Honey, in and of itself, has remarkable healing properties for the skin, and so the third mask contains it as well. A CINNAMON AND HONEY mixture provides a mask that can do wonders for overall skin maintenance.
A paste is created by pouring approximately 1/4 teaspoon of cinnamon into your hand and adding an equal amount of honey. As you mix this together it makes a mask that you should leave on for 15 minutes, then rinse with warm water, to see those blackheads disappear.
Finally, we all know the importance of a toner to close your pores, thus preventing further dirt from entering. A natural and powerfully effective toner for tightening those pores and preventing blackhead formation is by combining fresh lemon juice and water.
Not only is the astringency of lemon effective, but the high concentration of Vitamin C in it, promotes overall skin health as it sinks in, greatly reducing pore size.
Please SHARE This With Family and Friends