
THIS Brilliant Way Of Cutting Apples Is So Easy. I Wish I Knew About This Earlier!
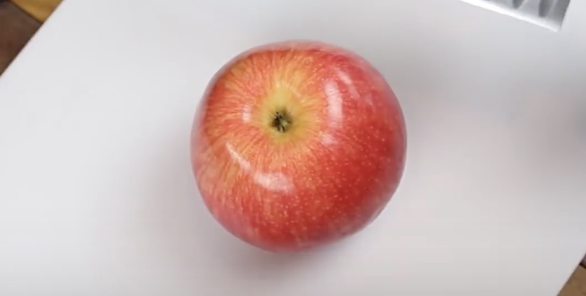
There is a simple, faster way to cut apples that keeps them fresh for much longer than most traditional methods. Most people usually cut apples into quarters and end up with pieces of core left on the slices or try and hack it off haphazardly. This video by Grant Thompson, “The King of Random,” demonstrates the handy technique and offers proof that it’s the smartest way to carve up an apple.
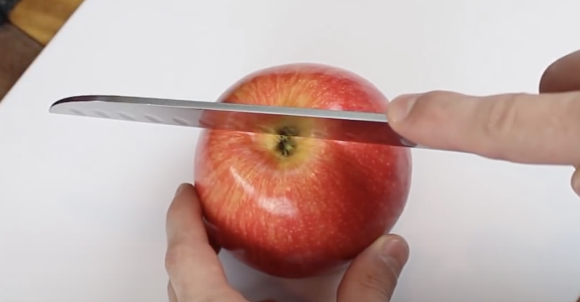
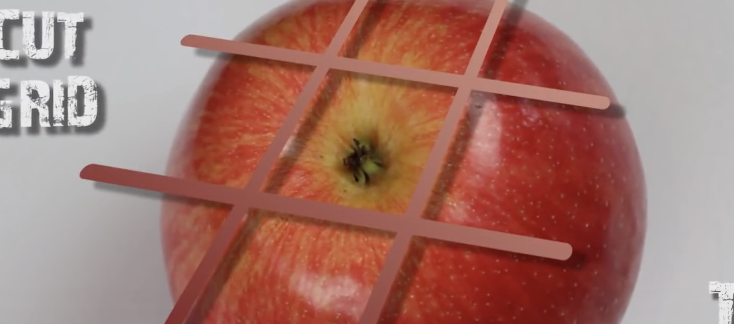
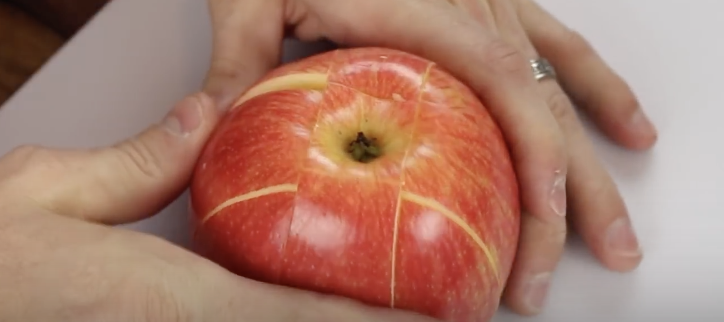
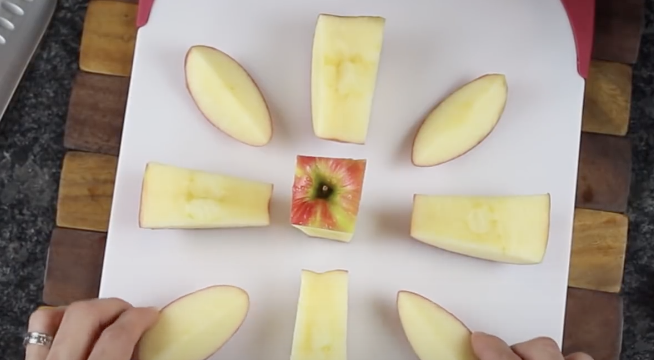
First, turn the apple upside down to stabilize and prevent it from rolling around when you cut it. Imagine a tic-tac-toe pattern, with the center square lining up with the middle core part of the apple, and cut down along the lines holding the apple together as you slice. You end up with 8 edible pieces and 1 core part that can easily be discarded. If you keep the pieces together it will stay fresh longer since none of the flesh is directly exposed to air which turns it brown after awhile. Slap a rubber band around the outside to ensure the slices stay together tight and pack it for lunch or a later snack.
An informal experiment was set up to test if this way is better than others. One apple was cut regularly and left out untreated and two were cut tic-tac-toe style, bound with rubber bands, and one was treated with lemon juice, which is said to keep apples from turning brown. After 9 hours the exposed ones turned brown, the held together one had slightly browned, and the lemon treated one was the freshest. As to timing, the tic-tac-toe method was 5x quicker and left virtually no mess.
Additional apple slicing tricks are also covered in the video that show neat ways to present it when serving at home. Briefly touched on is a way to cut up slices so that they can be rearrange into an apple swan. It is covered in another video but seems like a great way to get young children to eat more fruit, or impress your guests!
Please SHARE With Family and Friends
He Takes An Onion And Pushes A Hair Pick Into It. The Reason Is Brilliant!
In terms of food preparation, chopping up onions is probably one of the worst jobs you’ll ever have to do in the kitchen. Sometimes they’re so strong that they make your eyes water and burn, and when you get onion juice on your skin and fingers, it lingers forever and stinks. However, the worst part about it is the actual chopping part.
Onions are tricky to cut because all of the many layers fall apart and never seem to stay in place, if they did stay put it’d be a whole lot easier to slice and dice. Your cozy night in making a simple dinner can easily turn into a kitchen nightmare with a combination of blurry, watery eyes and a sharp knife slipping on stray onion pieces.
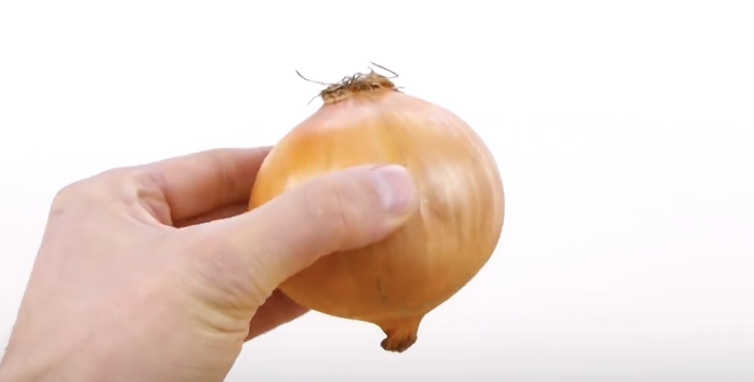
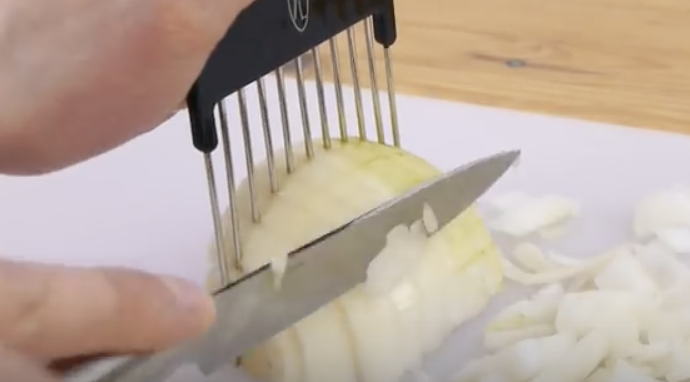
Don’t let that scenario become your reality the next time you have to chop onions, or for that matter any other type of similarly shaped fruits and vegetables. Instead, use a hair pick to streamline and simplify the entire process. In the accompanying video YouTube’s DaveHax demonstrates the trick and shows us exactly how easy cutting things can be.
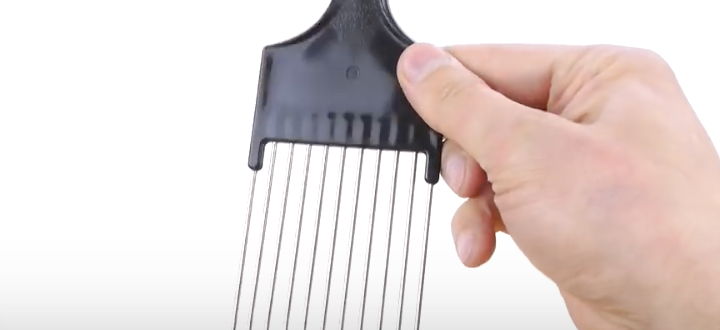
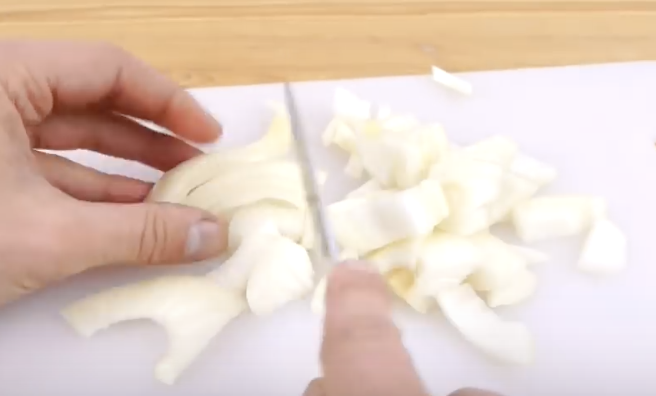
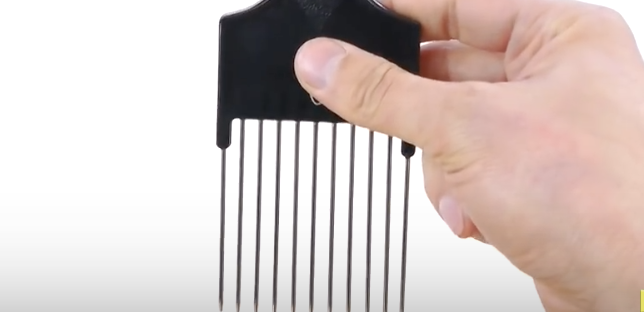
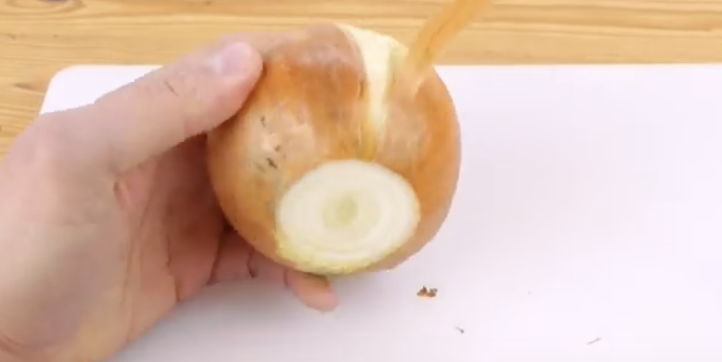
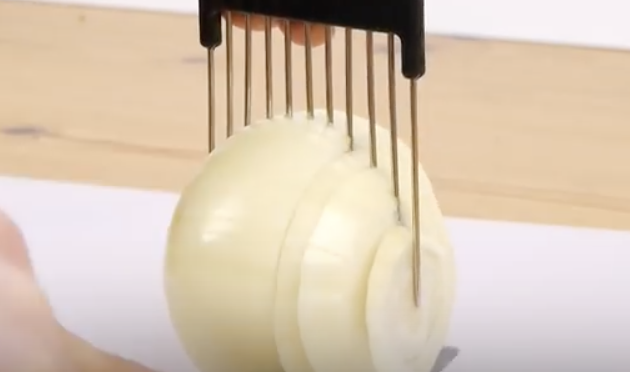
The key is making sure that you use a hair pick that has stainless steel prongs. Take an onion, chop off both ends, and peel all of the dry papery layers off it. At that point you simply stick the hair pick into the onion and use it to hold the bulb steady.
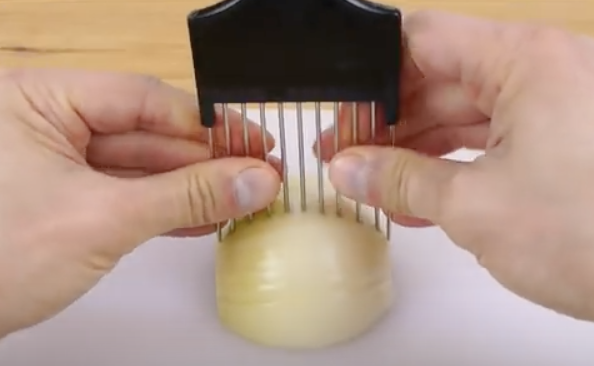
Then, using the spaces between the prongs as a guide, slice through them for perfectly proportioned cuts every time. Depending on how you stick the pick into the onion, you can make picture perfect onion rings or a bunch small diced cuts in just a matter of seconds.
The pick trick works for just about any fruit or vegetable you can stick it into. DaveHax demonstrates the technique on lemons, tomatoes, and cucumbers but really the possibilities are wide open for this hack.
If you don’t already have a suitable hair pick, be sure to write it down on your grocery list so that the next time you’re at the store you remember to get one. This is something that’s affordable, simple, and guaranteed to make life a whole lot easier. Once you try it, you’ll be hooked!
Please Share This With Family and Friends
Apparently I’ve Been Peeling Oranges Wrong My Entire Life. This Is So Good To Know.
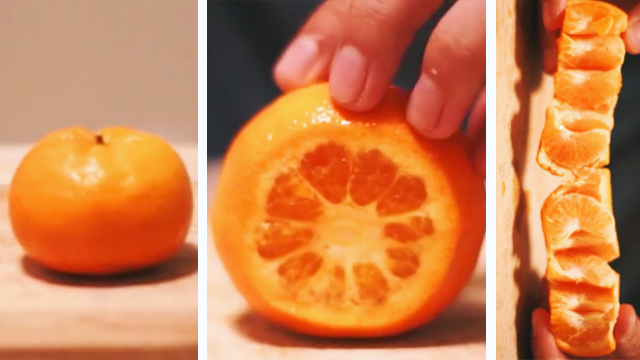 image via – rumble.com
Peeling an orange should be an easy task to do, at least that’s what we all have assumed at some point in our citrus eating lives! However, the sad truth is that most of us have no clue what we’re doing and end up making a big, sticky mess in the process. It turns out that there is a much better way to peel an orange than going in blind. So if you have ever struggled through attempts at peeling one open, you need to see this video.
The accompanying clip shows you exactly how to properly go about peeling a ripe, juicy, delicious orange without making a mess. The method is everything you’d want it to be; quick, easy, efficient, simple. All that you really need is a sharp knife and in less than sixty seconds you’ll be done. This technique will also reduce the chances of getting orange juice sprayed in your eyes, which is always a painful experience that no one ever enjoys.
Here is the best way to peel an orange without making a sticky mess. First, place the orange securely on a flat surface so it sits length-wise. Take a sharp knife and carefully cut off both ends of the orange. Next, make a slit down through the middle, but only cut to the center and then stop. This is key to this trick and you want to still have one piece that’s all in-tact, so don’t cut all the way through the orange!
Now grasp the orange at each side of the slit you just made and pull down sideways to split it neatly open. It should unfold to reveal the delicious inner fruit pieces and now you can remove any seeds or the white part, which is called the pith of the orange, if you don’t like how that tastes. What you’re left with are chunks of orange that you can easily peel off the rind and eat, so chow down and enjoy the fruits of your labor without making a mess!
The next time you reach for an orange be sure to try this technique and definitely check out the video to see how it’s properly done because once you see it, it’ll stick with you forever.
Watch the video below to see how it’s done:
Please SHARE This With Family and Friends 🙂


