
This Lady Begins With A Normal Piece Of Paper. But After She Makes A Few Folds Brilliant!
If you find buying paper bags to be a waste of money, but want or need a decorative gift bag, make it yourself! You can custom make one out of newspaper, magazines, craft paper, decorative paper, wrapping paper, or whatever else you may have lying around. If you require something sturdier than a plain old brown bag then this Innova Crafts video tutorial is perfect for you! I tried to distill the information into the description below, but for optimum results watch the video to see the step by step method used.
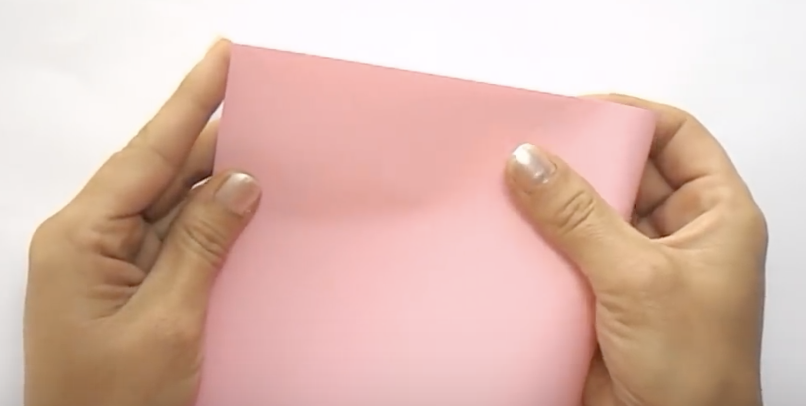
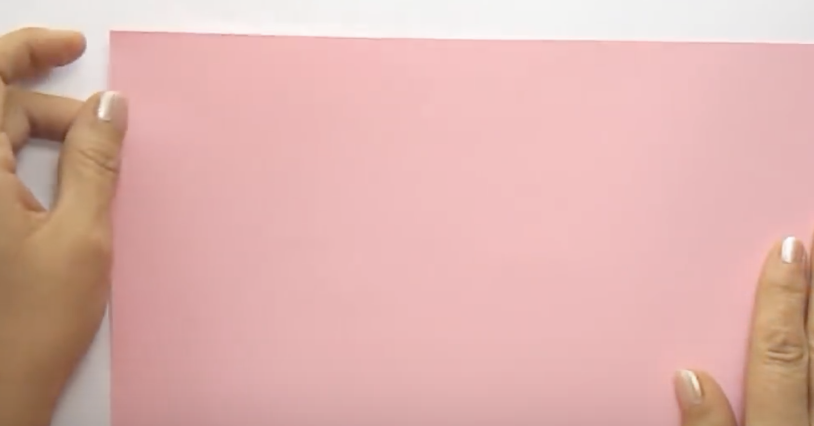
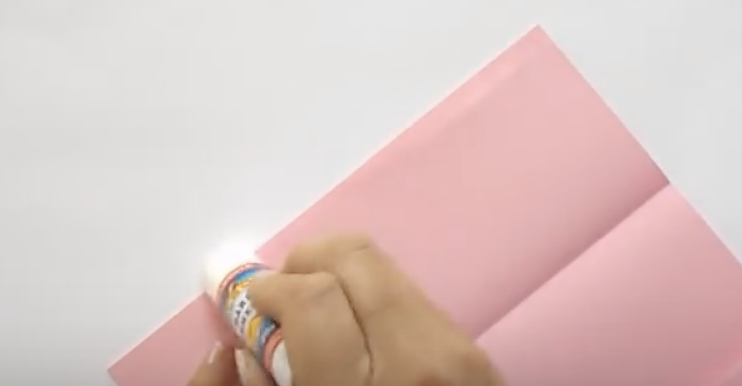
For this craft project you will need your choice of paper, glue, and some ribbon. To begin, fold the paper in half length-wise to see where the middle is, but do not crease it. Then, fold the sides in so that they meet at that middle point, with one of them slightly overlapping the other. Take a glue stick and apply glue to the edge that overlaps, then press it firmly together.
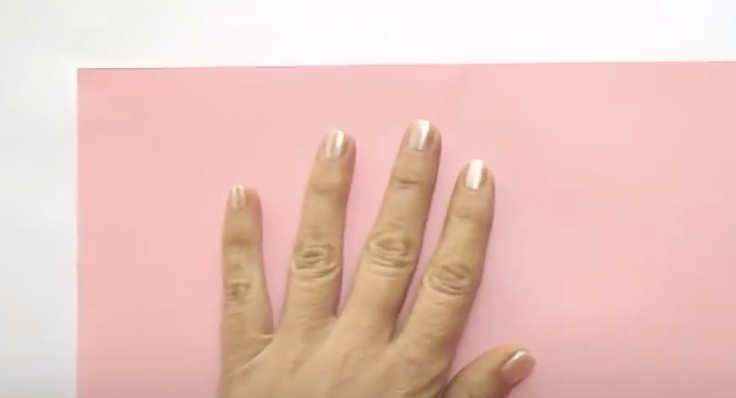
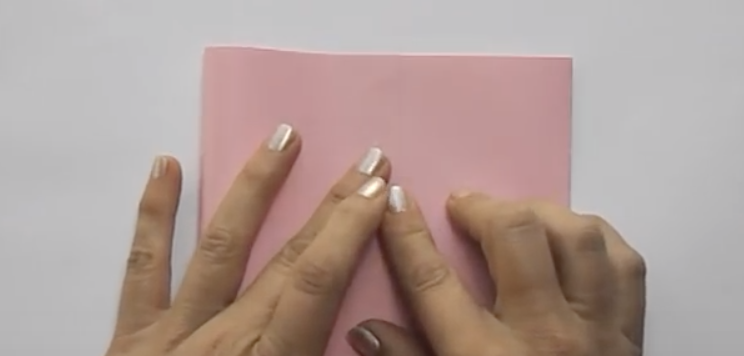
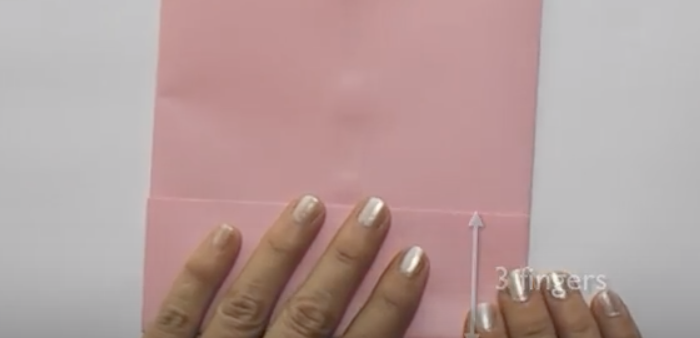
Fold the bottom of the paper upwards so that the folded part is about 3 fingers wide and crease it firmly. Open up the fold at the two bottom corner edges and press down on each side, so it looks similar to origami, then crease down the 4 triangles that should have formed. Now fold the top half of this bottom part you are working on down so that it reaches over the middle portion by 1cm.
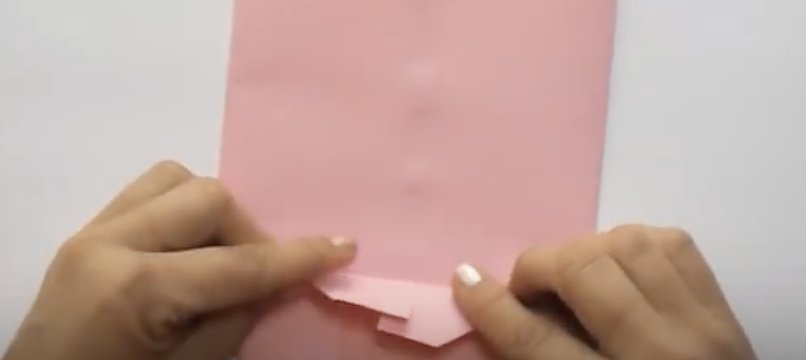
Do the same to the bottom half, folding it up and over by 1cm. There should be 2 diamond shapes on each side of the bottom section you folded at this point. Unfold the last two parts you did, glue each corner, and refold. Turn the paper 90 degrees so it’s on its side and fold the bottom edge up to meet the corner crease, like an envelope, and do this to the opposite side as well.
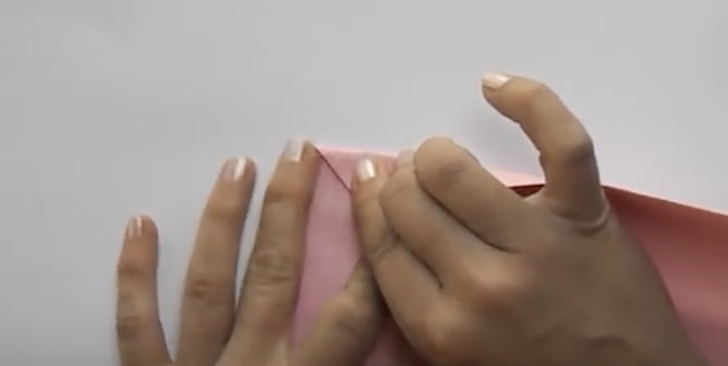
Now unfold the last two side folds you just did, pick up the paper, and open the top part as you would any old paper bag. Go around the bag creases and scour them into place, folding them in the opposite direction as the original folds, and check to make sure they are all in place and firmly defined.
At this point, you should have a regular looking paper bag! Take the top part of the bag and fold it under and over itself several times, like an accordion, then pinch the center while fanning the sides up and out into the shape of a bow. Take a piece of ribbon and wrap it around the center of the bag so that it runs through the pinched-area of the bag’s built in, fanned out bow.
Tie the ribbon into a pretty little bow and adjust it upwards so that it meets the paper bow part. You’re done! Be sure to watch the video for more information and remember to share the knowledge and love. Happy crafting and enjoy!
Please SHARE This With Family and Friends 🙂
I’ve Been Making Grilled Cheese For Years But I Have Never Thought Of Doing It Like THIS

As a kid growing up grilled cheese was the go to meal in my family. I really can’t remember a time when the grilled cheese sandwich wasn’t an important part of my life! It’s so simple yet so delicious. The video below takes the traditional grilled cheese sandwich and completely takes it to a whole new level of awesome. The chef in the video below has figured out an innovation that will raise the bar for grilled cheese makers all around the world.
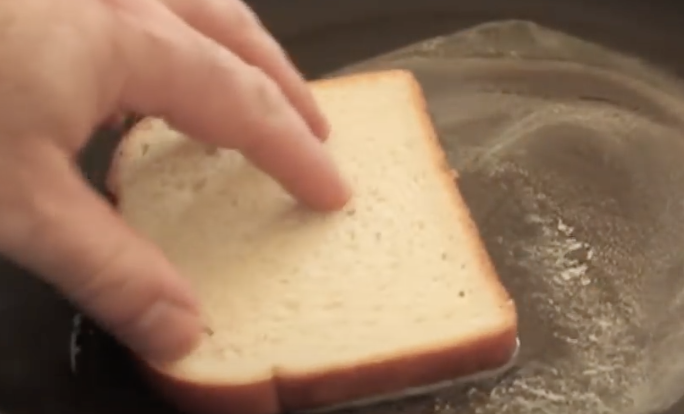
How does he do it? By adding more cheese of course! They call this the Inside-Out Grilled Cheese Sandwich and it not only has cheese on the inside but it also has cheese on the outside! Unlike the cheese on the inside that is all mushy, the cheese on the outside hardens and gets nice and crispy! Yum!
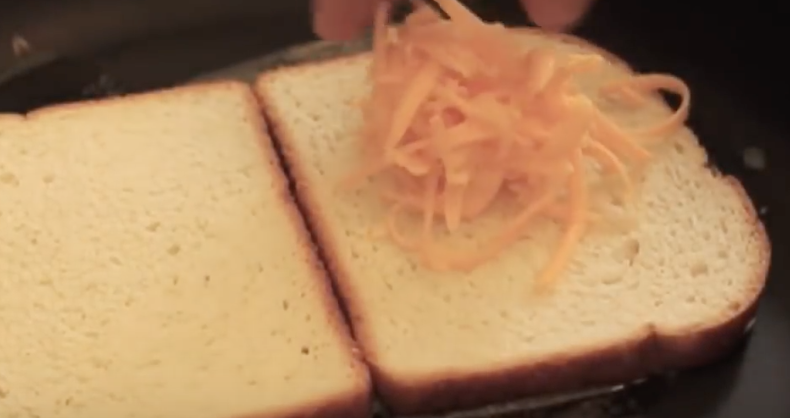
The idea for this sandwich seems so obvious after you see it, you’ll be wondering why you never thought about doing it this way in the first place. The chef in the video claims there is only 1 cheese to use when it comes to making these sandwiches and it’s cheddar. But, we know some people may not agree. What kind of cheese do you mainly use for your grilled cheese? let us know in the comments.

Please SHARE This Recipe With Family and Friends
She Takes A Two Liter Plastic Bottle and Melts It On An Iron. The Final Result Is Beautiful!

Custom made jewelery can cost a pretty penny if you buy it at the store or online. Why not try making some one of a kind pieces at home that cost practically nothing and look just as beautiful as their pricier counterparts! With this tutorial, making your own arm candy can be extremely low cost, easy, and fun to do. Plus, if you have children who are wrapping up the school year, it will give you something creative and hands-on to do with them. This project involves re-using and recycling plastic bottles to make bracelets, so you won’t waste or need to buy anything. You can make lots of them and even if you mess up it doesn’t matter, just keep going until you make the perfect accessory!
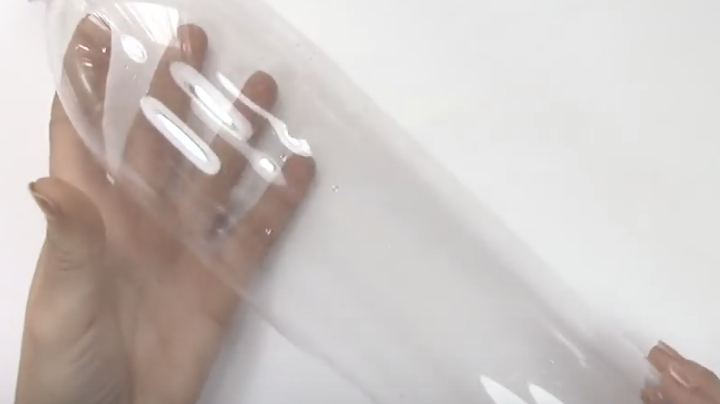
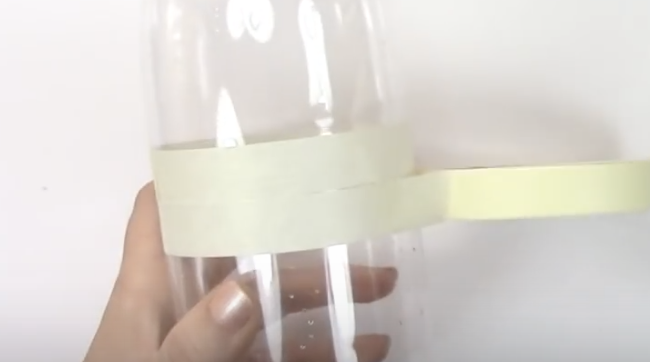
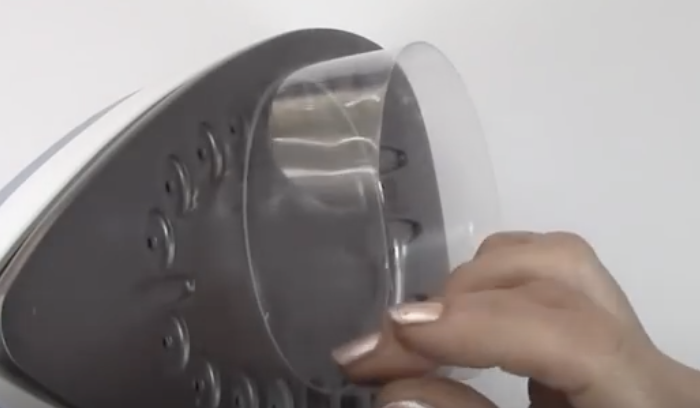
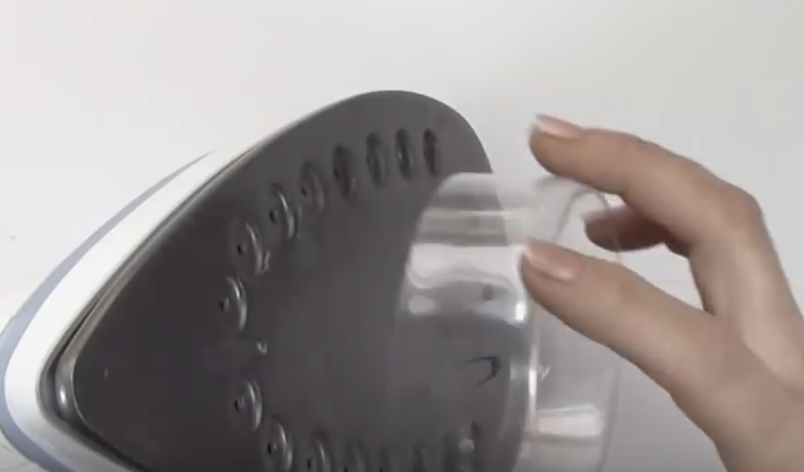
To create your very own you only need some plastic bottles, tape, scissors, an iron, and nail polish or acrylic paint. Remove all the labels from the bottles and wash them well beforehand. Start by taking a bottle and wrap a layer of tape completely around the mid-section. You may need to wrap several layers of tape around it depending on how thick you want the bracelet to be. Cut the plastic away from around where you taped and trim the edges, as neat and evenly as you can, then completely remove the tape.
Break out your iron and turn off the steam setting before adjusting it to a medium heat temperature. Be very careful doing this next step. Slowly begin to melt the sharp plastic edge on the hot iron so that each side is smooth and even all the way around. Make sure that you don’t melt the plastic too much, you only need to place it on the iron for a second or two.
Once it has cooled you can cover the plastic with nail polish or acrylic paint in whatever color or design you like. Ones with metallic finishes and textures would look really cool. Plus, you can add rhinestones, glitter, beads, stickers, or anything else to these. They will turn out shiny and can be custom made to match any outfit or look you are going for. Check out the Innova Crafts video to learn more on how to make them and enjoy!
Please SHARE With Family and Friends
This Guy Takes The Leaves Off The Top Of The Pineapple What He Does Next Is Unexpected!
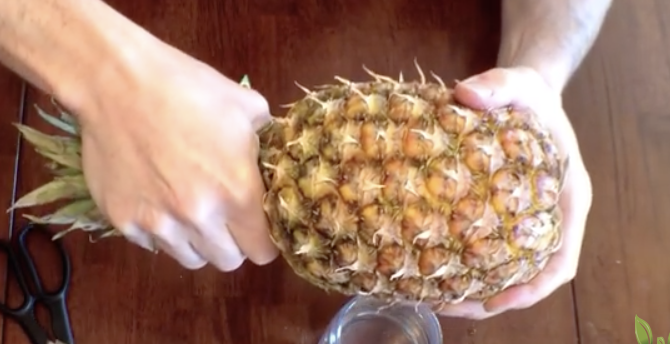
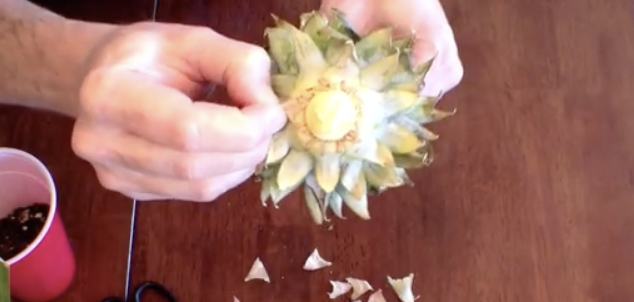
Did you know that you can plant a pineapple simply by using one that you buy at the store? I didn’t, but now that I watched this video I’m going to try it as soon as I pick one up. It’s so simple and easy to do, and if you love pineapples and plants then why not? Clint, from gardenfrugal.com explains and shows how it’s done in this tutorial. He originally tried two alternative ways to do this, but only one worked for him, which is what he’s teaching us. For this tried and true method all you need is a ripe pineapple, a pair of scissors, and a cup of water.
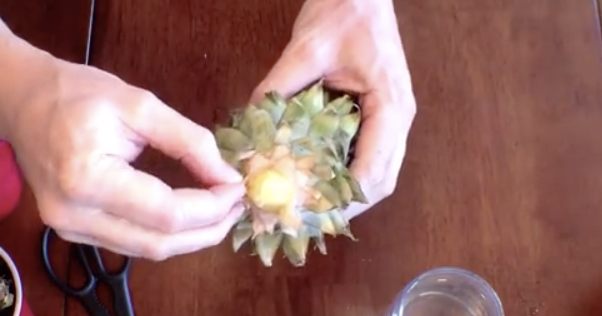
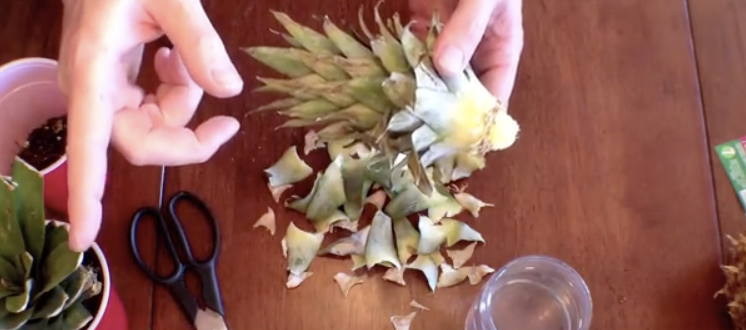
Here is how to prepare the pineapple for growing at home: Take a pineapple that is ready to eat. Grab the green top in one hand while holding the bottom in another, then pull upwards, and twist it up and off. Start to pick off the bottom leaves, gently removing them until you begin to see some roots on the piece. Remove the small leaves from all around until you are past the point where the roots are popping out of. Finally, take a pair of scissors and cut the leaf tips off so they are squared. Be sure to get the tight inner leaves as well. Doing this will show you later on where new growth is taking place. You may need to re-trim them if they start to turn brown.
Once the trimming is complete, stick the top in a cup of fresh water and make sure to change it daily at first. Place the cup in a window sill where it can get lots of sunlight and stay warm. Soon you should see more white roots beginning to sprout and once there is good growth it’s time to transplant it. Take a plastic cup, small planter, or container, and place some soil in it. Being careful to not damage the roots, gently place the sprouted pineapple top in the soil, and fill in more dirt loosely around it. It should start growing and soon you’ll have your own pineapple plant!!
Please SHARE With Family and Friends
Woman Places A Rubber Band Around This Coffee Filter And Dunks It In Water. WATCH What It Becomes!
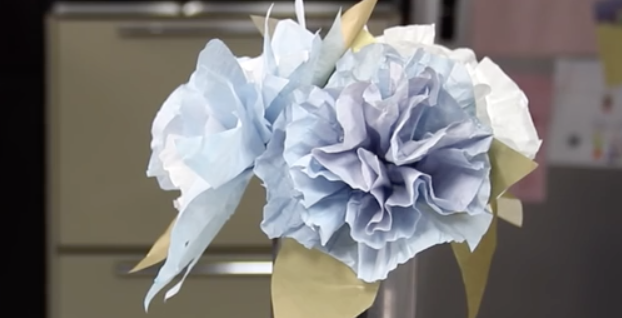
When it comes to getting someone special in your life a gift nothing is more thoughtful and unique than something homemade. These hand crafted flowers are perfect for decorations and make a great alternative gift to give a party host instead of the traditional bottle of wine. No special occasion is needed to hand these beauties out, present one to someone you appreciate, and show them you care.
To make your own you will need coffee filters, scissors, a straw/pen/pipe cleaner or similar object, small rubber band, masking or duct tape, and glue. The first method is called the bunch n’ crunch where you pinch a filter in the center and bunch up the remaining material into a flower like form. Add in layers by pinching 3-6 filters onto the first and ruffle them into shape until you have a nice, full flower.
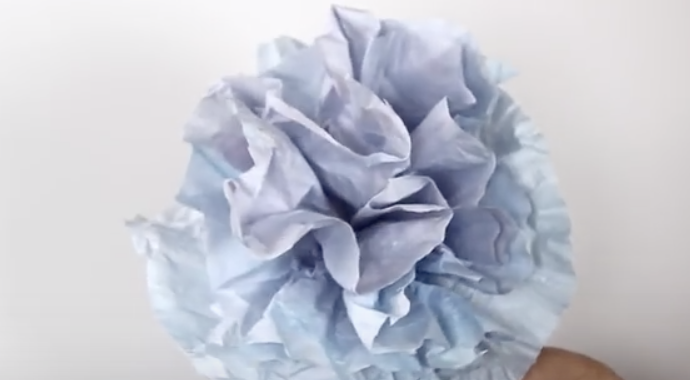
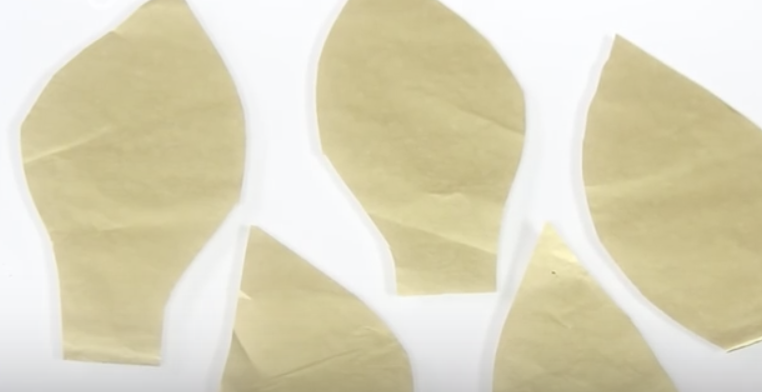
Take a rubber band to bind the base of the filters securely in place. To add petals, cut a filter into leaf-like shapes then glue them on behind any layer of flower, or wherever you think looks best. For the stem, attach a pipe cleaner on by wrapping it around the base of the flower or glue it on. You can style filters by dyeing, painting, cutting, and shaping them before you begin bunching to add more variety and uniqueness to the flowers.
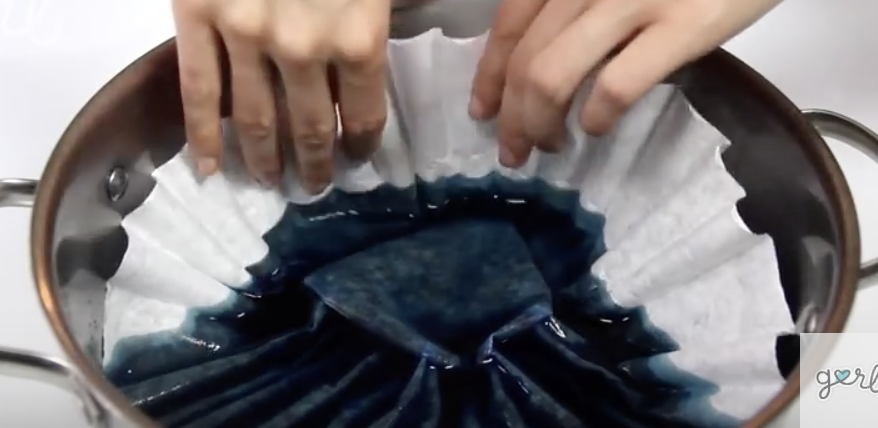
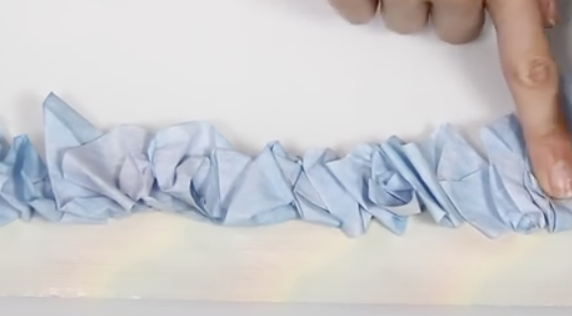
The second method is the singular rose technique in which you cut a filter into a spiral. Start cutting at the outside edge, around and inwards towards the center, leaving the spiral about an inch or two wide. Roll out 2 feet of tape sticky side up, secure it down at both ends, and place one end of the filter spiral down on the top half of it.
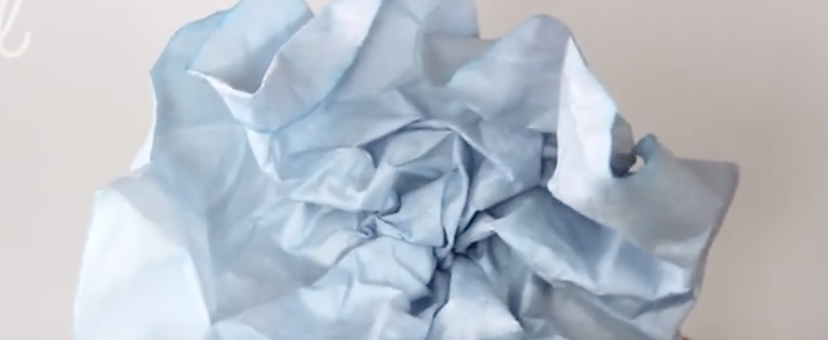
Unwind the spiral along the tape, making sure it overlaps as much as possible while you bunch and stick it on from one end to the other. Attach a pen or straw to one end the tape then slowly wrap it around until it’s completely rolled up into a flower. If you want you may attach more tape to the stem to further secure it to the flower. Watch the video for more tips and instructions on how to craft these beautiful flowers!
Please SHARE With Family and Friends
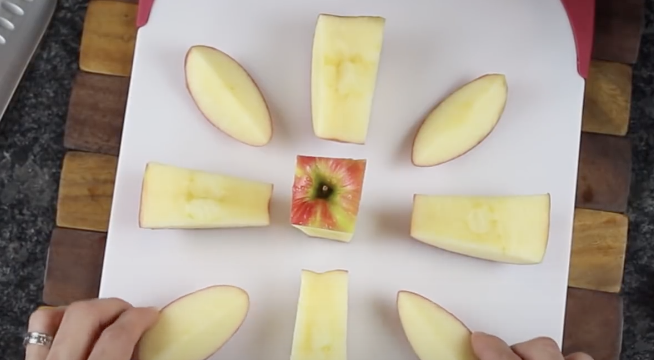
THIS Brilliant Way Of Cutting Apples Is So Easy. I Wish I Knew About This Earlier!
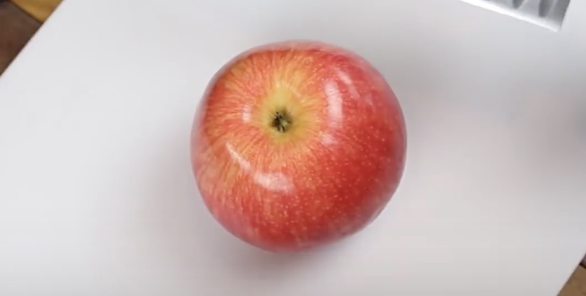
There is a simple, faster way to cut apples that keeps them fresh for much longer than most traditional methods. Most people usually cut apples into quarters and end up with pieces of core left on the slices or try and hack it off haphazardly. This video by Grant Thompson, “The King of Random,” demonstrates the handy technique and offers proof that it’s the smartest way to carve up an apple.
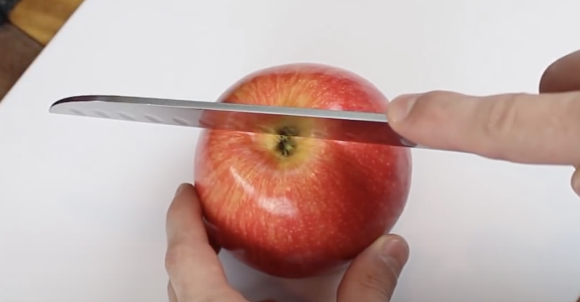
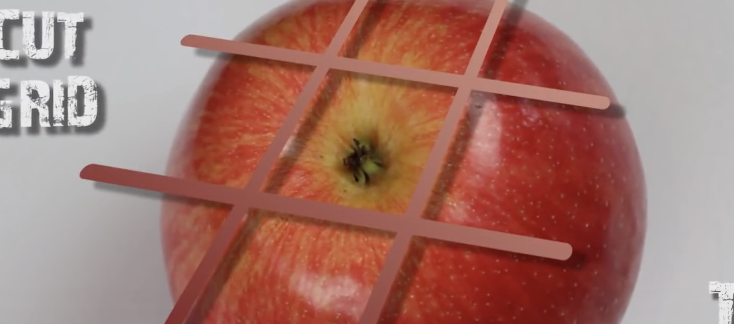
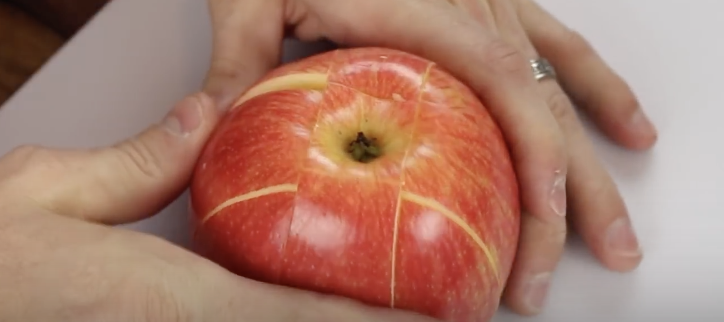
First, turn the apple upside down to stabilize and prevent it from rolling around when you cut it. Imagine a tic-tac-toe pattern, with the center square lining up with the middle core part of the apple, and cut down along the lines holding the apple together as you slice. You end up with 8 edible pieces and 1 core part that can easily be discarded. If you keep the pieces together it will stay fresh longer since none of the flesh is directly exposed to air which turns it brown after awhile. Slap a rubber band around the outside to ensure the slices stay together tight and pack it for lunch or a later snack.
An informal experiment was set up to test if this way is better than others. One apple was cut regularly and left out untreated and two were cut tic-tac-toe style, bound with rubber bands, and one was treated with lemon juice, which is said to keep apples from turning brown. After 9 hours the exposed ones turned brown, the held together one had slightly browned, and the lemon treated one was the freshest. As to timing, the tic-tac-toe method was 5x quicker and left virtually no mess.
Additional apple slicing tricks are also covered in the video that show neat ways to present it when serving at home. Briefly touched on is a way to cut up slices so that they can be rearrange into an apple swan. It is covered in another video but seems like a great way to get young children to eat more fruit, or impress your guests!
Please SHARE With Family and Friends


