
THIS Man Starts Rubbing a Potato All Over His BBQ Grill. The Reason Is Unexpectedly GENIUS!
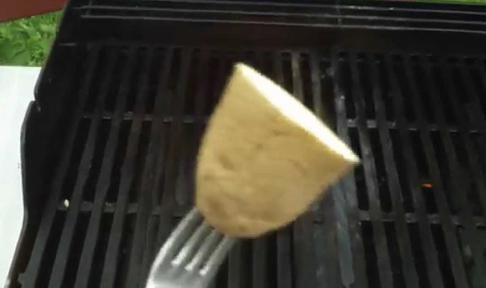
image via – youtube.com
There does come a point in the winter, regardless of how relatively mild an occasional one is, when grilling outside just isn’t inviting. Then those first hints that spring is in the air arrive; the birds are tweeting, and you can actually feel the warmth of the sun…it’s time to clean up the grill!
Food just tastes better on the grill… the smell as it’s cooking makes your mouth water and brings back happy summer memories. I’ve got to say that although we occasionally still go for steaks and burgers, more often than not, we go for the cleaner and healthier choices of chicken, fish and veggies.
There’s just one problem…how to deal with food sticking to the grill without having to constantly be standing there and flipping it? We’ve tried oiling the surface, but more often than not, flames ensue. So, when I came upon the video you are about to watch below, I was intrigued.
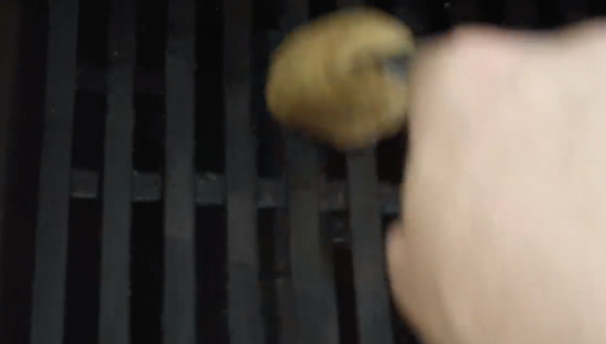
There’s a much better way to fire up the grill and make it non-stick, that I’ve never heard of before, so we tried it this past weekend. Rubbing a potato cut in half on the grill’s surface works… The fish didn’t stick and nothing burned!!
The reason why is explained in the footage below.
Please SHARE This Grilling Tip With Family and Friends 🙂
He Weirdly Starts Rubbing This Potato All Over His Grill. But The Reason Is Brilliant!
Now grilling season just heating up it’s the perfect time to get some bbq life hacks. Food just seems to taste better when it’s barbecued to a perfect smoky finish right on a hot grill. One downside to cooking directly on the grate is that certain foods tend to stick to it. Often, a slab of juicy steak will adhere to the hot metal and dislodging it can be a pain in the rear. Even worse is when it’s burgers that stubbornly stick to it and attempting to move them causes the meat to fall apart.
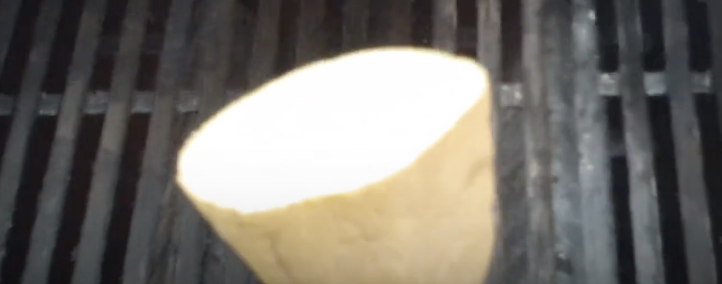
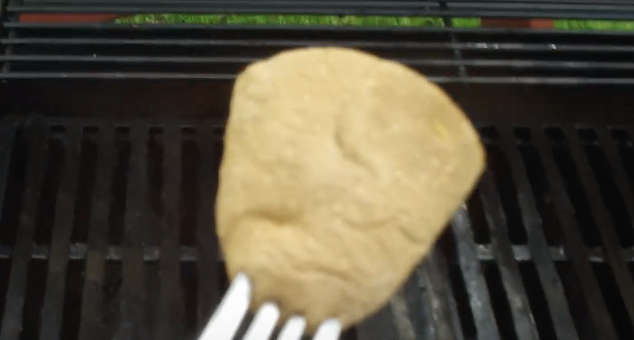
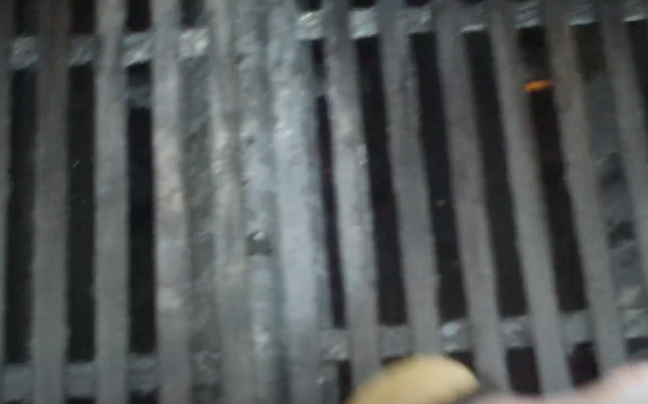
Thankfully, there is a way to prevent the frustrating grill-stick problem, by treating your grill surface and making it non-stick. All you need is a potato, a fork, and a grill. Start by heating up the grill until it’s nice and hot. Then cut the potato in half and stab one of the halves with a fork so that the white fleshy side faces out. Place the cut open side of the potato down on the hot grill and rub it back and forth across the entire area. You should hear a pleasing sizzle sound and only need to go over the metal grate several times to create a non-stick coating.
How does this work? The starch in the potato gets pulled out when heated up and transferred to the hot metal surface, where it forms a non-stick barrier, perfect for grilling on. Overall it’s an effective, easy, non-toxic, and non-messy way to quickly prepare your grill and stop food from sticking on. Check out the short video for more information and make sure to share this tip with friends and family, enjoy!
Please SHARE With Family and Friends
He Pours H2O On His Propane Tank Before He Starts Grilling. The Reason? I Had No Idea!
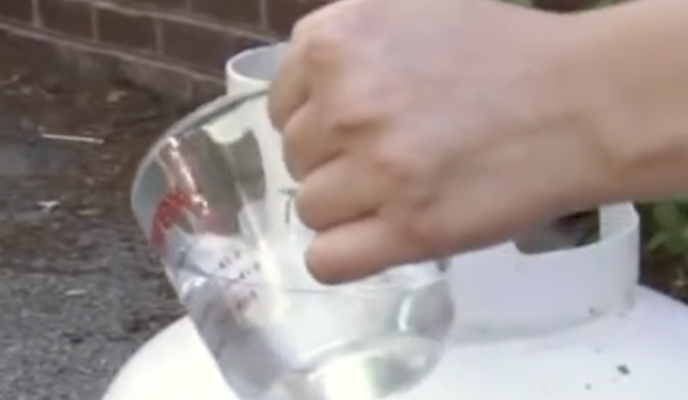
image via – youtube.com
Nothing tastes quite as delicious as food barbecued on the grill in the summertime, it just hits the spot. Everything from meat to corn on the cob and every other veggie under the sun takes on a whole new dimension of flavor when barbecued to perfection. There’s also nothing worse than finding out that you’re low or close to running out of gas right when you’re about to start grilling!
It happens, usually at the most inopportune times, especially if your propane tank doesn’t have a gauge on it. However, rather than abandon your BBQ plans you can try this neat little trick from America’s Test Kitchen to measure exactly how much propane is left in the tank. That way, you won’t ever run out of gas unexpectedly ever again.
First, boil up a pot of water and bring it outside to where your propane tank is located. Carefully pour the hot water all around the tank and down every side, making sure that the entire thing is covered. Next, feel around the tank with your hand and test areas to see if they are warm or cool.
Warm spots indicate that the tank was heated up by the water because with no gas to cool it down, there’s no propane at that level. Cool spots indicate the opposite. Where the tank is cooler to the touch is the level the propane is at. That’s because the liquid in the tank is absorbing all the heat, leaving the surface cool to the touch.
So the next time you are unsure about how much propane is left in your grill’s tank simply unleash your inner MacGyver, boil up a pot of water, and drip it down and around the tank. Cold spots will reveal the level and you can go from there.
Check out the video for more details and to get a better visual idea, and don’t forget to pass it on and enjoy!
Please SHARE This With Family and Friends
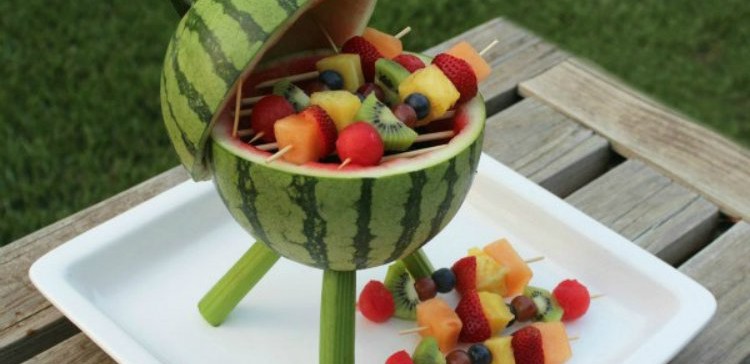
DIY: How To Make a Stunning Watermlon Grill With Fruit Kebabs For Your Next BBQ!
Summertime is when lots of fruits and veggies are at peak ripeness, especially berries and melons. It’s also a time when people eat fresher and tend to favor lighter fare over hot and heavy dishes. One warm weather favored food that tastes delicious and is easy to make is the fruit salad. No picnic or party is complete without one and the yummy salads can be custom made to fit anyone’s taste preferences.
Most people simply cut up a bunch of different fruits and combine them into a large bowl. However, there is a more creative way to present a fruit salad that is perfect for entertaining or when you want to make an eye catching and fun display. It may even draw in children and picky eaters, and get them to eat the salad or try different fruits. The trick is to make a ‘watermelon grill’ that both holds and displays the salad while bringing the dish to a whole new level. It’s fun, neat, and screams summer.
Learn how to construct your own edible watermelon grill by watching the video from YouTube channel SheKnows How To. Start off by cutting 3 holes into the watermelon. Lay the melon on it’s side horizontally and cut off the top one-third section from one end. Scoop out the flesh from inside with a melon baller and place it in a bowl off to the side. Once it’s mostly empty and hollow you can take several wooden skewer sticks and poke them through the top part of the rind, where you sliced it open, to make the grate part of the grill. Make sure that both ends of the skewers go completely through each side of the rind, then trim off any sharp ends that may be poking out the side. Prepare three thick and sturdy stalks of celery which are going to be the grill legs that support and hold up the melon. Cut them in even lengths and poke them into the three holes you created in step one. Now all you have to do is fill up the hollowed melon grill with a fruit salad mix and lay some fruit kebabs across the skewer grate on top, serve, and enjoy!
Please Share With Family and Friends


