
A Great Recipe To Poach 12 Eggs at Once.
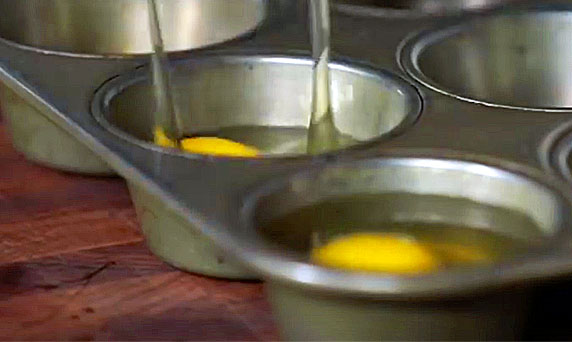
image via : facebook.com
Eggs are one of the most versatile foods to cook with and eat. They’re often a main ingredient in many recipes and can be cooked by themselves in lots of different ways. The fact that a dozen of them are inexpensive and widely available makes them a staple to have on hand. Plus, they make a great addition to main dishes or as a side accompaniment to a meal.
Even people who don’t happen to be master chefs can easily whip up a batch of scrambled, hard boiled, or fried eggs. However, when it comes to poaching an egg, that definitely falls on the more difficult side of the egg cooking-spectrum.
Poaching is a cooking method whereby a food is dropped and simmered in liquid. Usually water, milk, or some type of stock is used and it’s an ideal way to cook foods which tend to fall apart when cooked other ways. That’s why many recipes involving eggs, fish, chicken, and fruits are poached.
Mastering the technique can be tricky but if you follow the accompanying tutorial from the Food and Wine Test Kitchen’s Justin Chapple you’ll get it correct and soon you can be poaching up to 12 eggs simultaneously!
First off, you are going to need water, a muffin tin, and a dozen fresh large eggs. Start by pre-heating the oven to 350 degrees and then place one tablespoon of water in each of the cups on the muffin tin. Next, crack one egg into each slot, right on top of the water, and immediately place them into the heated oven.
Bake for 8-10 minutes and you’ll know they’re done if they match up with the following description- the egg white should be nice and firm and the yolk jiggly. To help keep them intact, use a slotted spoon to scoop them from the tin.
Also, if there’s any excess moisture simply place them on a paper towel lined plate and then sprinkle with salt and pepper to taste. In the end, you should end up with neatly cooked egg whites that ensconce a still runny, slightly creamy, liquid yolk.
When you dig a fork into them and pierce the whites the yellow yolk will spill out and that’s what the ideal poached egg should look like. Bon Appétit!!
Let us know if this life hack worked for you! Enjoy!
Please Share This With Family and Friends 🙂
THIS Man Starts Rubbing a Potato All Over His BBQ Grill. The Reason Is Unexpectedly GENIUS!
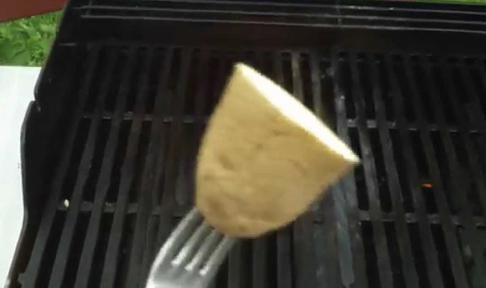
image via – youtube.com
There does come a point in the winter, regardless of how relatively mild an occasional one is, when grilling outside just isn’t inviting. Then those first hints that spring is in the air arrive; the birds are tweeting, and you can actually feel the warmth of the sun…it’s time to clean up the grill!
Food just tastes better on the grill… the smell as it’s cooking makes your mouth water and brings back happy summer memories. I’ve got to say that although we occasionally still go for steaks and burgers, more often than not, we go for the cleaner and healthier choices of chicken, fish and veggies.
There’s just one problem…how to deal with food sticking to the grill without having to constantly be standing there and flipping it? We’ve tried oiling the surface, but more often than not, flames ensue. So, when I came upon the video you are about to watch below, I was intrigued.
There’s a much better way to fire up the grill and make it non-stick, that I’ve never heard of before, so we tried it this past weekend. Rubbing a potato cut in half on the grill’s surface works… The fish didn’t stick and nothing burned!!
The reason why is explained in the footage below.
Please SHARE This Grilling Tip With Family and Friends 🙂
She Puts Bread In a Crock Pot Before She Goes To Sleep. When She Gets Up In The Morning YUM!
It’s no secret that a hearty breakfast is the best way to start the day off and yet many people fail to eat after they wake up. To stay as healthy as possible and have energy that lasts throughout the day you have to take the time to eat a good, and preferably home-cooked, breakfast!
For many of us this can be tricky, especially if you’re not a morning person. Whipping up something delicious means waking up earlier than usual and lots of us just don’t have the motivation to make anything first thing in the morning. Not to mention, it often takes a long time to cook up something yummy from scratch. In today’s hectic world it’s easier to reach for a cereal bar than to prepare, cook, eat, and clean up after making breakfast.
However, one simple invention changes all of that, a crock pot! You can make an amazing breakfast with practically no effort at all and you don’t have to wake up early. Slow cookers make life convenient because all you have to do is combine a few ingredients in a pot, set the timer, and allow it to work its magic. After a few hours the food is done, waiting and warm, it’s perfect!
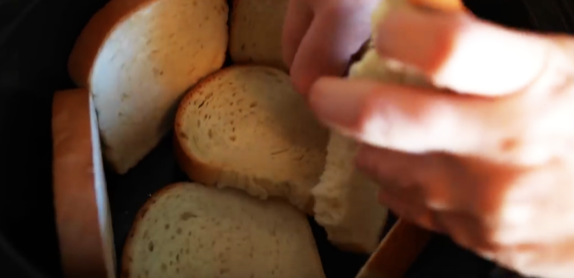
If you’re looking for a slow cooker breakfast idea that is sure to turn out unbelievably delicious, then this French toast recipe will definitely satisfy your taste buds. The accompanying video goes over how to make a batch of the classic brunch staple. It’s basic and easy to follow, plus you can use up any old or slightly stale bread you may have on hand. The following is a complete list of all the ingredients it calls for:
1 loaf of bread 1 teaspoon of vanilla extract
6 eggs 1 teaspoon of cinnamon
2 cups of milk brown sugar
Instructions:
1) Crack the eggs in a bowl and beat lightly with a whisk – 2) Stir in the milk, vanilla, cinnamon, and brown sugar. Mix together well – 3) Lightly mist the inside of the slow cooker with non-stick cooking spray – 4) Layer bread inside the pot until it’s full or you run out. Depending on the type of bread used, you may have to break it apart or cut slices into half pieces – 5) Pour the batter over the bread in the crock pot – 6) Sprinkle a bit more brown sugar and cinnamon on top – 7) Cover and cook on low for about 6 hours. Cook times may vary depending on the size/model crock pot you use, so adjust accordingly
Come morning you’ll wake up with the sweet smell of vanilla, cinnamon, and sugar in the air. This comes out tasting a lot better than it looks, the texture is fluffy and souffle-like, perfect for serving with fresh fruit, a spoonful of cream, or warm syrup. Help make life more convenient for friends and family and share this easy and scrumptious recipe with them, enjoy!
Please SHARE This Recipe With Family and Friends 🙂
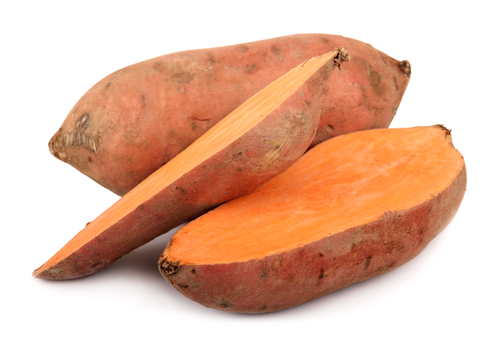
After Learning THIS Simple Trick I Won’t Prepare My Sweet Potatoes The Same Way Ever Again!
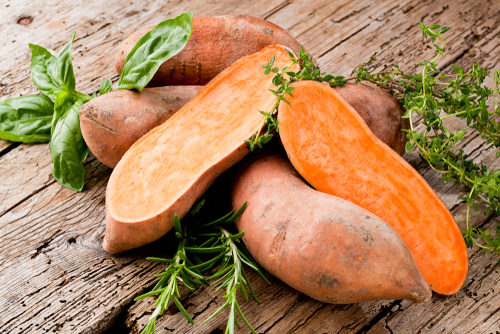
One of the most popular and readily available food items found in the produce section of any grocery store is the potato. There are often several different types that stores carry and one of the tastiest, most healthy varieties is the yam, aka a sweet potato. Sweet potatoes are exactly as their name implies; sweet!
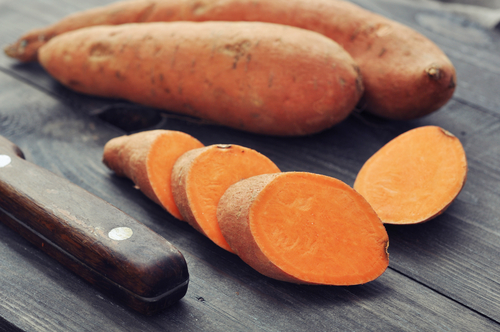
The orange fleshed root vegetables are considered a superfood because they’re packed full of the vitamins and nutrients that our bodies need, such as vitamins A, C, E, and B-6, as well as beta carotene, fiber, potassium, iron, manganese, and copper.
The antioxidants found in them can help prevent cancer and heart disease, strengthen your immune system, and even slow aging. Plus, they’re fat free and cholesterol free, if that doesn’t describe a super food, nothing else will!
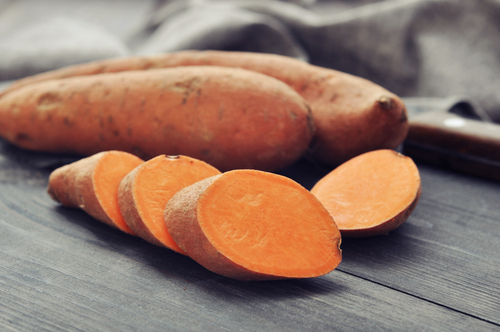
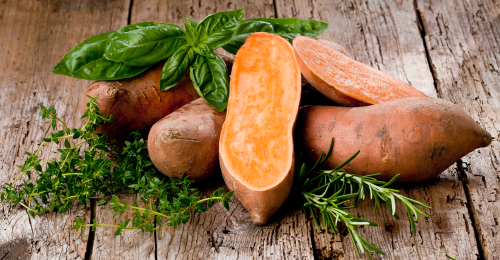
The humble vegetables are easy to cook with and can be prepared in all sorts of different ways. Most people prefer them mashed, baked, boiled. hashed, steamed, fried, or microwaved. Zapping them in the microwave is easily the quickest way to cook them because all you have to do is poke a few holes in the skin, select the preset “potato” button and a few minutes later they’re done.
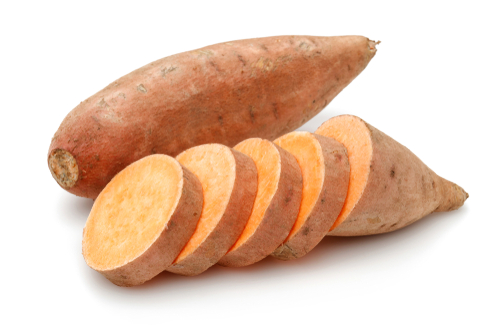
While that’s the fastest way to cook them, it’s definitely not the tastiest, the skin and flesh turn rubbery and becomes kind of mealy. It’s just not the same as a slow cooked, oven baked potato. Instead of microwaving and ruining the taste and texture, try cooking them in a slow cooker.

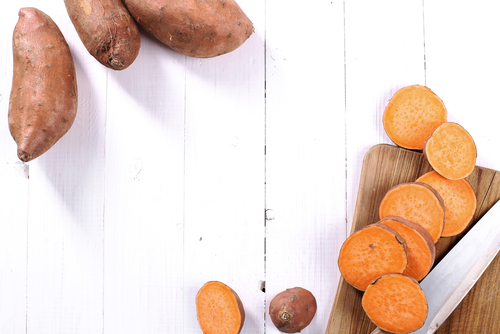
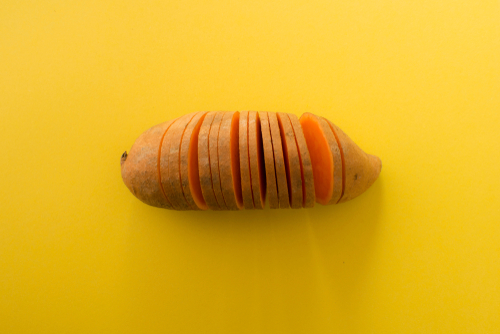
In the end it’s just as easy, but the potatoes will turn out much more delicious and you can prepare a bunch at once. All you need to do is wash and scrub a few sweet potatoes, trim off any bad spots, and then toss them into a slow cooker with a little water.
For 3 large sweet potatoes use about ½ a cup of water and for a larger batch adjust the water up to about ¾ cup or more. You want just enough water to steam them and there’s no need to poke them with a fork for this recipe. Cook on high for about 2-2 ½ hours for a small batch and 3-3 ½ for a larger amount.

While the potatoes are cooking you’re free to go about your day and when you get back they’ll be all done. The insides will be evenly cooked, fluffy, and tender, which is perfect for this sweet potato cookie recipe that calls for cooked potatoes. The video covers how to make them and a list of ingredients and directions are also listed below:
2 eggs ½ tablespoon nutmeg
2 ¾ cup flour 1 tablespoon baking powder
1 ½ cup apple sauce 1 tablespoon ground cinnamon
1 cup butter 1 tablespoon vanilla extract
1 cup cooked, peeled sweet potato

In a large bowl mix the eggs, vanilla extract, butter, apple sauce, and sweet potatoes together. In a separate bowl place the dry ingredients and combine the flour, baking powder, cinnamon, and nutmeg.
Slowly add the two mixtures together, stirring and mixing as you go, until they are well blended. Spoon the dough onto a baking sheet, pop it into a pre-heated 350 degree oven, and cook for 15-20 minutes. Let them cool before eating and enjoy!

If you use the practically effortless slow cooking method your potatoes will be all set and ready to be added to the cookie recipe, saving you time and energy. Pass this tip along and help add a little more convenience and healthy eating options to the lives of your friends and family!

Please Share This Recipe With Family and Friends 🙂
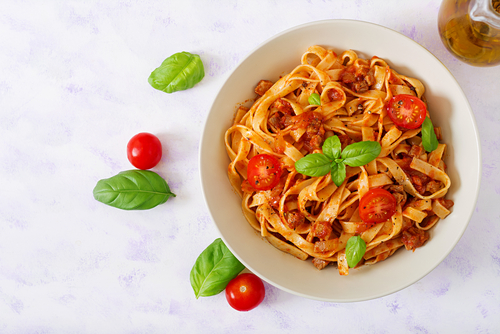
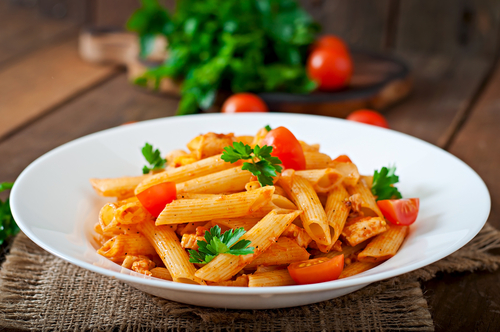
Apparently I’ve Been Making Pasta Wrong For All These Years. I Had No Idea.
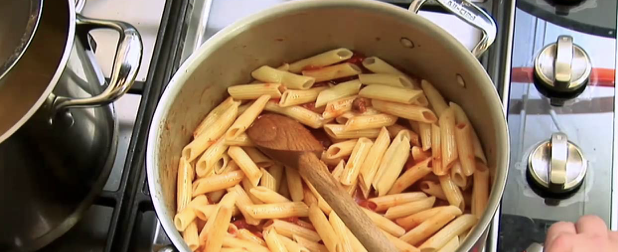
It doesn’t take a genius IQ or a centuries old secret recipe to boil up a decent pot of pasta. Even people who are a far cry from culinary aces know how to make the Italian staple. Most everyone starts off the process by bringing a pot of salted water to a boil. Next comes the pasta, it gets dropped in to cook, and then the water is strained off down the drain. From this point on it varies as to what people do next but typically they add some sort of topping, like sauce, and most of them are doing it wrong!
There are a few ways in which a yummy plate of pasta can go awry, and the chances are high that you’re guilty of doing some of these things! Professional chef and author Andrew Carmellini shares his knowledge and enlightens us on the proper way to sauce pasta in this video. If you follow his tips, the next heaping bowl of pasta that you eat will be perfect.
The first major no-no Mr. Carmellini covers is this; placing pasta on the plate right after draining it, followed by sauce directly on top, is wrong. If you’re like me then you’re probably thinking to yourself, but that’s how I’ve been doing it my whole life! What follows below is a much tastier way to prepare it, but first here are some common things that people do wrong when cooking pasta:
– Don’t dump the water pasta was cooked in down the drain, save it because you’ll use it later – Don’t rinse freshly drained pasta with cool water, it washes the starch off and the starch is what adds to the texture and taste of it – Don’t let pasta sit and get cold after draining, this just makes it stick together in mushy clumps.
Instead, do the following:
1) Put the sauce on the stove and warm it up before the pasta finishes cooking.
2) Take the pasta out of the water, strain it, and then add it directly to the heated sauce.
3) Cook the pasta and sauce together for at least a minute or two after combining. The sauce will cook into it and make the flavors meld together more evenly.
4) Take a little bit of the starchy water the pasta was cooked in and mix it with the pasta/sauce.
5) Turn the pasta and sauce off before adding some butter, olive oil, and grated Parmesan cheese to it. This gives it a richer, creamier, smoother taste and texture and is how many restaurant-quality Italian dishes are finished off.
6) When adding fresh herbs and spices, always mix them in with the pasta and sauce last to keep the flavor fresh and bold.
Now you can plate the pasta, dig in and enjoy! Be sure to check out the video below
Please Share these Tips with family and friends so that you’ll never have to endure lumpy, gross pasta again!
You’re Probably Prepping Pasta Wrong. Here’s An Awesome Life Hack To Make Pasta Without a Colander.

image via – facebook.com
Whether you’re in the mood for some Italian cuisine or you’re pressed for time and need to make dinner in a hurry, there’s nothing quicker and easier to make than pasta. Most people always keep on hand at least a few boxes of pasta and a jar or two of tomato sauce. In fact, they’re considered basic food staples in many households and who doesn’t love a home cooked plate of spaghetti! Pasta is simply delicious and easy to make. Plus, if you ever need to feed a hungry group of people, a big pot of pasta and sauce is the perfect meal to serve.
All that you really need to do is boil up some water, drop in the pasta, strain it, and dump some sauce in with the cooked noodles, right? Not exactly, if you’re making it that way then you’re doing it wrong. If you want to make perfect pasta that tastes amazing, you have to do it the right way. The following tips covered in this video clip will help you do exactly that, so check them out and learn the proper way on how to cook and sauce pasta.

1. Add salt to the water, just before it begins to broil and before you place the pasta in the pot. This will make your pasta end up tasting a lot more flavorful and elevate it to a restaurant-quality level.
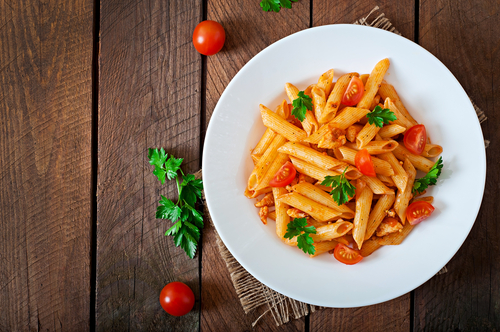
2. Do not add in olive oil to the water. If you add oil, the sauce will end up not sticking to the pasta, throwing the taste and texture off.
3. Don’t follow the instructions on the box. Each type of pasta is different in regards to how long it takes to cook. It’s better to taste taste and monitor it as you go along, that way it ends up how you like and prefer it. As for box instructions, oftentimes you don’t need to cook it as long as recommended.
4. Get the correct type of sauce for your pasta. If you plan on pairing it with a healthier sauce, use wider noodles. If you are using a thinner or runny sauce, use pasta with folds, like campanelle or rotini. They work great for holding thinner sauces on.
5. Before you drain the pasta, make sure to save at least half a cup of the starchy water it was cooked in. Then, once you’ve strained it, cook the pasta in the sauce and add in the starchy water you set aside. Cook it all together until the sauce is reduced and ready to serve.
6. Finally, if you plan on adding any additional fresh herbs or spices to the mix, make sure to always add them in with the pasta and sauce last. This will help keep the flavor fresh.
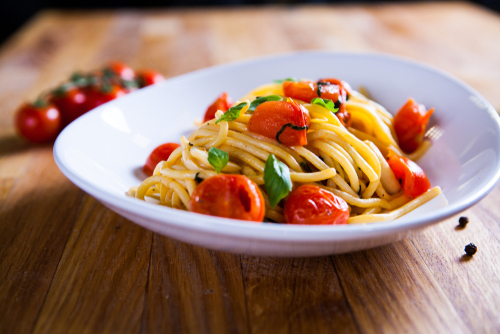
The next time you make pasta for dinner, be sure to try out all these tips and it will end up tasting perfect and absolutely wonderful.
Watch the tutorial video below for an in-depth look on how prep the perfect pasta:
Please SHARE this with family and friends


