
I’ve Been Peeling Post-it Notes Wrong For My Entire Life! I’m so glad I learned This!
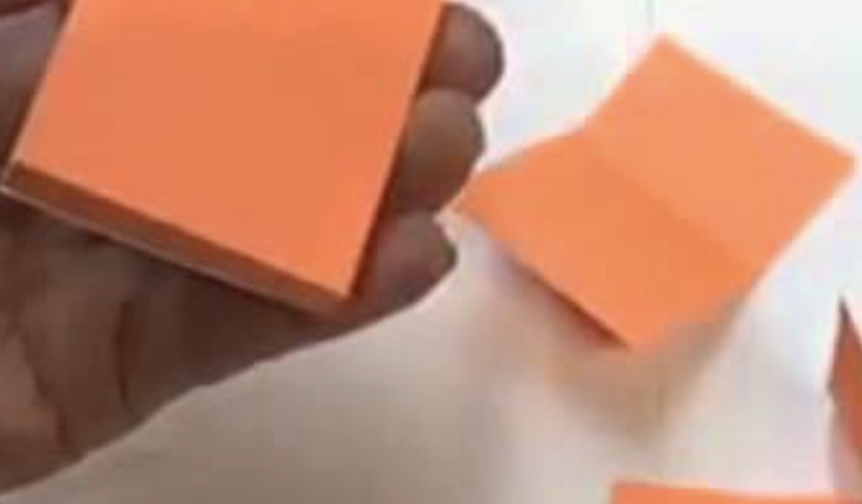
image via – youtube.com
Post-it notes are one of those simple, seemingly inconsequential inventions that make life all the more easier. The small pieces of paper have a strip of tacky glue on the back and come in a variety of sizes and colors. Sticky notes come in most handy when organizing paperwork and files and they’re great for leaving messages and reminders on. Besides attaching them to paper, you can stick them just about anywhere.
Most people press them onto the fridge, mirror, doors, their arm, computer screens, and really on whatever they’ll stick to. Post-its are the original brand name of the product and they’re sold just about everywhere these days. The original yellow-colored squares are iconic by now, after being developed back in the 1970’s by a man named Arthur Fry.
Fry was a scientist and inventor who worked at 3M when he accidentally created the glue that is now on the back of all Post-it notes. He was trying to make a super-strong type of adhesive but instead he ended up making the less strong, yet reusable, tacky glue that makes Post-its so great to use. The glue doesn’t leave behind any residue and won’t stick so hard that it tears anything when it’s removed.
There is a right way and a wrong way to do just about everything in life, and that includes using Post-it notes. Recently it has emerged that most people have been peeling the sticky notes the wrong way their entire lives. The most common way to go about removing a single Post-it note from the pad is by taking the bottom edge and peeling it upwards and off the pad.
This leaves the non-tacky part of the paper sticking up in the air and curled so that you can’t view it quickly. It also results in the notes catching on things and coming loose or falling off the surface they were stuck to. The correct way to remove a Post-it note is to peel it from the side while pulling along the adhesive line using a down and away motion.
Check out the video for a clear demonstration of the process and once you see it, you’ll never use a Post-it note incorrectly ever again. That’s because peeling them the right way leaves you with an ideal, flat note that won’t come off the surface you stick it to.
This is a great bit of information to know going forward so pass it on and share the knowledge!
Please Share This Trick With Family and Friends 🙂
THIS Picky Pup Refuses To Eat Her Dry Food But Her Dad Comes Up With THIS Unexpectedly GENIUS Trick!

image via – youtube.com
Man’s best friend has just a few simple needs in life and they all revolve around eating. Whether a dog is playing, cuddling, or sleeping, when they hear the sound of dinner being opened and prepared, they come running. Some of the more voracious pup’s appetites appear to have no limits and they will scarf up any and all treats or food scraps thrown their way, then continue on to eat grass, rocks, and whatever else they come across.
In direct contrast to these hungry dogs are the rare few who have very weak appetites and are extremely picky eaters. This type of dog doesn’t get all that excited around dinner time and when a bowl of food is placed under its nose, it doesn’t dig right in. Instead, they sniff their meals hesitantly before pushing the morsels around a bit and maybe they take a few bites, then walk off unimpressed.
When a dog lacks an appetite or is just not at all interested in their dinner, what’s an owner to do? It’s definitely concerning, we all want whats best for our canine companions, and one man who was faced with this exact problem came up with an ingenious solution.
YouTube user Delaypat explained that he’d been having feeding issues with his dog Luna who falls on the very picky side of the eating spectrum. No matter what he did Luna would not eat and he tried all kinds of approaches to feeding her.
He offered her different types of food and presented it in all sorts of unique ways on plates and bowls before he finally found a method that worked. It turned out that Luna, a sweet and calm Golden Retriever, prefers to have her meals home cooked before she tucks into them.
The video Delaypat uploaded of their daily feeding ritual is quite impressive. In order to get Luna excited for dinner he first prepares her bowl of food and then calls her over to the kitchen. Once she’s present the show begins.
The bowl is placed in the oven, which is never actually turned on, and the timer is set for one minute. As her food “cooks” he excitedly remarks to Luna about how her dinner is almost ready, building up her anticipation to eat. Once the oven timer goes off the food is finally ready to be served.
That’s when Luna finally shows her excitement as she prances around while licking her lips, keeping her eyes on the bowl while trying to sniff at it. The moment it’s placed on the floor in front of her she digs right in.
There you have it, one truly excellent way to trick a picky dog into eating!
Please Share This With Family and Friends Who Need a Smile Today 🙂
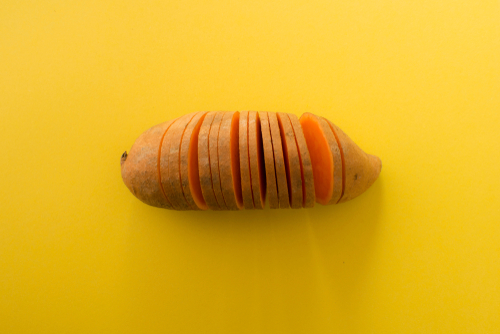
After Learning THIS Simple Trick I Won’t Prepare My Sweet Potatoes The Same Way Ever Again!

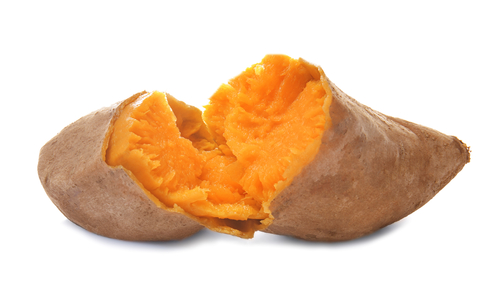
One of the most popular and readily available food items found in the produce section of any grocery store is the potato. There are often several different types that stores carry and one of the tastiest, most healthy varieties is the yam, aka a sweet potato. Sweet potatoes are exactly as their name implies; sweet!
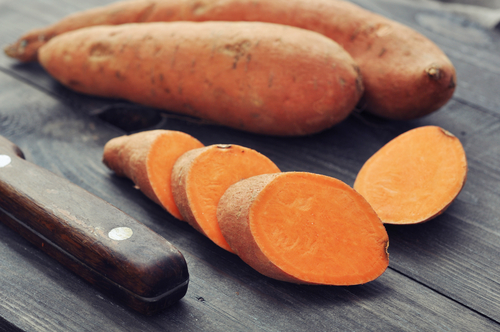
The orange fleshed root vegetables are considered a superfood because they’re packed full of the vitamins and nutrients that our bodies need, such as vitamins A, C, E, and B-6, as well as beta carotene, fiber, potassium, iron, manganese, and copper.
The antioxidants found in them can help prevent cancer and heart disease, strengthen your immune system, and even slow aging. Plus, they’re fat free and cholesterol free, if that doesn’t describe a super food, nothing else will!

The humble vegetables are easy to cook with and can be prepared in all sorts of different ways. Most people prefer them mashed, baked, boiled. hashed, steamed, fried, or microwaved. Zapping them in the microwave is easily the quickest way to cook them because all you have to do is poke a few holes in the skin, select the preset “potato” button and a few minutes later they’re done.
While that’s the fastest way to cook them, it’s definitely not the tastiest, the skin and flesh turn rubbery and becomes kind of mealy. It’s just not the same as a slow cooked, oven baked potato. Instead of microwaving and ruining the taste and texture, try cooking them in a slow cooker.

In the end it’s just as easy, but the potatoes will turn out much more delicious and you can prepare a bunch at once. All you need to do is wash and scrub a few sweet potatoes, trim off any bad spots, and then toss them into a slow cooker with a little water.

For 3 large sweet potatoes use about ½ a cup of water and for a larger batch adjust the water up to about ¾ cup or more. You want just enough water to steam them and there’s no need to poke them with a fork for this recipe. Cook on high for about 2-2 ½ hours for a small batch and 3-3 ½ for a larger amount.

While the potatoes are cooking you’re free to go about your day and when you get back they’ll be all done. The insides will be evenly cooked, fluffy, and tender, which is perfect for this sweet potato cookie recipe that calls for cooked potatoes. The video covers how to make them and a list of ingredients and directions are also listed below:

2 eggs ½ tablespoon nutmeg
2 ¾ cup flour 1 tablespoon baking powder
1 ½ cup apple sauce 1 tablespoon ground cinnamon
1 cup butter 1 tablespoon vanilla extract
1 cup cooked, peeled sweet potato

In a large bowl mix the eggs, vanilla extract, butter, apple sauce, and sweet potatoes together. In a separate bowl place the dry ingredients and combine the flour, baking powder, cinnamon, and nutmeg.
Slowly add the two mixtures together, stirring and mixing as you go, until they are well blended. Spoon the dough onto a baking sheet, pop it into a pre-heated 350 degree oven, and cook for 15-20 minutes. Let them cool before eating and enjoy!

If you use the practically effortless slow cooking method your potatoes will be all set and ready to be added to the cookie recipe, saving you time and energy. Pass this tip along and help add a little more convenience and healthy eating options to the lives of your friends and family!
Please Share This Recipe With Family and Friends 🙂
THIS Genius Life Hack Will Get Rid Of All Mosquitoes and Stop Them From Ruining Your Summer!
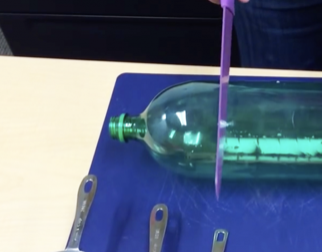
image via – youtube.com
I can’t believe how quickly this winter and spring has gone; it is actually almost officially the start of Summer. I love Summer so much; nature comes back to life and evenings sitting outdoors are so tranquil…that is if it weren’t for the dreaded mosquitoes.
I don’t know about you but the mosquitoes love me, and I usually end up running inside as they bite. I’ve bought citronella candles to keep mosquitoes away, but I really don’t like the smell; I always feel like I’m breathing in chemicals.
Although mosquitoes play a role in the ecosystem, they can carry disease and their bites are unbearably itchy. I was really happy to find this DIY which uses natural ingredients to attract mosquitoes away from me.
The video that you are about to watch below shows you how to cleverly make your own mosquito hack for the upcoming buggy seasons. The tutorial is easy to follow; you will need an empty plastic bottle, brown sugar, warm water, and yeast.
It is an irresistible concoction that attracts the mosquitos, so you can enjoy sitting out on those beautiful summer nights.
Please SHARE This With Your Family and Friends
This Dr. Reveals The Secret Trick To Stop A Baby From Crying In Less Than 30 Seconds Every Time!

image via – youtube.com
For experienced parents or those dealing with a newborn for the first time, a baby who is crying in a wailing, inconsolable way, is really upsetting. You have checked their diaper and fed them, and they are still crying hard. What to do? The video you are about to watch below, offers a miracle method, that will comfort the baby instantly!
Dr. Robert Hamilton, a pediatrician, has developed a technique of holding, that is best used on babies from 0 to 3 months. Having practiced pediatrics for over 30 years, Dr. Hamilton frequently has to deal with crying babies who are in a strange place, and often are getting their first inoculations.
Watch as he demonstrates this holding position, that he illustrates on several crying babies. He holds the baby in a 45 degree angle (protecting the neck), and secures their arms on their chest with his hand. With his other hand under the baby’s bottom, he shows different gentle rocking motions which instantly soothes the child.
The parents cannot believe their eyes or ears, for that matter! He demonstrates the technique several times, so that you will be able to follow it easily. What a lovely doctor he is; he doesn’t say exactly why this works but I have a theory…I think the position mimics the baby’s experience in the womb.
Have you tried this technique? Let us know if it works for you!
Please SHARE This With Family and Friends
I Thought It Was Impossible To Clean Off Caked On Grease Off A Stove. Then I Watched THIS Trick!
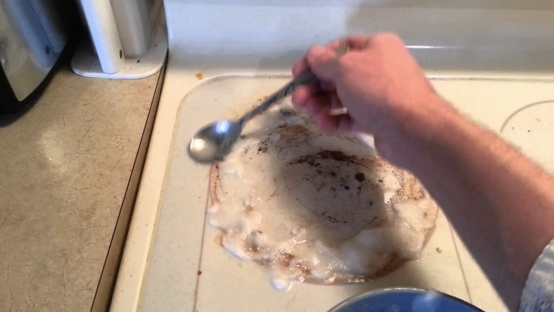
image via – youtube.com
A lot of people think cleaning sucks and I think it’s safe to say the majority of the population agrees agrees with this viewpoint. It’s not fun and can be very tedious and time consuming. However, somebody has to do it because the house isn’t going to clean itself, as much as we’d like it to.
Another pitfall with cleaning is that the products commonly used to disinfect and brighten up surfaces often contain harsh, toxic chemicals and cost a pretty penny. Thankfully there are a variety of cheaper methods out there that can be used to get around these expensive health hazards.
One of these quick and non-toxic methods involves a few simple ingredients that help make it easier to clean off the greasy, nasty, baked and burnt on crud that accumulates on ceramic or glass top stoves. It’s probably something that you’ve been neglecting to do for some time, and this will make it so much less painful when you finally get to it.
All you need is baking soda, water, a bowl, a spoon, a razor blade, and a scouring sponge. You likely have these items in your kitchen or house already and even if you need to pick one of them up it will still be a lot cheaper than store bought oven cleaners. Start by pouring some baking soda into a bowl then add a little bit of water and mix it into a goopy paste.
Take the paste and spoon it over the greasy stains, brushing and spreading it around so that it fully coats the blackened, burnt on areas. Let this sit for about 5-10 minutes while it works to loosen and help lift up the greasy crud on the stove top. When time’s up take a razor blade and gently begin to scrape the burnt areas off the oven.
Scrape the stove top with the razor blade in the same manner you would use it to scrape paint or stickers off glass. Also, using a new sharper blade will help to prevent scratches that are more likely to occur if you use an old, dull, or chipped blade. Finally, follow this up with a scouring sponge to get any remaining, tricky spots off.
Be careful not to press too hard because you may end up scratching the glass surface with it. Test out the area first, go slow, and it’s advised you use a softer type material scouring pad instead of a heavy duty, Brillo pad type. When your all done you may want to wipe down the stove top one final time with some soapy water. Dawn dish soap works great to cut through any lingering dirt or the greasy sheen that may be left behind and will leave your stove shiny as can be.
Check out the video for more information and be sure to try this method the next time you have to clean your stove top!
Please Share This Trick With Family and Friends


