
A Great Recipe To Poach 12 Eggs at Once.
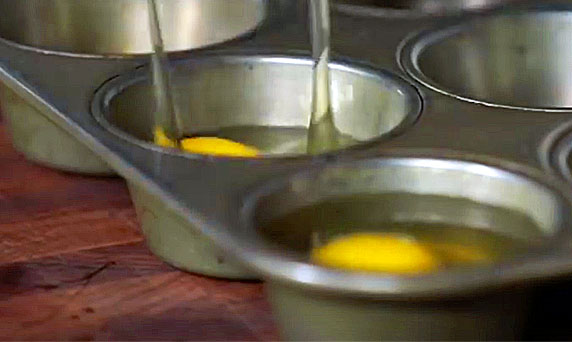
image via : facebook.com
Eggs are one of the most versatile foods to cook with and eat. They’re often a main ingredient in many recipes and can be cooked by themselves in lots of different ways. The fact that a dozen of them are inexpensive and widely available makes them a staple to have on hand. Plus, they make a great addition to main dishes or as a side accompaniment to a meal.
Even people who don’t happen to be master chefs can easily whip up a batch of scrambled, hard boiled, or fried eggs. However, when it comes to poaching an egg, that definitely falls on the more difficult side of the egg cooking-spectrum.
Poaching is a cooking method whereby a food is dropped and simmered in liquid. Usually water, milk, or some type of stock is used and it’s an ideal way to cook foods which tend to fall apart when cooked other ways. That’s why many recipes involving eggs, fish, chicken, and fruits are poached.
Mastering the technique can be tricky but if you follow the accompanying tutorial from the Food and Wine Test Kitchen’s Justin Chapple you’ll get it correct and soon you can be poaching up to 12 eggs simultaneously!
First off, you are going to need water, a muffin tin, and a dozen fresh large eggs. Start by pre-heating the oven to 350 degrees and then place one tablespoon of water in each of the cups on the muffin tin. Next, crack one egg into each slot, right on top of the water, and immediately place them into the heated oven.
Bake for 8-10 minutes and you’ll know they’re done if they match up with the following description- the egg white should be nice and firm and the yolk jiggly. To help keep them intact, use a slotted spoon to scoop them from the tin.
Also, if there’s any excess moisture simply place them on a paper towel lined plate and then sprinkle with salt and pepper to taste. In the end, you should end up with neatly cooked egg whites that ensconce a still runny, slightly creamy, liquid yolk.
When you dig a fork into them and pierce the whites the yellow yolk will spill out and that’s what the ideal poached egg should look like. Bon Appétit!!
Let us know if this life hack worked for you! Enjoy!
Please Share This With Family and Friends 🙂
She Gives Her Parakeet An Egg From The Supermarket To Play With. But Days Later She Gets The Biggest Surprise Ever!
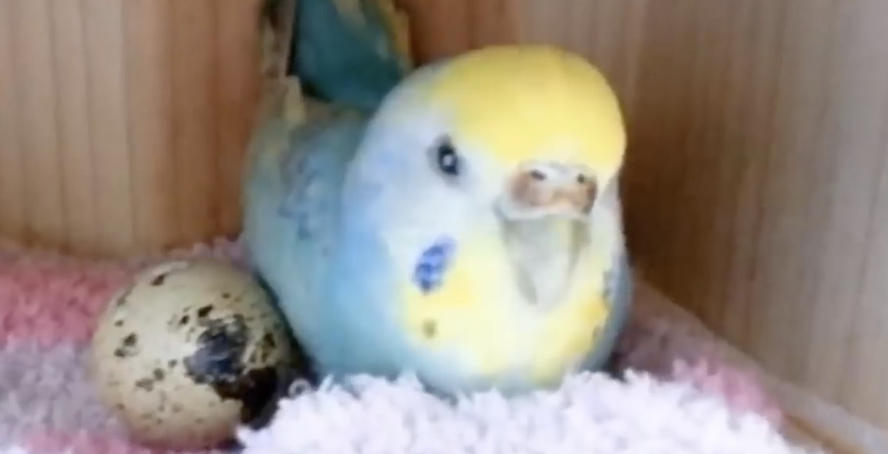
image via – youtube.com
No one ever really stops to think about the carton of eggs they buy at the grocery store. All most people care about is how fresh they are that they aren’t broken. When YouTube user Luna Angel went to the supermarket and spotted some quail eggs for sale, they initially grabbed her attention because they made her think of her pet parakeet at home, Pi-chan.
She ended up buying the quail eggs and when she returned home, she gave one of the speckled eggs to her little yellow and blue bird to see what it would do and how she’d react.
As soon as the egg was placed inside her cage, Pi-chan sat on it as if she had laid it herself. Her maternal instincts were strong, and Luna was happy to see her little bird so interested in the egg. Not long afterwards, she went to check on Pi-chan and was shocked at what she saw inside her cage. The egg had hatched, and a tiny, fluffy, unbelievably cute baby quail was sitting next to her songbird!
Naturally Luna was not expecting this, she had assumed the quail egg had been unfertilized, as most grocery store eggs are. The chances that she somehow picked up a carton that contained a fertilized one were extremely slim and yet there was a baby bird right in front of her.
It must have been fate because Luna was an experienced bird owner and lover, she knew that she’d be able to care for Pi-chan’s new friend, even if she had never raised a baby bird before!
As it turns out, baby quails don’t require very much work. Right after they’re born, they can eat pretty much anything and so feeding the little chick wasn’t an issue. In just a few days the bird was noticeably growing and getting stronger, much to the relief of Luna. Now instead of one she has two adorable little birds in her family!
Watch the video below for the full story:
Please SHARE This With Family and Friends
He Places Eggs In A Muffin Tin And Puts It In The Oven. THIS Reason Is Unexpectedly GENIUS!
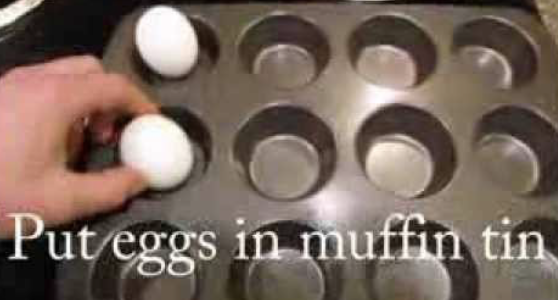
image via – youtube.com
Eggs are one of the most versatile foods to cook with and eat. They’re a main ingredient in lots of recipes and even taste great cooked by themselves in a variety of different ways. The fact that they are widely available and affordable make them a staple to have on hand in the kitchen.
Plus, they’re a great addition to main dishes or as a side accompaniment to a meal. Even people who are far from master chef status can easily whip up a batch of scrambled, hard boiled, or fried eggs. However, when it comes to hard boiling an egg, or 12, there’s a clever way to get it done right every time that doesn’t involve the standard stove-top method.
Instead, you can use your oven to easily hard boil a bunch of eggs all at once. All you need is a muffin tin and some eggs. This method is great for people or families who go through a lot of eggs and there is no guesswork involved. When you boil them on the stove it can be hard to figure out whether or not they’re done cooking, but in the oven it takes 30 minutes every time.
Also, the shells on the oven hard boiled eggs come off a lot easier, which is always a welcome thing and makes life easier. First, pre-heat the oven to a toasty 325 degrees. Take a muffin tin and gently place one egg into each of the muffin slots.
Carefully transfer the baking pan to the oven and cook the eggs for 30 minutes. Meanwhile, fill a bowl with water and dump a bunch of ice to it. When the eggs are done being cooked remove them from the oven and spoon them into the ice water. After a few minutes they should be sufficiently cooled down, so you can drain the water and remove the eggs.
All that’s left to do is peel and eat them, bon appétit!
Please Share This With Your Family and Friends
He Cracks 12 Eggs Into This Old Ice Tray. The Reason? I Had No Idea!
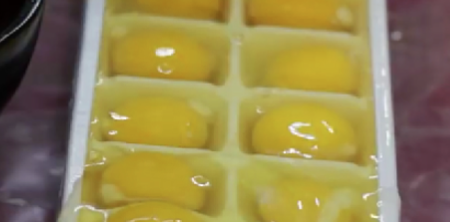
image via – youtube.com
You know that sinking feeling you get when you reach for a bottle of milk or carton of eggs in the refrigerator, only to find out that it’s expired? It’s a waste of money when that happens and it can easily throw off your plans for a nice cup of coffee or dinner.
Dairy products in general can be expensive so when they’re on sale it’s wise to stock up on your favorites. While many dairy items spoil and go bad not long after being purchased or opened, there is a way to store and preserve them for later use.
YouTube favorite HouseholdHacker explains it all and that by freezing dairy products you can extend their shelf life. This video lays out the details and shows how to go about doing exactly that. Here’s a breakdown of what works best for the most common dairy items.
First off, eggs can be frozen by cracking one egg into each individual ice cube slot in an ice tray. After they completely freeze simply pop them out of the tray and store in a freezer bag. Now you have them on hand for when a recipe calls for only one egg!
Next is milk, which can only be frozen for about 1-2 months and coffee creamer for longer, up to 6 months. Just stick the unopened and fully sealed cartons in the refrigerator right after you buy them. Once you remove it from the freezer thaw the milk in the refrigerator for a day or two and be sure to shake it up well before using because it will definitely have separated.
Cheese can be a bit more difficult to freeze because the texture can be affected, and not in a good way. While most cheese is freezable, Parmesan works the best, and shredded cheese is the way to go because blocks tend to get all dry and crumbly. Shredded cheese can be stored for up to 2-3 months and thawed out in the refrigerator before using, that should help retain its original texture.
Salted butter can last the longest, for 6-8 months if wrapped well, but unsalted butter only lasts for one month. Also, make sure there is nothing in the freezer with a strong smell or pungent odor because you risk having the butter pick it up and it’ll end up tasting like that.
Greek yogurt freezes well for a couple of months, but make sure to stir it well after thawing. A great way to enjoy frozen yogurt is to make yogurt pops. Simply stick a popsicle stick in the container top before freezing or pour the yogurt in an ice cube tray and use them in smoothies.
Full fat cream cheese can be frozen but results vary when thawed as to texture depending on the brand you buy. Once it has been thawed always make sure to use it right away in dips, sauces, or baked dishes.
Now you don’t have to see any of your dairy products spoil ever again. Hopefully these tips and information will help you in the future!
Please Share This With Your Family and Friends
She Wrapped An Egg In Silk. But When She Unwraps The Egg It’s STUNNING!
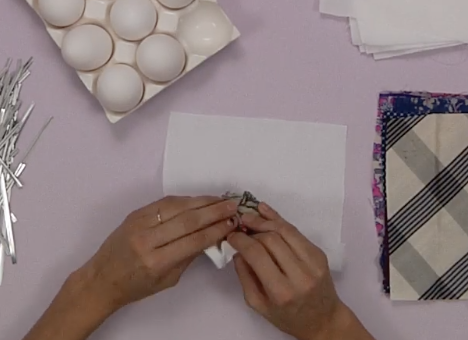
image via – youtube.com
There are many ways to dye an egg. Some people use Kool-Aid, food coloring, store bought kits, nail polish, and all sorts of other things. One lesser known method is an old fashioned way that uses dye from silk scarves to decorate hard boiled eggs. The scarves intricate patterns and colors transfer to the eggs, which turn out absolutely beautiful and truly unique, thanks to their level of detail.
All you need is eggs (uncooked), 100% silk scarves or ties, a ½ yard of white fabric, twist ties, white vinegar, and vegetable oil. You will also need scissors to cut the fabric and a pot of water to boil the eggs in, but that’s it! The whole process is neat and easily doable in under an hour.
However, do not use any of your favorite or treasured silk items because they will be altered by this; not completely ruined, but faded. Also, be sure to use only 100% silk to get the right results. Second hand or thrift stores are a great place to find them at the lowest cost.
To start, cut the silk and white fabric into 7 inch by 7 inch squares. Take an egg and wrap it very tightly in a silk square, then wrap that in a white fabric square, and secure with a twist tie. Once all the eggs are wrapped up place them in a pot and fill with water. Add 3 tablespoons of white vinegar to the water and boil for fifteen minutes.
Remove the eggs from the stove and allow them to cool off. Unwrap them from the fabrics and your done! If desired, rub the vegetable oil onto the finished eggs to give them a glossy sheen. The video says that the silks can be used 2-3 times in this fashion to dye eggs. The eggs are also edible, you start with raw ones and they becomes hard boiled by the end of the process.
The whole project is a great way to try something new, cheap, and easy with family and friends. Check it out!
Please Share With Family and Friends
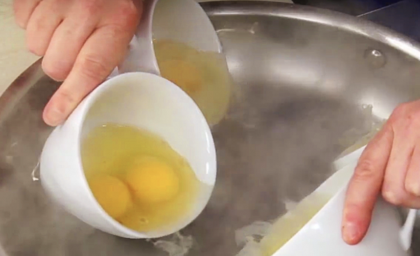
She Takes 4 Mugs Of Raw Eggs And Holds Them Over Hot H2O. When She’s Done A Delicious Surprise!
Eggs are one of the most versatile foods to cook with and eat. They are a main ingredient in many recipes and are often cooked by themselves in a variety of different ways. The fact that they are widely available and inexpensive further make them a staple to have on hand in the kitchen.
Plus, they make a great addition to main dishes or as a side accompaniment to a meal. Even people who are not master chefs can easily whip up a batch of scrambled, hard boiled, or fried eggs. However, when it comes to poaching an egg, that falls on the more difficult side of the egg cooking spectrum.
Poaching is a cooking method whereby a food is dropped and simmered in a liquid. Usually the liquid is water, milk, or some type of stock, and it’s an ideal way to cook foods that tend to fall apart when cooked other ways.
That’s why many recipes involving eggs, fish, chicken, and fruits are poached. Mastering the technique can be difficult but if you follow the accompanying tutorial from America’s Test Kitchen you can get it down right and soon you can be poaching 8 eggs simultaneously.
First off, you are going to need water, a skillet with a lid, 2 tablespoons of white vinegar, 1 teaspoon of sea salt, 8 large eggs, and 4 ceramic tea cups. Start by filling up a skillet with water and add in the white vinegar and sea salt.
Place it on the stove over high heat and wait until it boils. In the meantime, prepare the eggs by cracking 2 of them into each one of the tea cups. When the water has reached a steady boil turn off the stove and slide the skillet off of the hot burner.
Grab two tea cups in each hand and gently tilt them while lowering the rims into the water. All of the eggs should flow out at once and thus will cook evenly. Place the lid on the skillet, wait five minutes, and do not move or agitate the pan.
Take the lid off and scoop up each egg individually with a slotted spoon. Place them all on a paper towel lined plate to absorb any excess water and sprinkle with salt and pepper to taste. In the end, you should end up with neatly cooked egg whites that ensconce a still runny, slightly creamy, liquid yolk.
When you dig a fork into them and pierce the whites the yellow yolk will spill out and that’s what the ideal poached egg should look like. Bon Appétit!
Please Share This Recipe With Family and Friends


