
An Awesome Trippy Halloween Makeup Tutorial
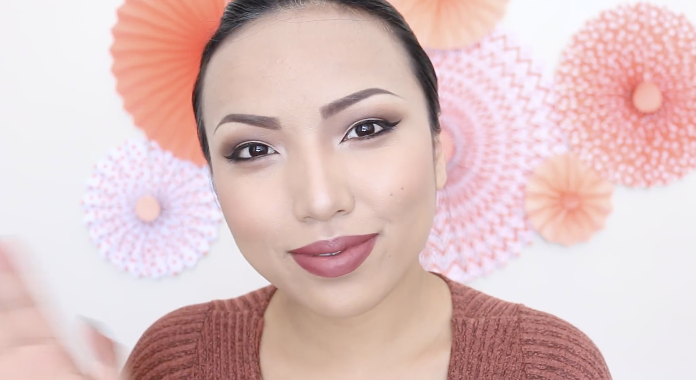
image via – youtube.com
For as long as humans have walked this Earth they have been painting their faces. The reasons for doing so are as varied as the designs and colors people use to adorn themselves. Some did it to protect their skin from the sun, wind, insects, and predators while other cultures use body paints in parts of their rituals and ceremonies. These days most people paint their faces for fun and it usually involves a costume, party, or special occasion like Halloween.

Young children love getting cute, simple designs painted on their cheeks at fairs and birthday parties and we all know at least one adult who goes all out on October 31st. Even if you don’t have any reason to paint your face, who cares, you can do it anyways and unleash your inner artist!
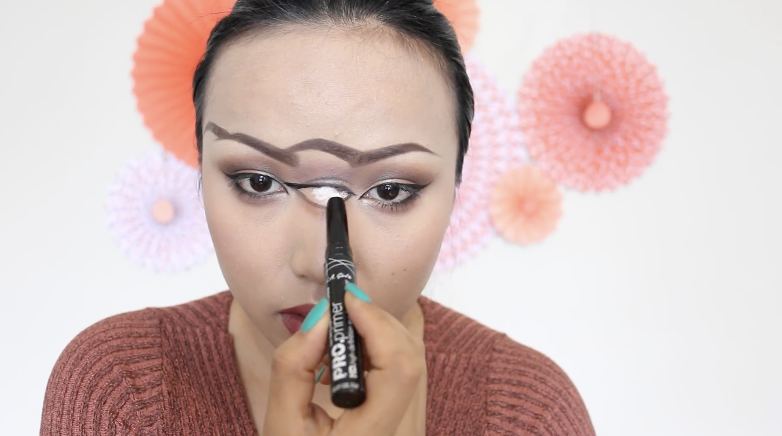
For a bit of inspiration look no further than this incredible makeup tutorial from Promise Phan. She’s a popular YouTuber and makeup artist who regularly posts videos of all the different looks she recreates on herself. Her work is spot-on and she’s transformed into Angelina Jolie, Bruno Mars, Tinker Bell, even an Avatar, but this look is her trippiest one yet.
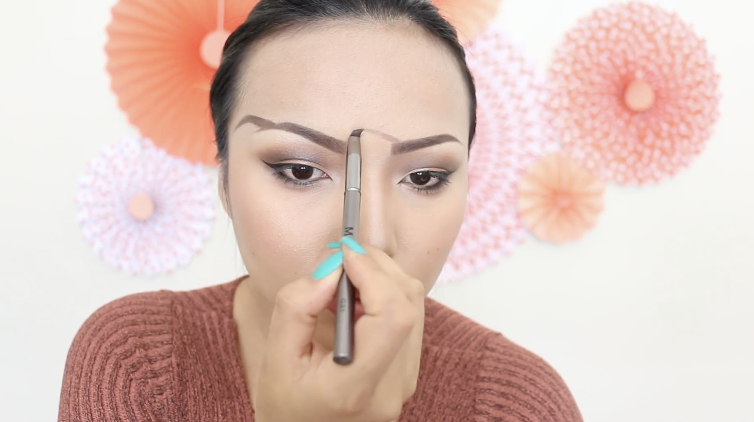
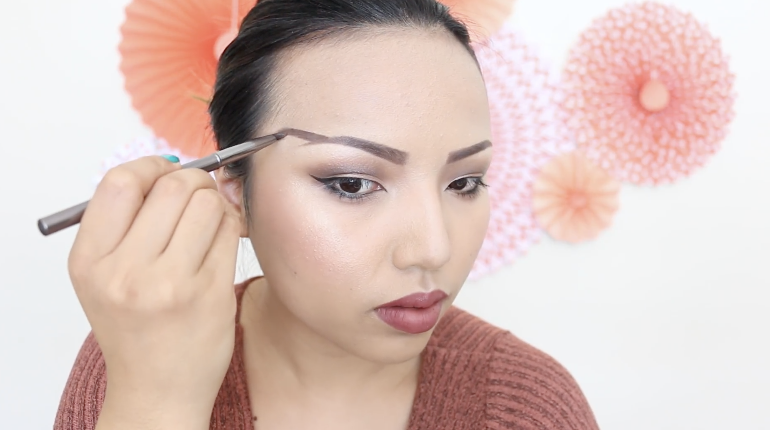
In this video she shows us how to re-create a look that can best be described as visually and mentally confusing! She draws three extra eyes on her face, one in the center and one on each side, and when she’s all done it turns out looking wildly insane. This look is seriously neat and interesting to look at, but not for too long because it might make you feel kind of dizzy! If you can re-create this come Halloween time, you’ll definitely stand out and turn heads.
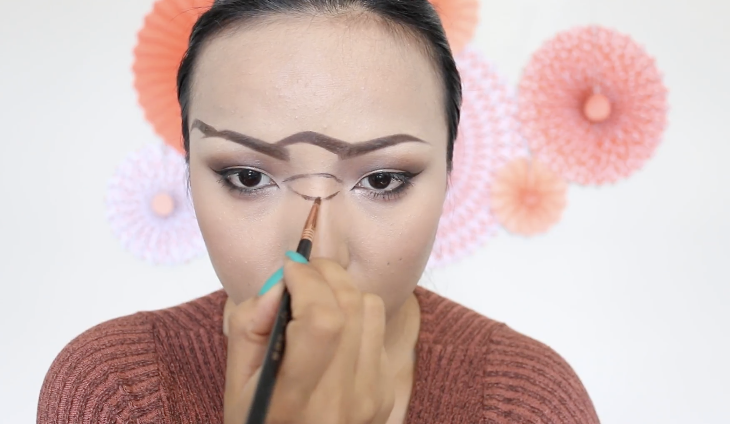
While it certainly looks hard to recreate, it can be done. As long as you take your time and possess some basic drawing skills you should be able to pull it off. If not, ask an artistic friend to draw it on for you because it’s always easier to have someone else with a steady hand for this type of thing.
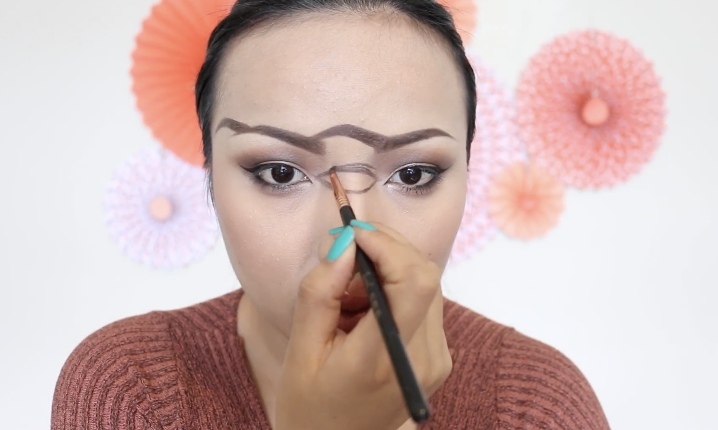
If you do decide to try it alone Promise recommends that you focus on making the eyes match your own as closely as you possibly can. The lips and noses are easier and more forgiving since they’re less exact and done by highlighting and shading.
If you have a steady hand and listen to her direction carefully you can pull off this dizzying look… and also freak a lot of unsuspecting people out!
Please SHARE This Awesome Tutorial With Family and Friends 🙂
If you enjoyed this story keep scrolling for more of our handpicked stories of the week:
––––––––––––––––––––––––––––––––––––––––––––––––
Everytime I went to my best friends house it smelled incredible. But then she showed me This Trick:
images via – youtube.com
It is wonderful to have our homes smell good, and scented candles became very popular over the last decade. That is, until it was discovered that many of these candles and scented sprays contain really dangerous chemicals, that can cause permanent lung damage.
I, myself, have stopped using those candles that I used to love, because of the inherent health hazard they carry. I’m always looking for natural alternatives that are chemical free, to provide a nice fresh smell in my home. When I came upon this DIY video for creating a natural air freshener I was intrigued.
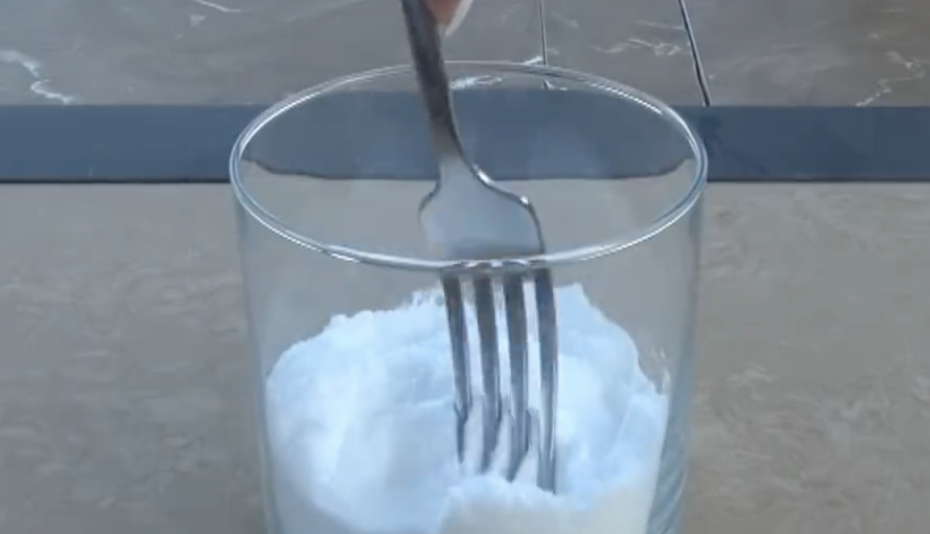
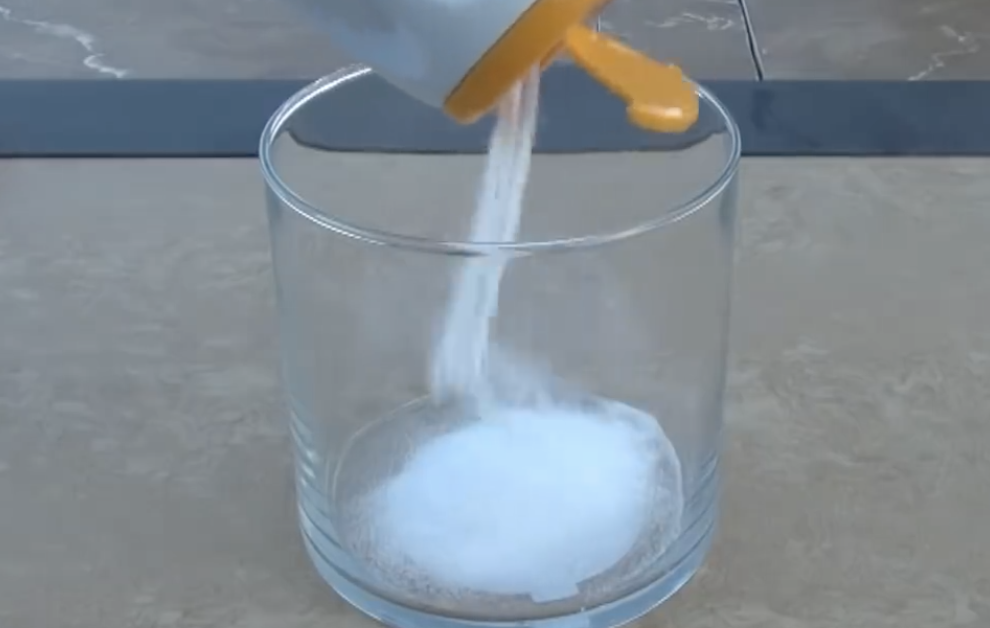
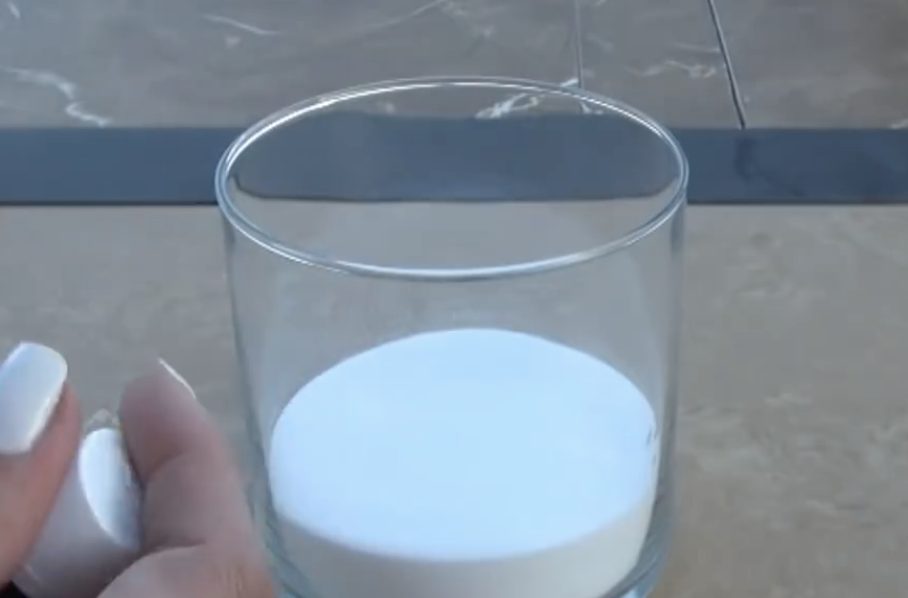
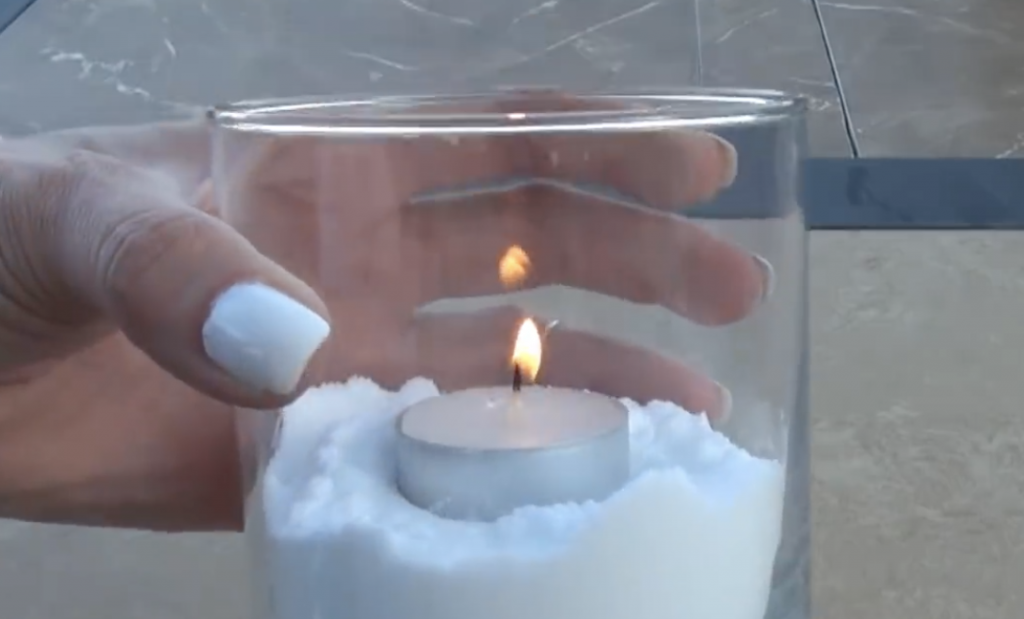
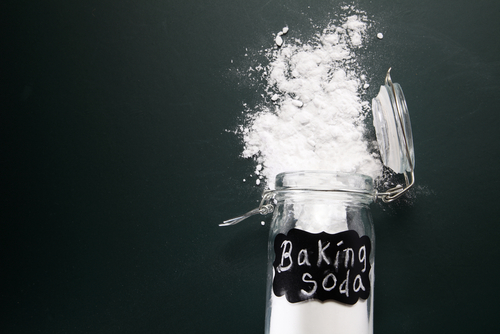
The video below is a great tutorial for how to easily, inexpensively and quickly make your own fresh and chemical-free deodorizer. Two alternative versions are demonstrated, which differ slightly in how they release the fragrance.
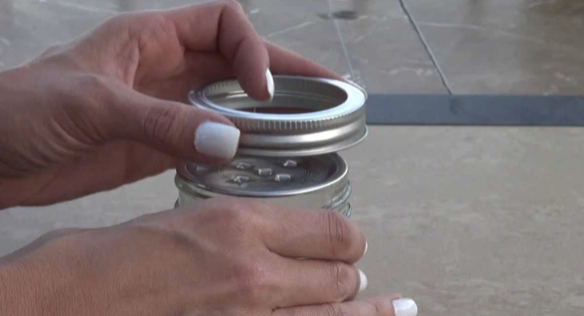
For both versions, all you will need are: a MASON JAR WITH A TIN LID, HAMMER, FORK, EMPTY CANDLE CONTAINER, SCREWDRIVER, BAKING SODA AND SOME ESSENTIAL OIL. The DIY is easy to follow, and gives you a great means to slow-release a pleasant scent into any room in your home.
Watch the video below for the full simple, easy and cheap DIY air freshener life hack:
Please Pass This Onto Family and Friends 🙂
If you enjoyed this story keep scrolling for more of our handpicked stories of the week:
––––––––––––––––––––––––––––––––––––––––––––––––
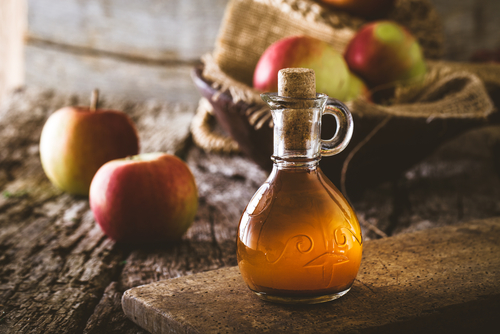
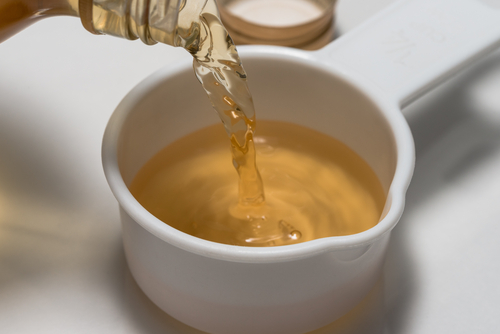
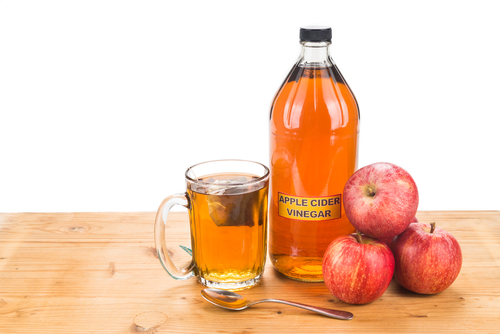
Check out this Awesome Vinegar Shower Head Cleaning Life Hack everyone should know:
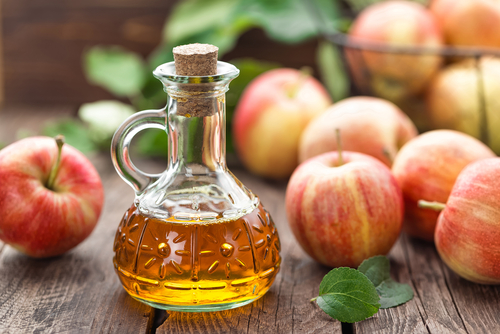
image via – shutterstock.com
Vinegar is arguably one of the most useful substances on the planet, at least when it comes to making life in your home easier, less expensive and safer! Why use nasty chemicals that cost an arm and a leg when you can use something that has been proven by time and countless mothers and grandmothers? I personally use vinegar for more things than I can count, and I have known about the wonderful liquid since before I can remember because my mom used it for literally everything. We are going to thoroughly run through some of the best little known vinegar life hacks that will make your life so much easier.
Is your drain clogged? Try pouring baking soda, followed by vinegar, down the drain and watch the magic. Something gooey sticking to your wall? Grab the vinegar and give it a squirt, then easily wipe it away.
Does your trash can smell like garbage, even when it’s empty? Soak a piece of bread in vinegar and leave it in the garbage can overnight, and voila, no more stank. It can also be used as an all-purpose cleaner: just fill up a spray bottle with one third vinegar and two thirds water.
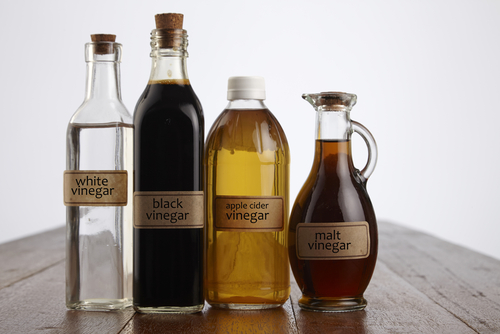
Too many fruit flies? Fill a glass with apple cider vinegar, cover it with plastic wrap, and poke a few holes. The flies enter, but cannot escape. It can even be used to straighten clothes if an iron isn’t available. A few other uses include keeping cats off the furniture, helping cut flowers stay fresh longer, getting tough stains out of pots and pans and cleaning glasses for a smudge-free sheen. Let us know what you think in the comments.
Hopefully you find these helpful tips and tricks over the next few weeks and months.
Please Pass These Vinegar Hacks Onto Family and Friends
––––––––––––––––––––––––––––––––––––––––––––––––
If you found these 10 Vinegar Life Hacks helpful keep scrolling for more awesome vinegar life hacks:
––––––––––––––––––––––––––––––––––––––––––––––––
Check out this Awesome Vinegar Shower Head Cleaning Life Hack everyone should know:
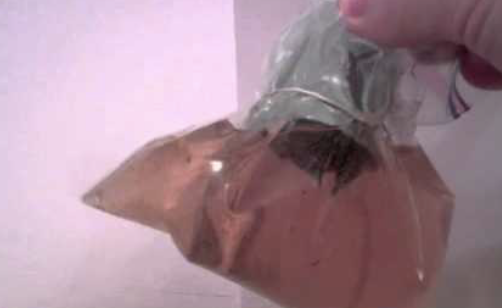
image via – facebook.com
When it comes to cleaning just about everyone loves learning new simple ways to get the same old things done. It can be fun and interesting to discover what nifty and quick solutions people have come up with to solve common problems. This video, from YouTube channel Outdoors and Gear Review highlights a helpful trick for dealing with a common and difficult problem you’re likely to encounter when tidying and cleaning your bathroom up; hard water deposits and stains.
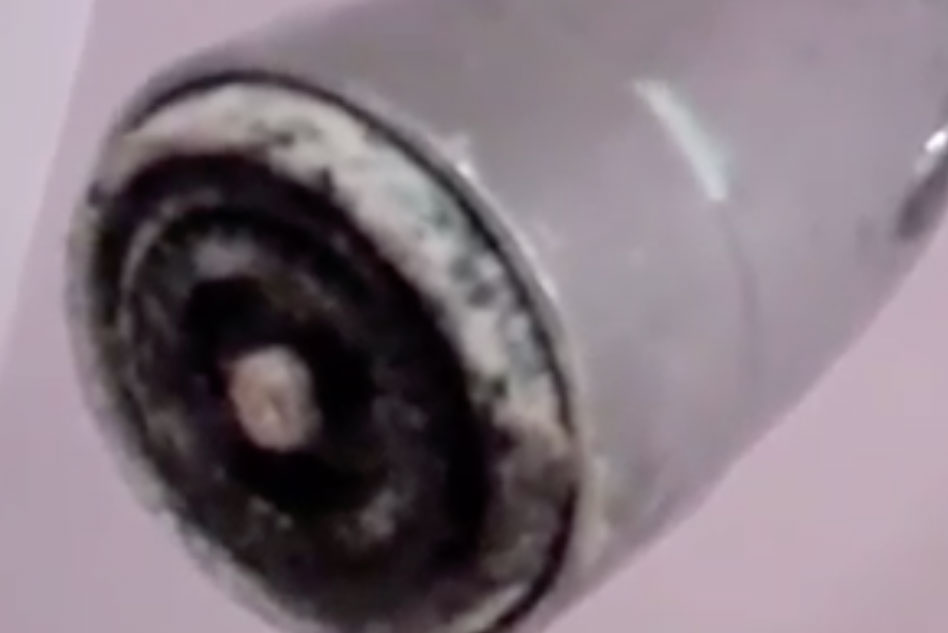
Hard water can be a real pain in the neck and the nasty looking stains and blemishes that it leaves behind on bathroom and kitchen surfaces can be extremely hard to fully remove. The ugly spots and stains are caused by water that contains large amounts of minerals such as limestone, calcium, and magnesium.
These metals and minerals are naturally occurring, most often in areas with low water tables and mountainous regions, and water that contains them is perfectly safe to use and drink. The biggest downside to it is the crusty, whitish colored mineral deposits and stubborn stains it leaves behind. Over time these gradually build up on stuff, especially faucets and shower heads.
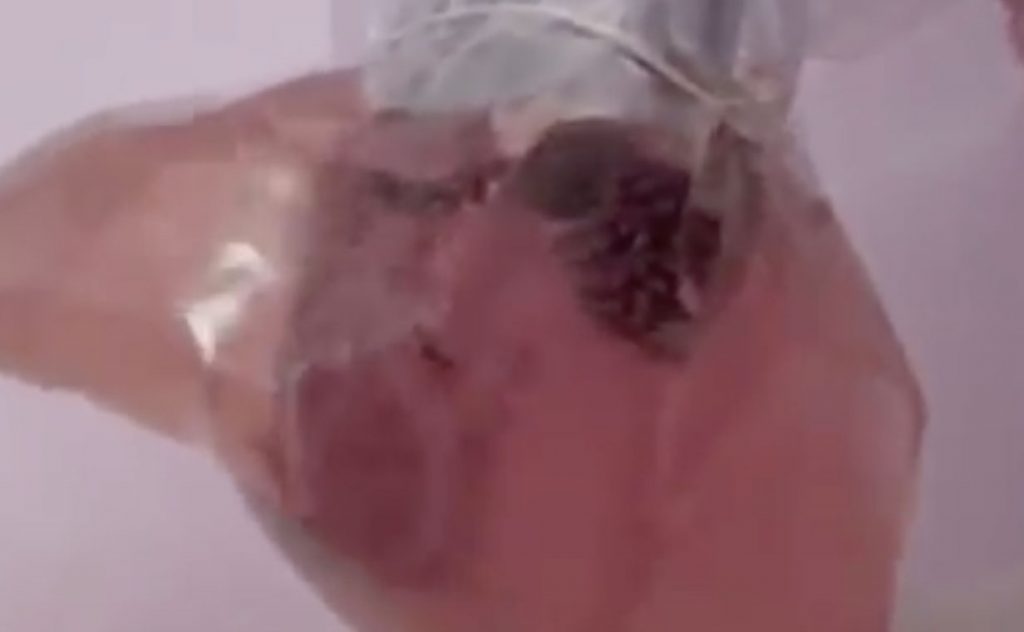
Many people struggle to remove these stains and often think that they need strong, harsh chemical cleaners to get rid of them effectively. However, there’s a better and more affordable way to go about cleaning a shower head with crusted on mineral build up. All you need is apple cider vinegar, a Ziploc bag, and a rubber band.
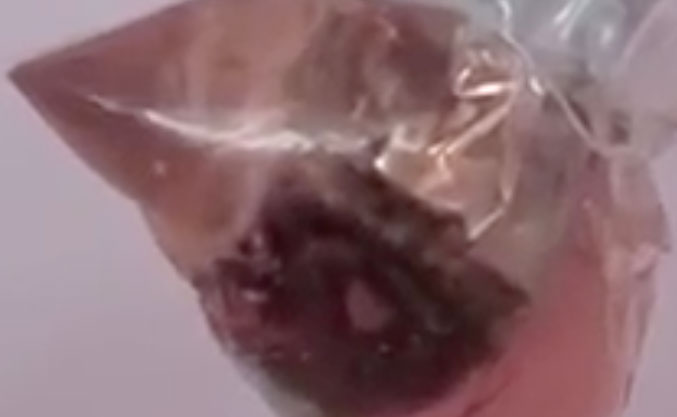
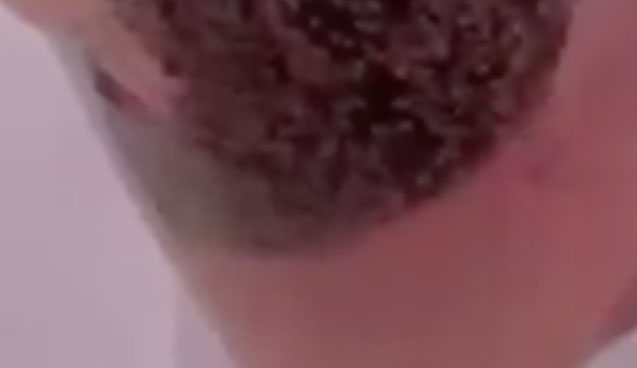
Simply pour some apple cider vinegar into the plastic bag and place it over and on the shower head. Use a rubber band to secure it in place and then leave it on overnight. Remove the baggy the following day, wipe the shower head clean, and it should be restored to its former glory!
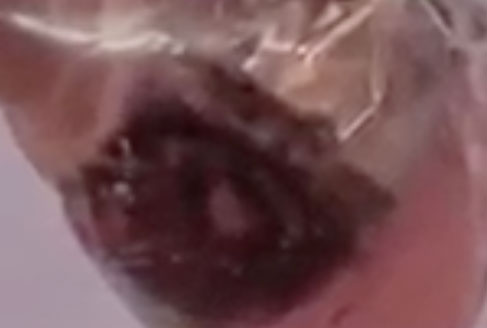
Check out the video for more information and to see just how shiny and spotless looking it turns out. This may be the fastest, easiest, and most natural way to clean hard water stains. It requires minimal effort or exertion on your part so try it the next time you’re stuck cleaning the house!

Have you tried any of these? Will you be trying any? Let us know..
Pass This Onto Your Family and Friends
––––––––––––––––––––––––––––––––––––––––––––––––
If you found this gross and grimy vinegar shower head cleaning life hack helpful keep scrolling for more awesome life hacks
––––––––––––––––––––––––––––––––––––––––––––––––
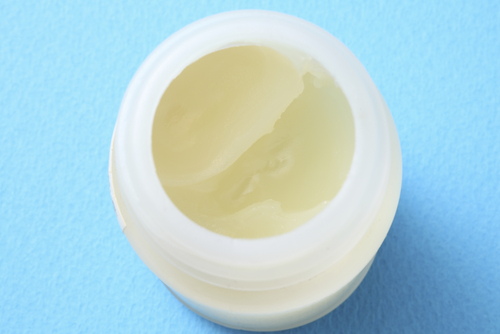
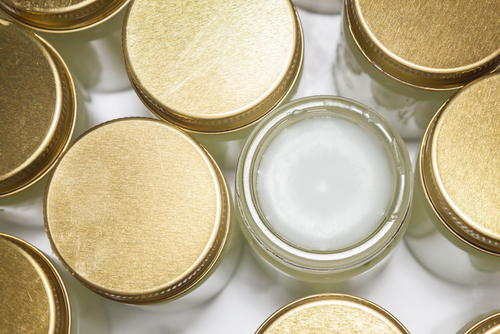
Check out These 5 Awesome Vaseline Life Hacks Everyone Should Know:
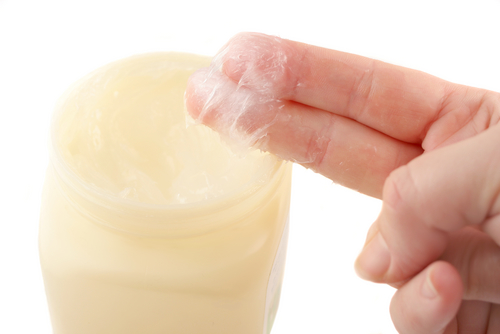
image via – facebook.com
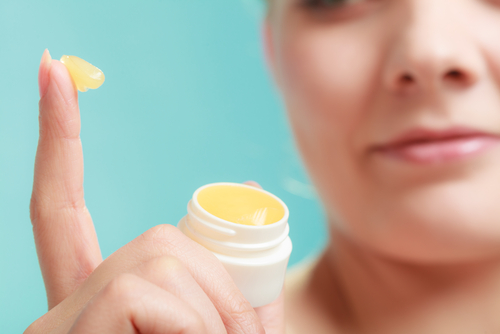
While you may only think of Vaseline as an integral part of your grandmother’s home remedies and go to solutions, it actually really is a product that can seemingly do it all. People use the petroleum based, gooey, slippery substance for all sorts of things. There are countless household and beauty tricks that involve it, whether it’s loosening stuff up or smearing some on minor cuts and burns to help them heal. This article and video focuses on several beauty related uses for the product that may prove useful and come in handy, and will definitely save you time and money.

If you love to paint your nails then you likely have encountered polish bottles with their tops stuck on them. It takes almost superhuman strength to loosen and get them them of when they dry on and stick like that. To prevent this, take a cotton swab and dab some Vaseline around the base of the bottle opening and on the threads where the cap twists on, now it won’t stick the next time you go to open it.
Another nail polish trick is to coat the skin around your nails with some Vaseline before painting them. This will keep the polish from sticking to your skin, cut down on the clean up, and make your paint job look all the more professional.
If you have rough, dry skin on your feet rub a little Vaseline on them before you go to bed. Slather some all over your feet, then put on a pair of socks, and wake up to smooth soft skin. For those of us with sensitive ears that act up and become sore when wearing earrings, try rubbing Vaseline on the metal stud part that goes through your ear.

By coats the earring it helps them slide through and lessens any negative reaction or sensitivity you may have. If the scent of your perfume disappears way too quickly take some Vaseline, apply a thin coat to the area where you plan to spritz it on, then spray the perfume over that area. This works great at holding the fragrance and makes it last much more longer, plus it won’t alter the perfume’s scent.
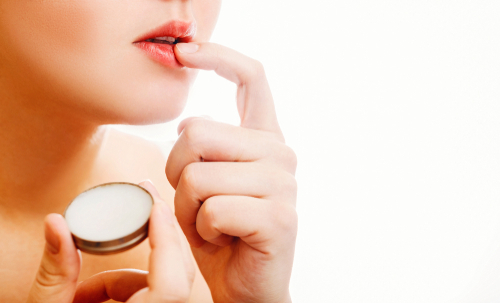
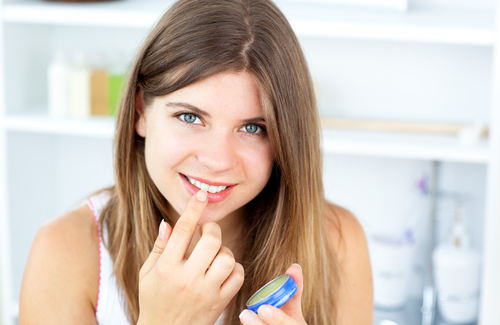
If you haven’t already, toss a small jar of the wonder product in your bag so it’s always on hand close by. Use it to touch up makeup, soften rough skin, loosen stuck tops and lids, or as a lip gloss/chap-stick stand in when you inevitably lose or misplace them.
Besides being versatile, it’s also widely available and can be found in practically any pharmacy, health, convenience or grocery store around the world. Best of all, Vaseline is relatively cheap and costs only a few dollars, with a jar of it easily lasting a year or two before running out. With Vaseline, the possibilities may just be endless!
Have you tried these life hacks?
Please Pass This Onto Your Family and Friends
––––––––––––––––––––––––––––––––––––––––––––––––
If you found these 5 Vaseline Life Hacks Useful keep scrolling for more amazing life hacks:
––––––––––––––––––––––––––––––––––––––––––––––––
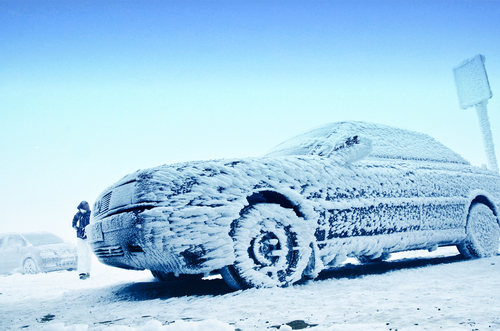
The Next Batch of Life Hacks are some incredibly useful winter life hacks that will make your life so much easier this winter:
image via : shutterstock.com
Along with the cold weather, there are a number of special challenges that winter brings along with it, and we all have to just deal with them! Dry skin, chapped lips, stuffy noses, darkness at 4PM, winter storms, the list goes on and on. One of the most annoying things by far is clearing walkways and driveways of snow and ice. The same goes for cars, but while you can often drive through a little bit of snow, you can’t with an ice-covered windshield. Not only is it illegal to drive with an obstructed view, it’s also insanely dumb and extremely dangerous!
While defrosting the car and scraping ice off the windshield seems like a necessary evil, it doesn’t have to be. You really don’t need to wake up extra early just to stumble around in the freezing cold darkness so that you can drive to work. Instead, you can save yourself some time and energy by doing the following:
In a spray bottle container mix together 2 parts isopropyl alcohol with 1 part water and then add in 1 tablespoon of liquid dish soap. Shake it up, spray it directly onto an icy windshield, and watch the ice literally melt away right before your very eyes!
This rubbing alcohol spray is the perfect thing to have on hand for freezing cold mornings and icy windshields. You can leave the bottle in your car and it won’t even freeze, unless it gets well under zero. That’s because the freezing point of isopropyl alcohol is -128.2 degrees Fahrenheit, so when you spray it on the ice, it doesn’t freeze up. Instead, it helps to melt the ice and keeps it from re-freezing. Since all you have to do is mist it on, it’s by far the quickest and easiest way to clear a windshield that’s coated with a thick layer of ice.
Don’t forget to check out the video to see exactly how well this works in action and be sure to pass it along to those who could use the smart tip. If it can make someone’s life a little bit easier this winter, then it’s worth it!

This is super helpful for those rough winter months.
Please Pass This Onto Your Family and Friends
––––––––––––––––––––––––––––––––––––––––––––––––
If you found this awesome winter life hack help keep scrolling and reading for 7 More Amazing Winter Life Hacks:

image via – Shutterstock.com
Winter is tough. Along with the cold, dry weather comes a number of challenges that we all have to deal with. Cars need to be cleared of snow and ice and the same goes for walkways and driveways. Traveling often becomes way more difficult than usual and to top it off our health also takes a tumble for the worse.

Many of us are plagued by dry itchy skin, sore chapped lips, and stuffy noses that just won’t go away. These things quickly add up and can make it seem like winter is dragging on forever, especially when problems pop up outside on top of the health issues we may be facing.

Which is why these simple winter hacks, covered by the Millennial Moms YouTube channel, are perfect for right now. The video features some of the most clever ways to solve common winter woes and it might offer a solution to a problem you’re currently dealing with. These are some of the best hacks shown in the clip, but there are a total of fifteen, so be sure to check it out for all of the rest.

1) Winterize Boots- This trick does the job to keep feet warm and dry inside of boots that aren’t waterproof. After putting on your socks take two large plastic Ziploc bags and stick a foot in each. Grab a couple of rubber bands and slide them on over the bag to secure it in place and seal the top off around your leg. Pull on your boots and say goodbye to cold, wet feet.

2) Prevent Static Build Up In Hair- Pull a dryer sheet on over the bristles of your hair brush so that they poke through. Brush your hair as normal to eliminate the static, plus it’ll smell clean and great.

3) DIY Boot Inserts- Maintain the shape of tall boots by cutting a foam pool noodle into thirds or fourths, then stick a piece in each boot and they’ll stay upright, making them easier to organize and wear later on.

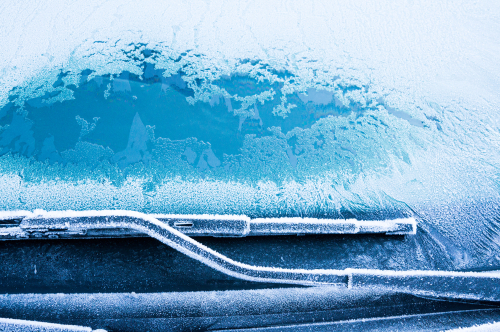
4) Stop Wipers From Freezing to a Car Windshield- Take an old pair of long cotton socks and slide them over each wiper, puling it down as far as it can go or reaches. This will prevent wipers from freezing and/or sticking to the windshield, and makes life all the more easier.

5) Organize Winter Gear- Hats, scarves, gloves, mittens, hand warmers, neck warmers and all other winter accessories can be neatly stored in one accessible place with a shoe organizer. Hang it over a door and never search for lost gloves again.

6) Windshield Treatment- This one is the best! A combination of vinegar and water works wonders at preventing frost and ice from building up on car windshields and windows. Mix the two liquids up in a spray bottle, spritz it on car windows, then wipe off with a soft cloth.

7) Boot Tray- Keep floors safe, clean, and dry by making your own boot tray. This one is much more appealing than commercially available ones and works even better. Fill a large metal cookie sheet with a layer of decorative rocks and put it near the door so that when people enter they can immediately place wet boots on the rocks. The water will drip through the rocks to the bottom and soon evaporate. Don’t forget to check out the rest of the tips covered in the clip and be sure to pass it along to those who could use these smart hacks to make their own lives easier.
These are just really helpful.
Please Pass These Awesome Winter Life Hacks To Your Family and Friends
––––––––––––––––––––––––––––––––––––––––––––––––
If you found these 7 incredible winter life hacks to be helpful keep scrolling for a — For 12 Awesome Car Cleaning Life Hacks You Probably Haven’t Heard About:
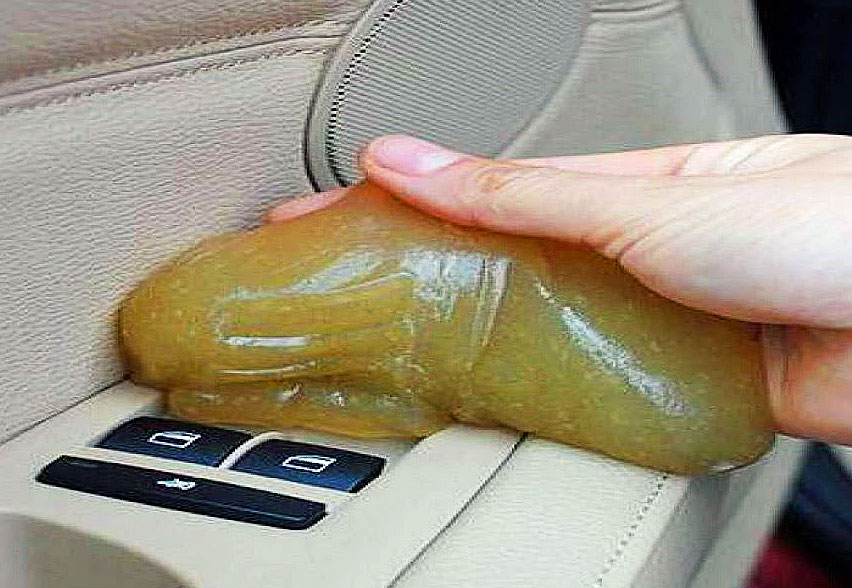
image via : facebook.com
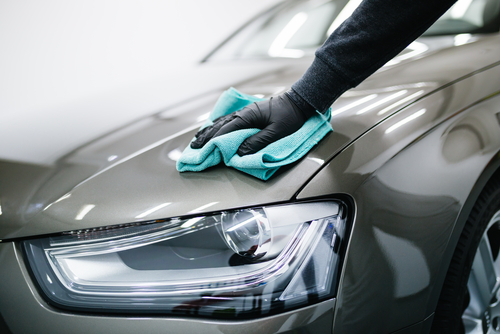
Having your car professionally detailed can easily end up being quite expensive. While it’s always nice to have a sparkling clean car, it’s even better when you can have it without spending a small fortune. Thankfully there are all sorts of cheap ways to clean your car with common items that you probably already have around the house. They can do the job just as well, if not even better, than what professional cleaners use.
These are just a few of the handy tricks covered in the accompanying video so be sure to check it out for even more:
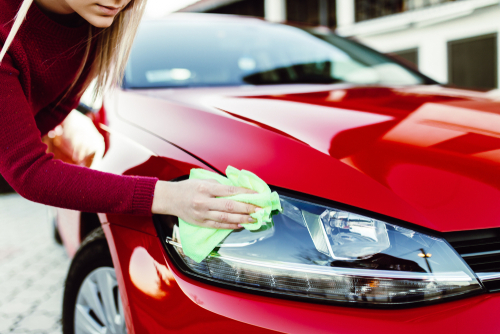
Clean your headlights with toothpaste. Use regular toothpaste, not the gel type, to polish up car headlight lenses by rubbing it on evenly with a cloth. Move in quick circular motions to then buff it off and you should notice the grime and fogginess disappear.
Remove stubborn old bumper stickers cleanly and completely with WD-40. Simply spray the sticker with WD-40 and let it sit for a while, the sticker will absorb it, then you can peel it right off.
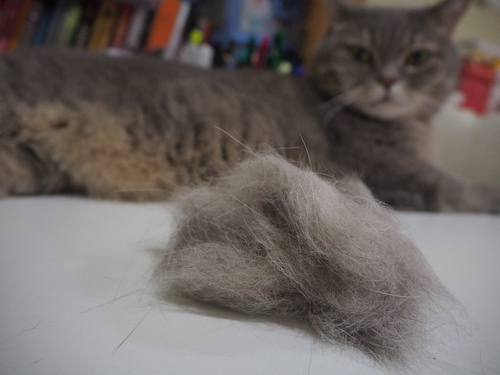
Remove pet fur from carpets and seats with a spray bottle, water, and a squeegee. Spray the water on the seat and then move the squeegee over the area, it will gather and lift up the hair so you can easily pick it up.
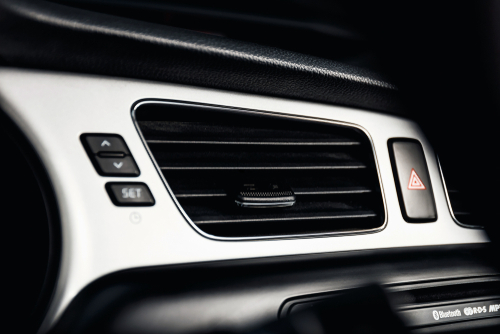
Clean air vents with small foam brushes. They can easily fit in even the smallest vents and pick up all the dirt and dust inside them.
Use coffee filters to dust your car dashboard. Unlike cloth towels and paper towels, coffee filters won’t leave behind lint or just push dust around. Instead they work great at picking up dust and you can toss a few in the glove compartment for whenever you might need one to freshen up the dash.

Get streak free windows by cleaning them with newspaper. It’s the cloths and paper towels that leave streaks when you clean your windows so don’t even bother using them. Instead, spray down the window with cleaner and wipe it off with a piece of newspaper as you normally would.
Get rid of stubborn, lingering odors by sprinkling baking soda on car seats and carpets. Let it sit for a couple of hours before vacuuming it up. The baking soda should absorb the foul odors, leaving your car smelling fresh and clean.

There are even more clean car tips covered in the video and it might just have the solution you’ve been looking for so be sure to check it out!

Will you be trying any of these? Let us know
Please Pass These Awesome Car Cleaning Hacks To Your Family and Friends
THIS Woman Dips Coffee Filters Into A Bowl Of Water. But The Reason Is Unexpectedly GENIUS!
image via – youtube.com
When it comes to decorating for any seasonal holiday, you want to look festive and on-point without breaking your budget. There’s no better way to achieve a fresh, spring or summer look than with these dip-dyed coffee filter flowers. While they may sound cheap and thrifty, which they are, they’ll end up turning out beautiful and vibrant looking every time.
They’re super easy and inexpensive to make even if you’re not a crafty type of person. The homemade, handcrafted flowers make for some uniquely thoughtful decorations and they can be used as neat little candy holders or a centerpiece down a table. They’re even perfect for gifting at any time of the year and no special occasion is needed to hand these beauties out. Present one to someone you appreciate and show them how much you care!
To make your own pretty dip-dyed flowers you will need the following items; coffee filters, food coloring, cups, scissors, a shallow dish or pie plate, warm water, a hot glue gun, a cooling rack, and a baking sheet. In the accompanying video Marianne from HGTV Hand-Made shows us step by step exactly how to make these flowers. Read on below for instructions and watch her transform plain old coffee filters into pretty spring blossoms.
In a shallow dish mix up the dye one color at a time, using a ratio of 10 drops of food coloring to one cup of warm water. Take a stack of about 10 coffee filters and place them upside down in the warm water. Remove them once you notice that the dye reaches the top edge of the filters and place them on a cooling rack to dry.
Make sure to place a baking sheet under the cooling rack to help contain the mess and catch any dye-colored water that drips off the filters. Now repeat the process with the other colors you want to make and allow them all to completely dry before moving on to the next step.
To make the flowers, start off by taking a paper cup and carefully trim it down with a pair of scissors so that it’s about 1½ inches tall. Use a total of 3 coffee filters from 2 different colors each and stack one bunch atop the other. Flatten them down and fold them in half, then cut a 1-inch notch in each fold.
Fold it in half again (so it’s in quarters) and cut a one-inch notch in the resulting fold, plus another notch in the middle of the fan-shape that you have at this point. Unfold it one time, so that it’s still folded in half, and trim away the edges near each of the notches so that they end up resembling petal-like shapes.
To assemble each flower, take a cup and dab a little bit of hot glue in the center of it. Take one colored coffee filter, center it over the cup, and press it down into the glue. Fold the sides down roughly around the cup and then take another filter and glue it atop that one.
Take the third and final filter of that one color and glue it to both the bottom and up the sides of the cup, so that it’s covered. Now take the 3 remaining filters from the second color and glue them all to the bottom of the cup. You can fan the filter edges out gently and arrange them so they look fuller, and now they’re ready to use!
Let us know how yours turn out!
Please Share This With Your Family and Friends 🙂
You’re Probably Prepping Pasta Wrong. Here’s An Awesome Life Hack To Make Pasta Without a Colander.

image via – facebook.com
Whether you’re in the mood for some Italian cuisine or you’re pressed for time and need to make dinner in a hurry, there’s nothing quicker and easier to make than pasta. Most people always keep on hand at least a few boxes of pasta and a jar or two of tomato sauce. In fact, they’re considered basic food staples in many households and who doesn’t love a home cooked plate of spaghetti! Pasta is simply delicious and easy to make. Plus, if you ever need to feed a hungry group of people, a big pot of pasta and sauce is the perfect meal to serve.

All that you really need to do is boil up some water, drop in the pasta, strain it, and dump some sauce in with the cooked noodles, right? Not exactly, if you’re making it that way then you’re doing it wrong. If you want to make perfect pasta that tastes amazing, you have to do it the right way. The following tips covered in this video clip will help you do exactly that, so check them out and learn the proper way on how to cook and sauce pasta.

1. Add salt to the water, just before it begins to broil and before you place the pasta in the pot. This will make your pasta end up tasting a lot more flavorful and elevate it to a restaurant-quality level.

2. Do not add in olive oil to the water. If you add oil, the sauce will end up not sticking to the pasta, throwing the taste and texture off.

3. Don’t follow the instructions on the box. Each type of pasta is different in regards to how long it takes to cook. It’s better to taste taste and monitor it as you go along, that way it ends up how you like and prefer it. As for box instructions, oftentimes you don’t need to cook it as long as recommended.
4. Get the correct type of sauce for your pasta. If you plan on pairing it with a healthier sauce, use wider noodles. If you are using a thinner or runny sauce, use pasta with folds, like campanelle or rotini. They work great for holding thinner sauces on.

5. Before you drain the pasta, make sure to save at least half a cup of the starchy water it was cooked in. Then, once you’ve strained it, cook the pasta in the sauce and add in the starchy water you set aside. Cook it all together until the sauce is reduced and ready to serve.

6. Finally, if you plan on adding any additional fresh herbs or spices to the mix, make sure to always add them in with the pasta and sauce last. This will help keep the flavor fresh.

The next time you make pasta for dinner, be sure to try out all these tips and it will end up tasting perfect and absolutely wonderful.
Watch the tutorial video below for an in-depth look on how prep the perfect pasta:
Please SHARE this with family and friends
This Woman Makes 12 Twists In Her Hair And Then Goes To Bed. Then She Wakes Up.

image via – youtube.com
If you are short on time in the morning and have flat or unruly hair, then you know how much of a pain it can be to try and style it into the perfect look. Most of the time people just throw their hair up in a bun or let it fall as it may. When it comes down to it, achieving beautiful looking hair is hard to do outside of a salon, especially perfect curls.
It takes time, patience, and a lot of heat and products to get bouncy, frizz free curls. At least that’s what many women commonly assume. However, there is a much easier, less expensive alternative to traditional assumptions and methods of curling hair. Best of all, you can do this yourself at night right before you go to bed. When you wake up all you need is 5 minutes or less for your hair and that is it!
There is no heat, irons, or dryers necessary for this, you don’t even need to shower, but you will need a brush, a hair tie, and a few bobby pins. First you should brush your hair to get any tangles out and make it easier to work with. Get your hands wet and then run your fingers through your hair so that it’s evenly damp all around.
Separate out a small chunk of hair as if you were going to curl it with an iron, and begin to twist it around until it coils up tightly. Hold that piece with your free hand and move onto the next section of hair and twist that up. Repeat until your whole head of hair is all twisted up.
Secure the twists up into a secure bun and pin any loose pieces with a bobby pin or two. If any of the ends or twists pop out of the bun just twist them back up and tuck them into the elastic. When you’re finished with that you can mist some hairspray on and then head to bed.
When you wake up simply take down your hair and separate the twists. You can tussle it up and disarrange it for a messier look and add more hairspray to hold the curls better. For a quick volume boost, try flipping your hair over and spritz on some hairspray, then crunch up your hair.
Wait a few seconds for the hairspray to dry and flip your head back up. All in all it will only take about 5 minutes or less to style your curls and you’ll look great. It really is this easy to master and this technique can give you frizz free, bouncy, beautiful curls.
There’s no need for any products or gadgets, and since it’s done overnight you’ll free up a lot of time in your morning routine yet still look great. This video will show you exactly how to curl your hair and it provides a lot of great tips on the process. Check it out and try it tonight!
Please Share This Overnight Hair Trick With Your Family and Friends 🙂
She Begins Twisting Different Parts Of Her Hair. But When She’s Done An Unexpected Stunning Surprise!
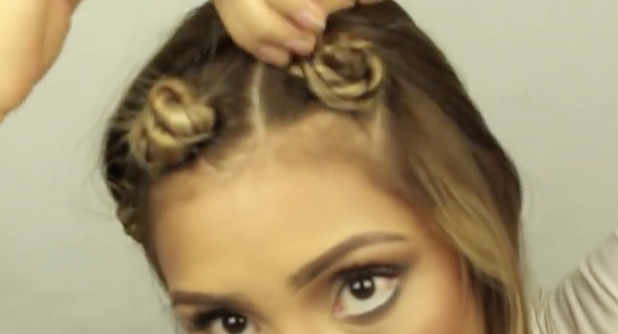
image via – youtube.com
If you love the way that curly hair looks and feels, but lack the time and patience it requires, then you have to check out this tutorial on how to easily attain a head full of bouncy curls. You don’t even need to use a curling iron or any heat with the Real Beauty by Cynthia technique covered here.
It’s perfect for people who are short on time in the morning and for those who have flat or unruly hair. Instead of just throwing your hair up in a bun or letting it fall as it may, wake up and spend less than five minutes styling your hair. That’s all you need and it’s really easy to master this technique. So if you want bouncy, frizz free, and beautifully defined curls, this video will show you exactly how to twist your way to them!
As mentioned above, there’s no heat, irons, or dryers necessary for this and you don’t even need to shower, but you will need a brush or comb, texturizer (Cynthia uses L’Oreal), and some bobby pins. First, brush your hair to get any tangles out and make it easier to work with.
Take a section of hair and add a tiny bit of texturizing cream, combing it through your hair. Twist the hair section up into a knot and secure it closely to your head with a couple of bobby pins. Repeat these steps on each section of hair you twist up, until all of it has been sectioned off and secured into place.
If you do this right before you go to bed at night when you wake up your hair will be ready to unravel and style. If you do it earlier in the day then at a minimum you should wait a few hours until you’re positive that all your hair has completely dried and set before taking it out.
Either way, the longer you keep the twists and bobby pins in, the better. When you wake up, or are sure that your hair is dry, simply take a section of hair and remove the bobby pins before unraveling the twists and separating them as you go.
You can tussle them up and disarrange it for a messier look and add a little hairspray to better hold the curl in. For a quick volume boost try flipping your hair over and spritz some hairspray near the roots only, wait a few seconds for it to dry, then flip your head up.
At the most it’ll only take about 5 minutes to style your curls and you’ll look great with minimal effort and no heat!
Please Share This With Family and Friends 🙂
She Places Leftover Celery Scraps In A Cup of H2O. 3 Days Later She Reveals The UNTHINKABLE!
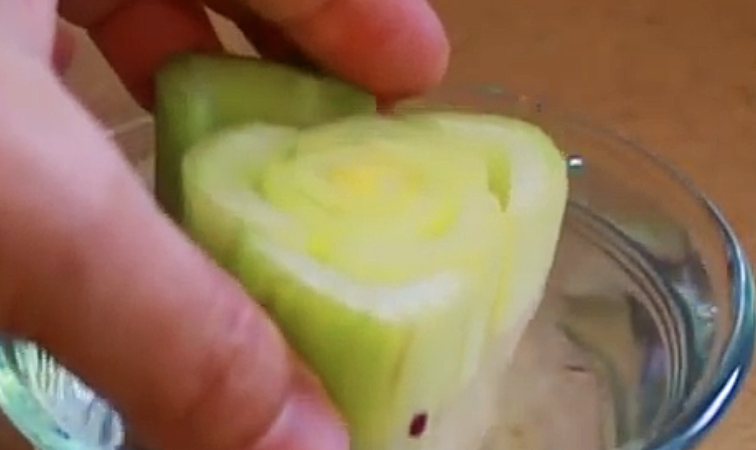
image via – youtube.com
If you are like me, and have always loved the idea of growing your own fruits and vegetables, but have never given a fully constructed vegetable garden a whirl, the following video below is for you. The official start of Summer is only a few days away, so this is the perfect time to watch this unique approach to enjoying your own fruits and veggies all summer.
Although we all have the option of composting food scraps, instead of just throwing them in the garbage, Cobi Kim shows us a far cooler and more productive way to deal with food waste. She actually illustrates how simple it is to GROW A GARDEN FROM KITCHEN SCRAPS!
I never thought of being able to grow my own PINEAPPLES! Instead of tossing the crown, Cobi shows you how to ready it to be placed in water, in order to develop substantial roots. After 3 weeks it is ready to be planted in the soil.
Similarly, you will be shown how to cut the bottom of a celery stalk, to be placed in water until the root growth readies it to be planted outside. Check out the video for complete details for these items, as well as transforming ginger, garlic, green onions and round onions into a lush and satisfying fruit and vegetable garden!
Have you tried this?
Please SHARE This With Family and Friends 🙂


