
Have You Ever Transferred Your Old VHS Tapes Onto Your Computer? THIS Is The Easiest Way To Do It!
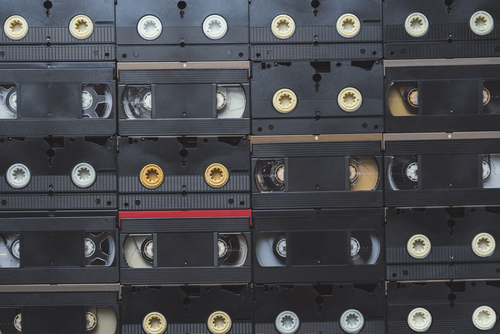
image via – shutterstock.com
Technology is constantly being improved and advanced upon, which makes it hard to keep up with. This has inevitably led to a number of once brand new and highly innovative products being rendered obsolete. VHS players are a perfect example of this since the previously popular and must have items are now a thing of the past.
As a result, many people’s extensive collections of VHS tapes featuring home videos and recordings go unused and end up sitting in boxes taking up space around the house. Besides being bulky dust collectors, those tapes may also be deteriorating and you risk losing anything on them.
VHS tapes have a shelf life which varies by brand and how used or rough they have been handled. If you want to preserve the homemade videos and memories they contain, transferring the tapes onto a computer is the ideal way to go.
By saving them in a new, updated digital format you can easily share them with others, edit the content, and watch videos without having to break out the old VHS player. Transferring VHS tapes to a computer can be simple and easy if you know what you’re doing.
In this quick video tutorial CNET senior editor Donald Bell walks through the transfer process and if you follow what he does, you’ll be all set. First and foremost, he makes it very clear that this is only for archiving home video footage and not copyrighted TV shows or movies.
It’s illegal to duplicate and/or distribute such programs as doing so violates their copyrighted content and can get you in a lot of trouble. To do this type of transfer you need a VCR player with audio and video output, VHS tape(s), a computer with room on the hard drive, and a compatible adapter to connect the computer and VCR.
One hour of video will take up approximately 750 megabytes of storage on your computer’s hard drive, so if you prefer to save space on your computer an external hard drive is recommended. Also, the adapter must be compatible with the type of computer you’re using, PC or Mac, or it won’t work.
To start, first plug in the adapter’s color coded ends to their matching connections on the backside of the player. The yellow connection is for video, white is for mono audio, and white/red is for stereo audio. Install the software included with the adapter and follow the steps it takes you through until you’re able to see and hear the video, this shows that it’s properly connected.
Now you can name the file and start the transfer. Press the record button and hit play on the VCR to record in real time. Real time recording means that you have to wait for the whole thing to play through and press stop recording when you’re done.
After that you can edit out any unwanted portions from either the beginning or the end of the video. Finally, a file path to the location of the file you just created will show up, along with options to watch, upload, or further edit the video.
Now you can burn the videos onto DVDs or transfer them to other computers and send copies of them to friends and family. Best of all, you can throw out all those bulky VHS tapes or put them away in storage for good!
Pass this information along to others whose video collections could use an upgrade and help them preserve all the memories and milestones they’ve captured on VHS in digital format.
Please SHARE This With Your Family and Friends
She Sculpted This Whole Cake Into A Rose Shape. But When Slices and Reveals The Inside? WOW!
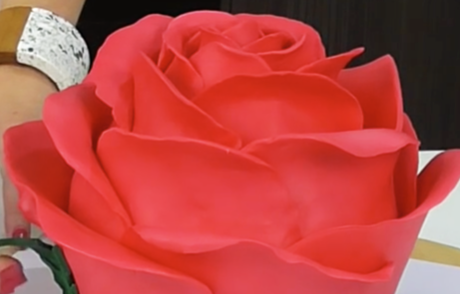
image via – youtube.com
If you want to make an extra special Valentine’s Day treat, or simply a gorgeous looking dessert, you have to try your hand at this rose cake recipe. It’s basically a work of art and even though it looks really hard to make, it can be accomplished.
All you have to do is follow along and watch what Vanessa from Cake Style does in this video tutorial and copy her every step of the way. She also included some really helpful links to the other recipes she used to make the cakes, frosting, and modeling chocolate, so be sure to check them all out.
Before you can begin decorating you’ll need to bake two 6 inch round cakes ahead of time and whip up a batch of sweet butter cream frosting. Add some red food dye to color it pink or red and then make a batch of the modeling chocolate that she uses.
Modeling chocolate is similar to fondant in that it’s easy to mold, shape, and add color to, but it’s made from mainly melted white chocolate and corn syrup which makes it taste a lot better. The main issue with fondant is that it tastes gross, so modeling chocolate is definitely the way to go.
Once you have those three main components you’ll need to gather up a few things including a large spatula, bread knife, metal or plastic scraper, small rolling pin, 3 ¾ inch round cake plate, 12 inch square cake board, cornstarch, small paintbrush, Exacto knife, water or clear alcohol, toothpick, parchment paper, cutting board, turntable, and 2¾, 2½, and 3¾ inch cookie cutters.
It may sound like a lot, but all of these things will make your cake turn out looking like a professional made it. The decorating instructions are best left to Vanessa to explain and this is something you truly have to see in order to understand and replicate it.
She does an excellent job describing everything that you’ll need to know and by the time your done you’ll have a seriously sweet looking rose cake.
Try it out, even if it turns out less than perfect, it’s the thought that counts. Plus, it’ll still be edible!
Please Share This Recipe With Your Family and Friends 🙂
She Starts Sticking ‘Shattered Glass’ Onto Her Nails. But When She’s Done My Jaw Dropped!
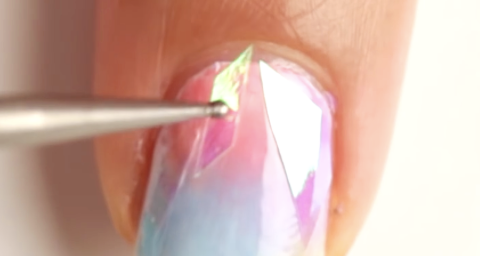
image via – youtube.com
Nail art is a lot of fun and some trends just really call to people who like to try an edgy look. If you are one of those people, the video you are about to watch below is for you. It is known as shattered glass; a new Korean nail art.
Park Eun Kyung is the nail creator; her nail lab, Unistella by E.K. has been known to come up with some of the most unique trends out there. This amazing effect of shattered glass is illustrated by YouTube channel “Creativenailart”, in an easy-to-follow way that makes it possible for you to try it at home.
She paints her nails white as a primer, then using liquid latex, she protects the edges of her nails. After drying she uses a small makeup sponge with polish colors to imprint on her nail which will help to produce the glass effect after she applies cut iridescent tissue paper and then the final coat.
It really creates a cool illusion. Let us know what you think.
Please SHARE this creative DIY with your friends and family
At First It Seemed Like A Normal Cake But When It Begins to Spin At :06 My Jaw Dropped!
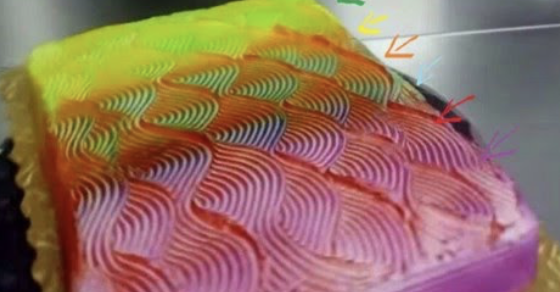
image via – youtube.com
Who doesn’t want to taste the rainbow in cake form? If you do, this awesome color changing cake video will make your day. The icing on the cake is exactly what makes it appear so magical. The contrasting colors look like they melt all across the top and sides of the tasty frosted treat in a series of neat waves.
The psychedelic effects were achieved by combining a system of clever decorative wave techniques to the icing, with the bright colors airbrushed on afterwards. Spraying on the different colored food dyes at certain angles, so that they only cover one side of the peaks and ridges, makes them appear to effortlessly change color as the cake is spun around.
The result is a seriously cool cake which can be perceived a number of different ways, all depending on where you stand!
The rainbow hued sheet of baked deliciousness was uploaded by YouTuber CharlotteSometimes who shared a short clip that shows her spinning the cake around so that you can really see how it transforms depending on the angle it’s viewed from.
In addition, she also made available an easy to follow tutorial on how you can re-create the visually stunning cake at home in your own kitchen. While it appears tricky and super hard to do, it’s really not.
The biggest hurdle to replicating the masterpiece is that it requires the right tools, like a cake decorating airbrush and an icing comb. Other than that, it seems like a really fun, interesting, and challenging baking project that anyone can take on.
This is the perfect cake to whip up for a birthday party, special occasion, or for anyone who holds a lot of love for neat, colorful, sweet things. Make sure to check it out below.
Let us know how yours turns out!
Please Share This Incredible Cake With Family and Friends 🙂
She Begins Hot Glueing Marbles To a Ball Made of Foam. But When She’s Done It’s STUNNING
If you’re looking for a quick and easy way to make your lawn or garden pop, then you have to check out these beautiful homemade gazing balls. They shimmer and sparkle when they catch the sunlight and add an extra-special touch to the landscape. They’re fun and easy to make, but the best part about them is that they’re super affordable and won’t cost you more than a few dollars. In comparison, store bought versions can be very pricey and the less expensive ones are usually dull, plain, cheaply made, and not too exciting to look at!
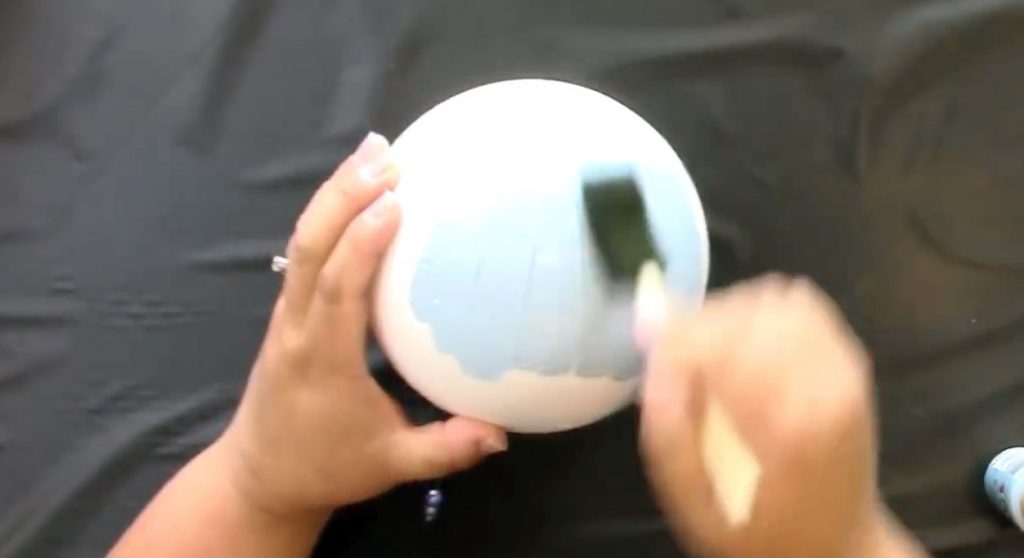
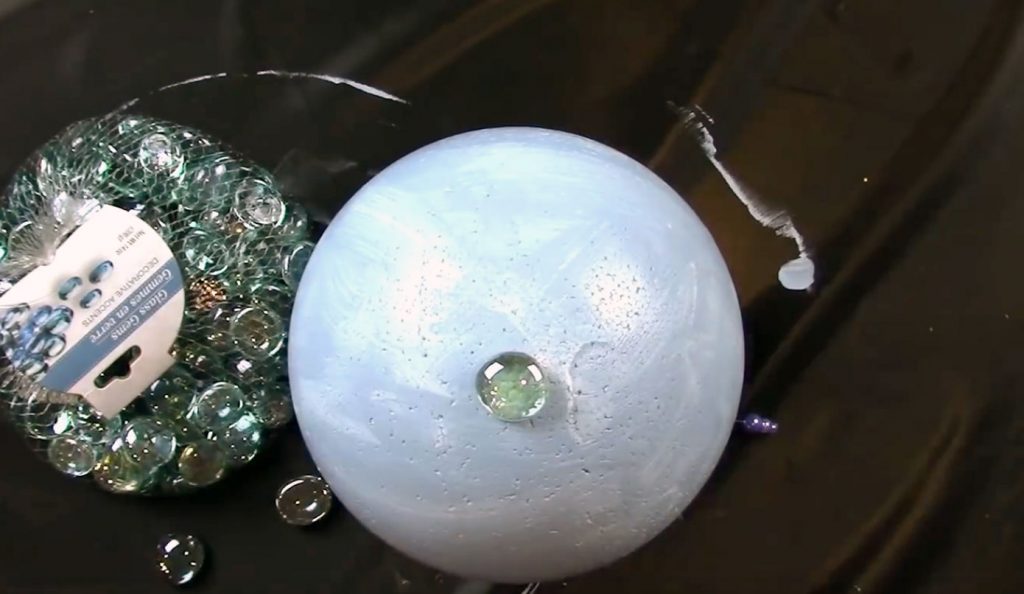
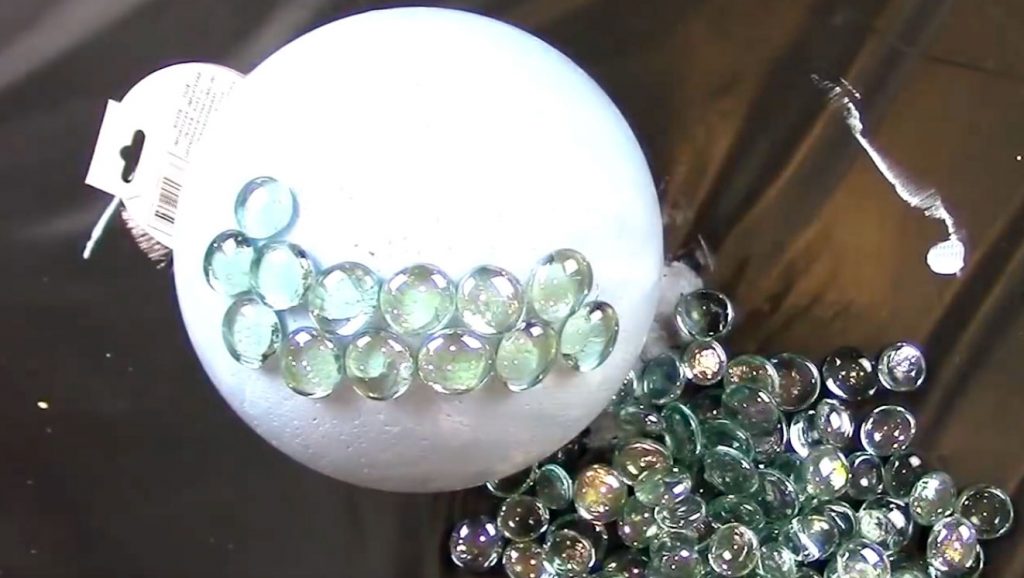
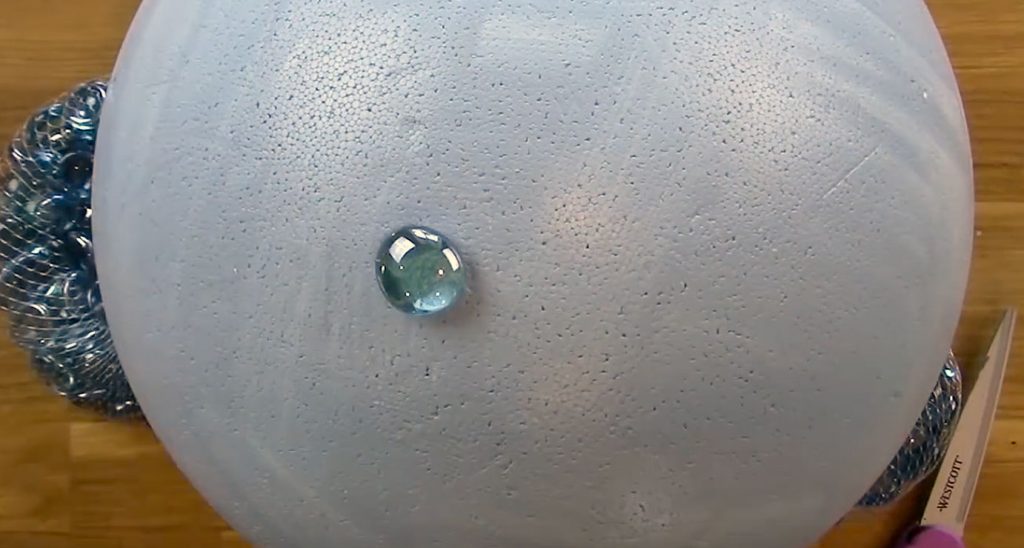
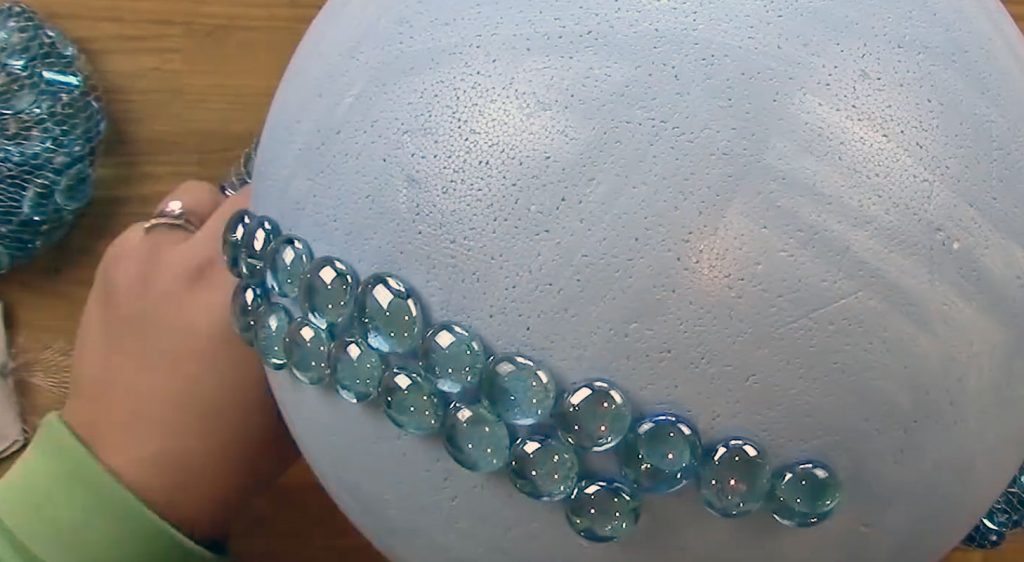
This craft project is also something that kids will enjoy making and it allows them to really get creative. You can make different sized balls in any color or combination and you can customize them to your exact standards. All you really need are Smoothfoam balls and flat glass marbles that most dollar stores carry in stock.
Craft extraordinaire Jennifer Priest, who runs her own blog named Hydrangea Hippo, shows us how to make them in the accompanying video. She conveniently included a list of all the supplies that she used and links to them as well. The materials you will need include Smoothfoam balls, flat glass marbles, a hot glue gun, acrylic paint, and a foam brush.
It’s important that you use Smoothfoam balls and not Styrofoam ones because Styrofoam will absorb all the paint you put on it and melts very easily. You’ll also want to use something that you can stick into the foam ball to hold on to, like a chopstick or long pin, that way you can paint the entire ball without making a mess and getting your hands all dirty.
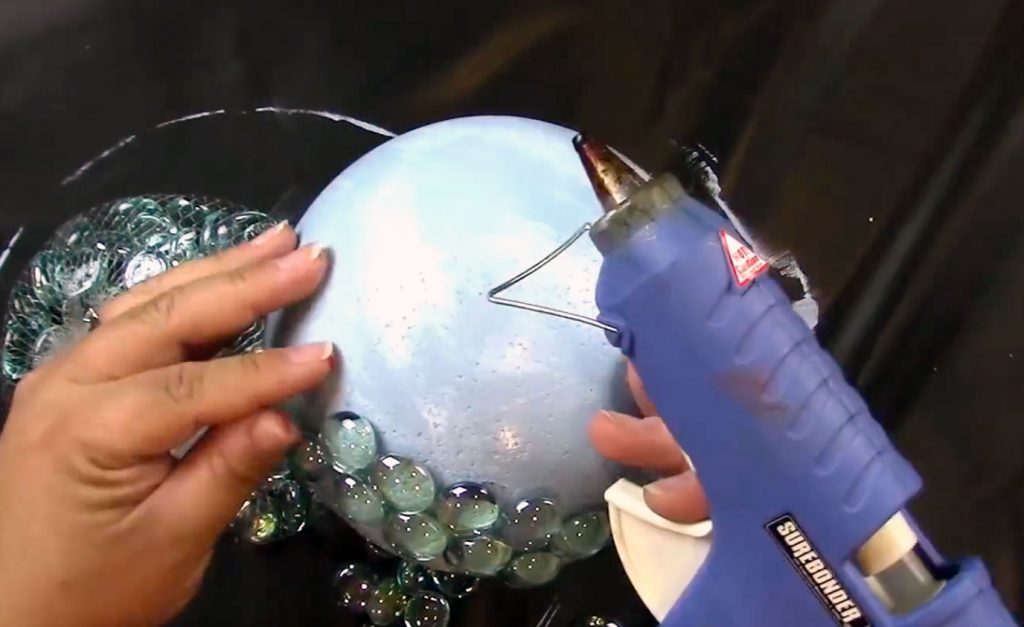
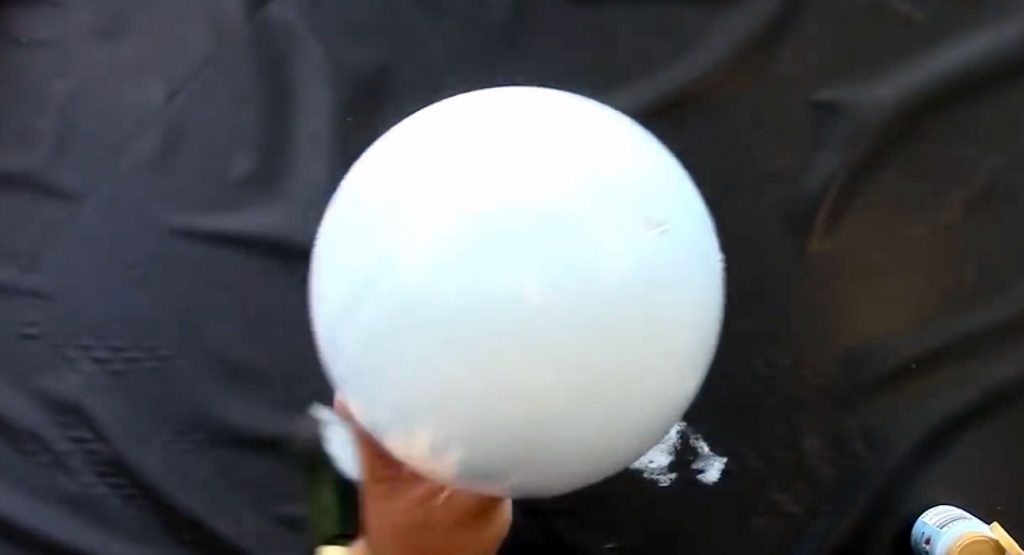
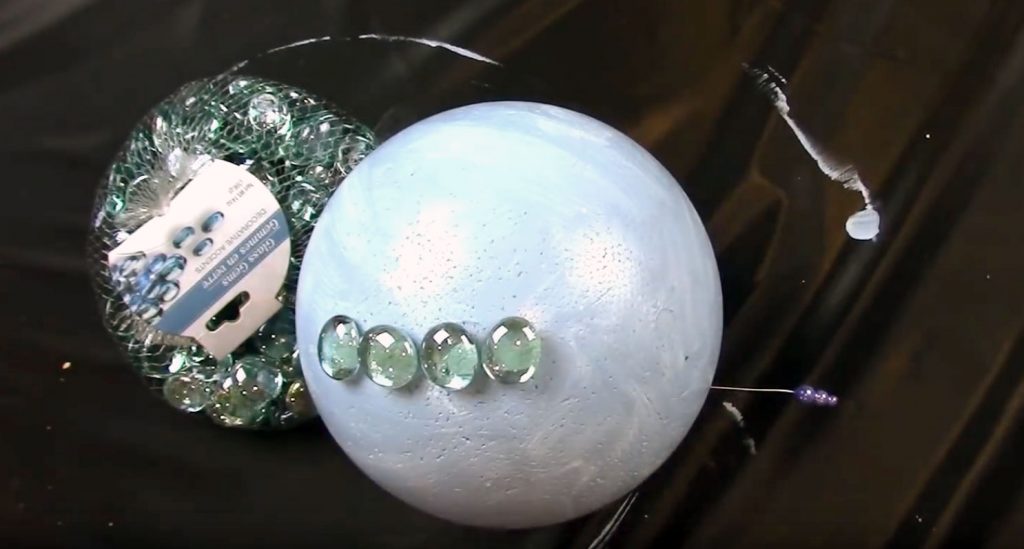
Start out by painting the foam balls and then set them aside to dry. Once the paint has completely dried fire up your glue gun and apply a dab of glue to the smooth side of each marble. Stick them onto the ball smooth and glued side down and as close to one another as you can until the entire thing is coated in marbles.
Now you can place the ball in the garden, flower beds or pots, on a pedestal or stand, or wherever else you desire. They can be hung as well, just stick a small screw hook into the side and it’s ready to be strung up. The decorating uses for these go beyond lawn and garden and they make beautiful additions to party or wedding décor as well.
These gazing balls turned out looking anything but cheap and you’d never guess they were made with simple items from the dollar store. They would make a lovely and thoughtful Mother’s Day gift and with everything starting to really bloom, now is the time to make them!
Please Share This With Family and Friends 🙂
She Coils Her Hair Around This Regular Straw. When She’s Done An Unexpected Stunning Surprise!

Do you love curly hair, but lack the time and patience it takes to attain it? If you’re short on time in the morning and have flat or unruly hair, then you know how much of a pain it can be to try and style it into the perfect look. Most of the time people just throw their hair up in a bun or let it fall as it may. When it comes down to it, achieving beautiful looking hair is hard to do outside of a salon, especially well defined and perfect curls.
It takes time, patience, and a lot of heat and styling products to get frizz free curls, at least that’s what most of us commonly assume. However, there is a much easier and less expensive alternative to traditional methods of curling hair. Best of all, you can do this yourself at night right before you go to bed.
When you wake up all you need is 5 minutes or less for your hair and that’s it! There is no heat, irons, or dryers necessary for this, you don’t even need to shower, but you will need a brush, plastic drinking straws, a spray bottle with water, and some bobby pins.
First you should brush your hair to get any tangles out and make it easier to work with. Take a section of hair and damp it with the spray bottle and water. Then take a straw and wrap the hair around it, starting at the top near your scalp, and working down to the ends. Once the section of hair is completely wrapped around the straw, take a bobby pin and secure the top part to your scalp.
Take another bobby pin and fold the bottom portion of the straw back, so that it naturally seals the lower end of the hair, and pin it into place. Repeat these steps for the rest of your hair until all of it has been sectioned off and secured in place. At a minimum, wait a couple of hours or longer until you’re positive that all your hair has completely dried before taking it out.
The longer you keep the straws and bobby pins in the better, and you can leave them in overnight. When you wake up, or are sure that your hair is dry, simply take a section of hair and remove the bobby pins before sliding the straw out. You can tussle it up and disarrange it for a messier look and add a little hairspray to better hold the curls.
For a quick volume boost try flipping your hair over and spritz some hairspray near the roots, wait a few seconds for it to dry, then flip your head back up. All in all, it’ll only take about 5 minutes to style your curls and you’ll look great.
It really is easy to master and this technique can give you bouncy, frizz free, beautifully defined curls. There’s no need for any products or gadgets, and since it can be done overnight you’ll free up a lot of time in your morning routine, yet still look great.
This video will show you exactly how to curl your hair with straws and it provides a lot of great tips on the process. Check it out and try it tonight!
Please SHARE This With Family and Friends


