
She Places White Vinegar and Alcohol Inside Her Ear For 60 Seconds a Day. The Reason Is Brilliant!
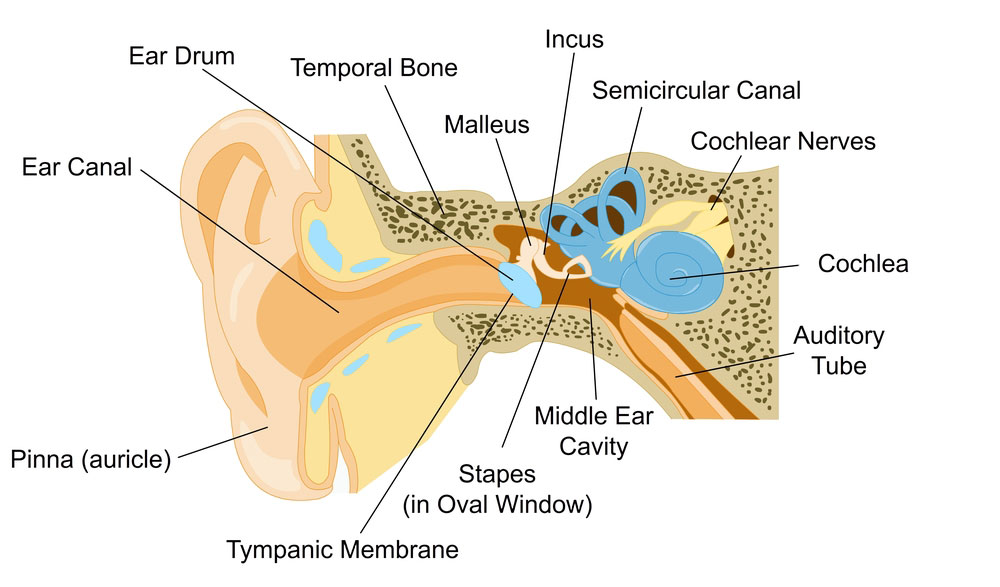
No one wants either that clogged feeling of earwax nor the grossness of it being visible. It’s commonly thought of as dirt that needs to be removed, when in fact, earwax is actually produced by your body to protect the inner ear from things in the environment that can adversely affect it. In actuality earwax acts as a barrier from real dirt, bacteria, and other potential environmental intrusions.

Not only does earwax serve this health-maintaining function for the inner ear, but it normally gets rid of excess wax naturally. Despite this fact, many of us are bothered by that gooky feeling of excess wax, and go for the Q-tips to dig it out. In the video you are about to watch below, Dr.David Hill discusses earwax, and the best ways to clean it when it builds up and is bothersome.

He explains why using Q-tips is the very worst thing you can do when trying to clean your ears. As he discusses in greater detail, Q-tips push the earwax deeper into the canal and can cause some serious damage.
He makes some healthier suggestions for the safe cleaning of our ears, including a mixture of white vinegar and alcohol. For exact proportions and some other suggestions, follow his sensible and healthy suggestions, so that you don’t actually cause some serious damage to your inner ears.

Please SHARE This Information With Family and Friends
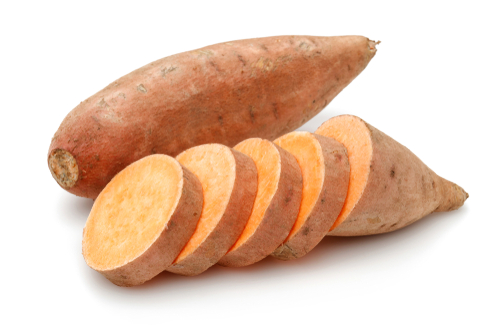
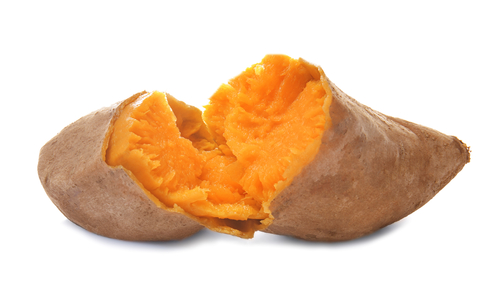
After Learning THIS Simple Trick I Won’t Prepare My Sweet Potatoes The Same Way Ever Again!

One of the most popular and readily available food items found in the produce section of any grocery store is the potato. There are often several different types that stores carry and one of the tastiest, most healthy varieties is the yam, aka a sweet potato. Sweet potatoes are exactly as their name implies; sweet!
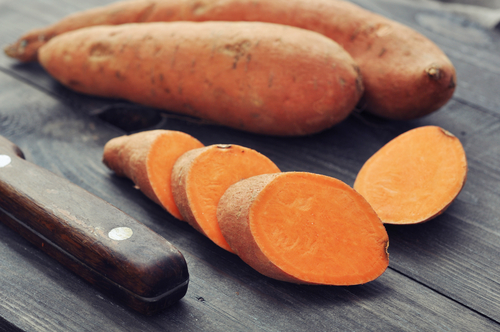
The orange fleshed root vegetables are considered a superfood because they’re packed full of the vitamins and nutrients that our bodies need, such as vitamins A, C, E, and B-6, as well as beta carotene, fiber, potassium, iron, manganese, and copper.
The antioxidants found in them can help prevent cancer and heart disease, strengthen your immune system, and even slow aging. Plus, they’re fat free and cholesterol free, if that doesn’t describe a super food, nothing else will!
The humble vegetables are easy to cook with and can be prepared in all sorts of different ways. Most people prefer them mashed, baked, boiled. hashed, steamed, fried, or microwaved. Zapping them in the microwave is easily the quickest way to cook them because all you have to do is poke a few holes in the skin, select the preset “potato” button and a few minutes later they’re done.
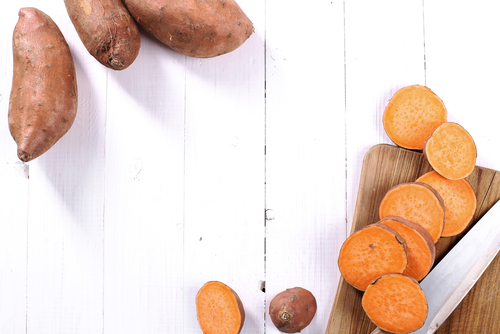
While that’s the fastest way to cook them, it’s definitely not the tastiest, the skin and flesh turn rubbery and becomes kind of mealy. It’s just not the same as a slow cooked, oven baked potato. Instead of microwaving and ruining the taste and texture, try cooking them in a slow cooker.
In the end it’s just as easy, but the potatoes will turn out much more delicious and you can prepare a bunch at once. All you need to do is wash and scrub a few sweet potatoes, trim off any bad spots, and then toss them into a slow cooker with a little water.

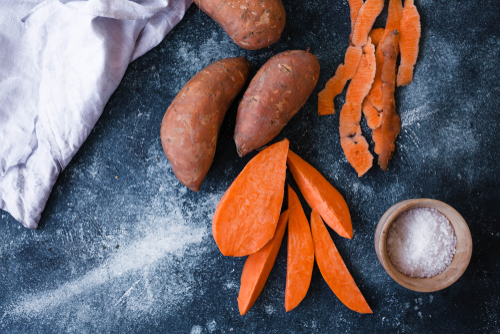
For 3 large sweet potatoes use about ½ a cup of water and for a larger batch adjust the water up to about ¾ cup or more. You want just enough water to steam them and there’s no need to poke them with a fork for this recipe. Cook on high for about 2-2 ½ hours for a small batch and 3-3 ½ for a larger amount.

While the potatoes are cooking you’re free to go about your day and when you get back they’ll be all done. The insides will be evenly cooked, fluffy, and tender, which is perfect for this sweet potato cookie recipe that calls for cooked potatoes. The video covers how to make them and a list of ingredients and directions are also listed below:

2 eggs ½ tablespoon nutmeg
2 ¾ cup flour 1 tablespoon baking powder
1 ½ cup apple sauce 1 tablespoon ground cinnamon
1 cup butter 1 tablespoon vanilla extract
1 cup cooked, peeled sweet potato

In a large bowl mix the eggs, vanilla extract, butter, apple sauce, and sweet potatoes together. In a separate bowl place the dry ingredients and combine the flour, baking powder, cinnamon, and nutmeg.
Slowly add the two mixtures together, stirring and mixing as you go, until they are well blended. Spoon the dough onto a baking sheet, pop it into a pre-heated 350 degree oven, and cook for 15-20 minutes. Let them cool before eating and enjoy!

If you use the practically effortless slow cooking method your potatoes will be all set and ready to be added to the cookie recipe, saving you time and energy. Pass this tip along and help add a little more convenience and healthy eating options to the lives of your friends and family!
Please Share This Recipe With Family and Friends 🙂
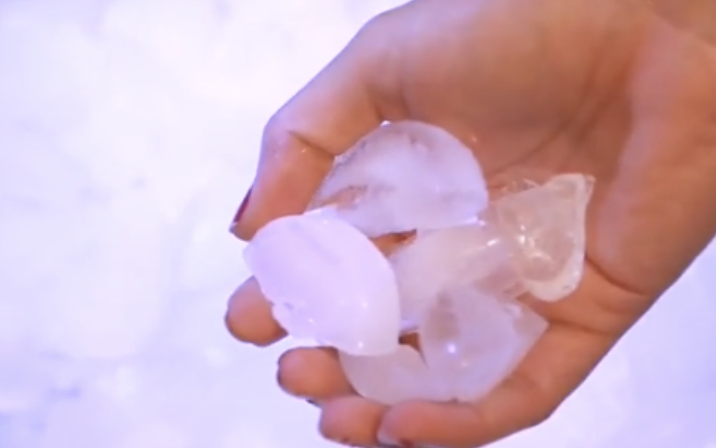
She Places Ice Cubes In The Dryer! This Life Hack Will Change The Way You Do Laundry Forever!
Doing laundry is a chore that can take days to get through. It’s a necessary evil in any normal person’s life since clothes, towels, and sheets don’t clean themselves. Oftentimes you put a load of laundry in the dryer and end up forgetting about it.
Later on when you remember and come back to it all you have is a dryer full of very wrinkly clothes. While a lot of us bust out an iron a this point to get the stubborn, set-in wrinkles out, you don’t have to resort to this boring and time consuming task. Instead, try this trick from Jumble Joy. It’ll save you a lot of time and energy, and leave you with wrinkle free clothing in just five minutes.
All you need is a dryer and an ice cube. Take all your wrinkled clothing, or anything else that needs to be de-wrinkled, and toss them in the dryer along with one ice cube. Adjust the dryer setting to high and set the timer for 5 minutes.
When the time is up open the dryer immediately and remove all of the articles. They should come out wrinkle free, and to keep them that way either hang or fold them as soon as possible. There you have it, one of the easiest, most simple and effective ways to achieve wrinkle free sheets, towels, and clothing without having to resort to using an iron.
Try it the next time your clothes get all wrinkly and ugly, and pass this helpful tip along to friends and family. It’ll make their lives all the more stress-free and wrinkle-free!
Please Share This Story With Family and Friends
Apparently I’ve Been Using Ketchup Cups Wrong For All These Years. I Had No Idea!
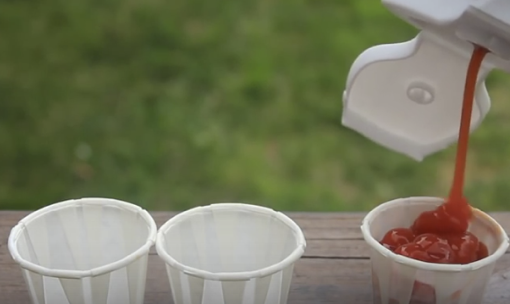
image via – youtube.com
The key to coming up with any new idea that will be successful, is finding something that a lot of people need, that isn’t available, or improving on something that does exist. In the video you are about to watch below, “The Crazy Russian” has yet again found a way to improve on an item that needed it.
Besides McDonalds and Burger King, there are many restaurants that use those little white paper cups for you to put your ketchup, mustard or mayo in. They are so teeny tiny, that you usually need to fill a few of them for your fries and other needs; dipping fries in their small opening can be difficult, often resulting in the container falling over.
I’m sure you all know what I’m talking about, but never thought of coming up with a solution for those little containers. Well, the clever Crazy Russian has done it again!
He shows you how to make the containers larger, in a few seconds, and always is good for a laugh.
Please SHARE This Tip With Your Family and Friends
Apparently I’ve Been Folding My Socks Wrong For My Entire Life. THIS Is The Unexpectedly Surprising Way To Do It!
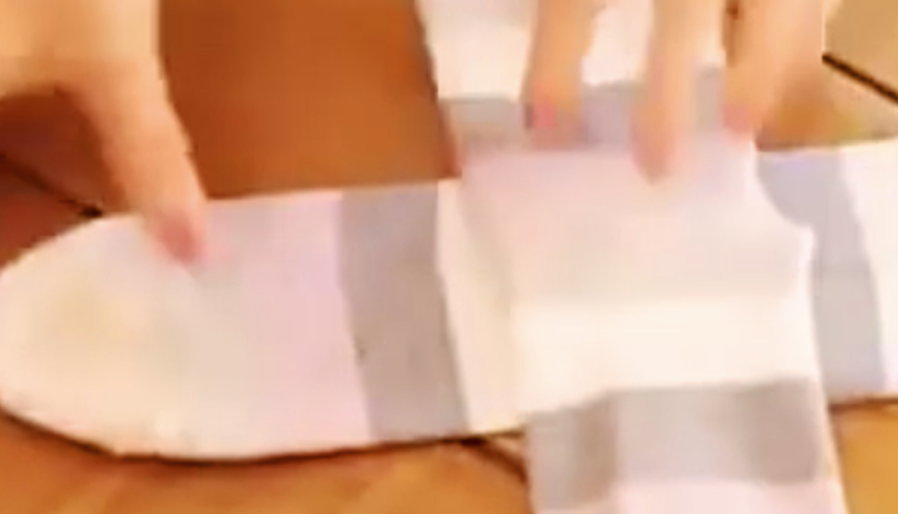
image via – youtube.com
You are about to spend 16 seconds of your life watching the following video below, that will change your sock drawer forever. You don’t have to be an OCD type to just love this DIY. I’m a very neat person on the outsides of my home, but my closets and drawers are more chaotic than I would like.
I have always put my own, my husband’s and kid’s socks together by stretching the top of one sock and looping the other through, to keep pairs together. This always has the tendency to stretch one top of the pair of socks, as well as increasing the probability of one sock coming loose and disappearing.
Additionally, this method has never made it easy to keep the drawer organized in any way, and to find what your looking for quickly. When I found this amazing DIY that’s so easy to follow, I tried reorganizing my sock drawer using their method before writing this article. It’s not only fun to do, but I have to tell you that I felt really satisfied after putting all my socks back into the drawer, when I was done. It was such a thing of beauty, that I pulled out my phone out to snap a pic and send it to my friends, who were all in awe.
Sometimes it’s just getting one chaotic area of your life organized, that can just make your day! It truly is the little things in life that can give you pleasure. Let us know if you will use this method after watching this short footage.
P.S. An added bonus just may be less socks disappearing into “SOCK HEAVEN”. Wouldn’t that be nice?
Watch the video below for the full instructions and technique tutorial:
Please SHARE This With Family and Friends
She Puts Her Nails In A Bowl of Water And Green Nail Polish. When She Pulls Her Hand Out It’s STUNNING
image via – youtube.com
Nails have always been painted and decorated to match and compliment outfits and occasions, and now they’re fast becoming one of the most versatile and fun ways to get into different holiday spirits. People have come up with thousands of cool designs and techniques to get crazy, creative looking nails. There are tons of how to videos online that teach how to achieve super complex looking nail art designs. Some are easy and others are best left to professionals at a salon.
This tutorial from the My Simple Little Pleasures YouTube channel is perfect for St. Patrick’s Day. The video shows how to turn nails into festive four leaf clovers with water and nail polish that goes on with a marbling effect. The instructions make it very easy for anyone to recreate and each of the specific products used are listed in the video description. Try it out and get creative! After all, the worst thing that could happen is you may have to remove the polish.
For starters you will need white and green colored nail polishes, base coat, clear and fast drying top coat, a small paper cup, room temperature filtered water, plus a wooden cuticle pusher manicure stick or a similar type of sharp tool.
Start off by prepping your nails and apply a layer of base coat beforehand to help protect them. Gather all the things you need and fill the paper cup with room temperature filtered water. Take the green polish and drip a drop of it into the center of the water cup, then take the white polish and let a droplet of it fall in the middle of the cup.
Keep alternating drops of the nail polishes for six times each into the cup until 12 rings of polish have formed on the surface of the water. Take the cuticle pusher stick and use the pointy side to gently and carefully draw four lines, one from each side to the center of the cup. This draws the polish together and is what will form the four leaf clover so make sure to evenly space the lines so that the leaves will turn out even as well.
Next, take the pointy end of the stick and dip it down into the center to shrink the clover. Work quickly so that the polish doesn’t dry. Now it’s time for the application part. To make this less messy you may want to place tape around the skin near your nails beforehand. Line your middle nail up with the center of the cup as evenly as you possibly can so that the other two surrounding fingernails are also even with the polish lines in the cup.
Gently dip your fingernails down into the water and keep them there while you use the wooden manicure stick to clean up the excess polish around them. When the surface is clear, pull the nails out and allow them to dry. You can remove any extra nail polish that’s on your fingers and clean up nail edges to make them look neat. Be careful not to smudge or smear it but if you do, once it’s completely dry, you can fix up any spots that need it. Lastly, don’t forget to finish the look off with a clear top coat to protect your new paint job and make it last longer.
This four leaf clover nail art design is really easy to DIY and people will definitely notice the cool marbled effect on your nails, they really stand out! Best of all, doing this yourself at home will save you all the money that you would have ended up spending at the nail salon and it’s not cheap. All it takes is a little time and effort and you can have festive, creative, unique looking nails!
Please Share This With Family and Friends 🙂


