
Are Ants About To Mess Up Your Year? Try THIS Simple Trick To Get Rid Of Them Immediately!

Spring and Summer are almost here, at least for half the earth, and with it comes great outdoor activities and freedom from the cold! However, there are some annoying things that come along with summer treats, that could use a clever remedy. YouTuber Grant Thompson has come up with 10 SUMMER LIFE HACKS, that you don’t want to miss in the video below!
You will be amazed at the cool tips he’s come up with, from getting rid of ants naturally by making homemade corn meal, to ridding your home of fruit flies which are everywhere during this season. We all love hamburgers on a bun, but it’s usually a messy eating experience, often embarrassing when you are out with friends…he’s got a trick that’s foolproof!
Every kid loves a popsicle…but ohhh those sticky hands..Thompson has the cutest trick for that one! Going to have a relaxing day at the beach and getting to go into the water together is always a problem…how do you keep your valuables secure and hidden? This hack is great!
These and 5 other Phenomenal Hacks are offered in the footage you are about to watch. Let us know which are your favorites.
Please SHARE Summer Life Hacks With Your Family and Friends! 🙂
THIS One Simple Trick Will Get Rid Of Those Annoying Fruit Flies and Gnats For Good!
A fruit fly infestation in your home can be more than a bother. These tiny pests, also known as gnats, can often become unbearable. It can require disposal of fruits and vegetables, replacing cleaning supplies, fixing suspect drains and plumbing and on and on.
After attempting all of these fixes you may find yourself still battling the infestation. This is due to the fact that the breeding of these gnats is rapid. If you have run out of patience with these annoying pests, there is a simple solution that I truly wish I knew about years ago!
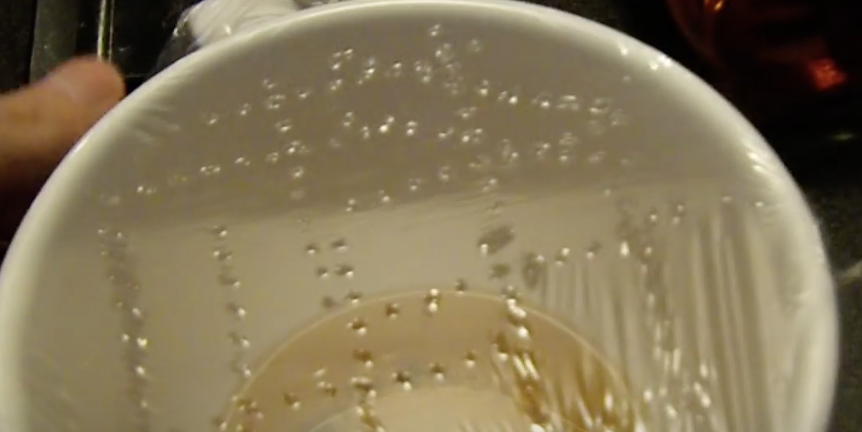
All you need is a cup, some apple cider vinegar, plastic wrap and a device to poke very tiny holes like a toothpick. This DIY will show you what to do with these simple products to finally take care of the problem. Watch this simple video, and your problem will be solved. It is the perfect life hack with spring in full swing and summer right around the corner!
Please Share this with friends and family
I Was Confused When Mom Put A Container Of Toys Into The Freezer. But The Reason Is Surprisingly Brilliant!

When kids are home in the summertime you need to keep them busy and engaged in fun activities. Children often lose interest in their toys and the same old games they play day in and day out. When boredom sets in no one has fun. If you find that you’re running out of ideas to keep them entertained, check out these ice toys.
They’re a novel way to keep kids busy for a long time when it’s really hot outside and you can make them at home with a few simple items that you likely already have on hand. Your kids will play with them for hours and will love having a new activity to do!
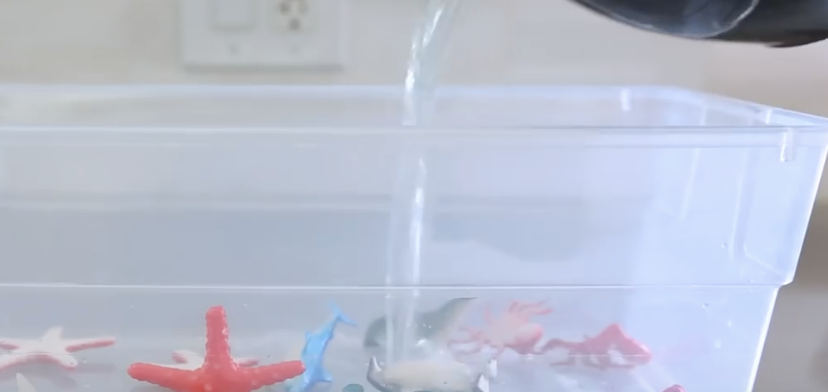
First up is ice toys which are made by using a plastic tub or bin, small toys that can get wet, and colored liquids. Place the toys in the bin, pour some liquid over them, and freeze it until completely frozen. Take it out and pour another color over the first layer.
Make sure the liquid you pour on top of the first frozen layer is very cold because if it’s too warm it will crack the layer underneath it. Freeze that layer completely and repeat the process, adding as many different layers of colored liquid as you’d like.
It takes awhile for all the layers to completely freeze so be sure to start this well in advance of when you want to use it. When it’s time to play, give the kids some tools to work with and help them figure out how to get the toys out of the ice. It should hold their attention for a long time and if it doesn’t simply pop the ice back in the freezer and come back to it at another time.
Next is ice paints that you can make with paint, an ice cube tray, water, and toothpicks. Fill an ice cube container a third of the way with paint, then top them off with water. Stir the paint and water, freeze for about two hours, then stick a toothpick in each paint cube and allow it to completely freeze. Take them out and have the kids paint with the ice cubes on paper as they melt.
The third project is ice boats. You will need small plastic containers, supplies to make sails with (such as paper, fabric, toothpicks, umbrella toothpicks, or small bamboo forks), and finally aluminum foil to make a river. Freeze water in the plastic containers and halfway through freezing them stick a toothpick, or whatever you choose to use for the mast, in the middle of them.
After they completely freeze take them out and glue or tape on some fabric or paper sails. Take some tin foil and form a ‘river’ out of it where the ice boats can float down. Then grab a hose so there is a constant flow of water and have the kids sail their boats down the river. They can race their boats and will play with these fun toys until they melt!
Please Share These Ice Projects With Family and Friends 🙂
He Takes A Used Beer Bottle And 8 Bucks Worth Of Supplies. The Result I Need THIS For My Backyard!

If you are looking for a way to spruce up an outside patio or seating area then try making these easy, affordable, and unique looking tiki torches. The homemade torches make a clean and safe alternative addition to outside spaces and look a lot better than the average, boring, store bought, ugly tiki torches your used to seeing. The project uses recycled wine or beer bottles and a few other supplies that can be picked up at the hardware store for less than $8. It only takes about five minutes to transform a patio from drab to fab, so try it today!
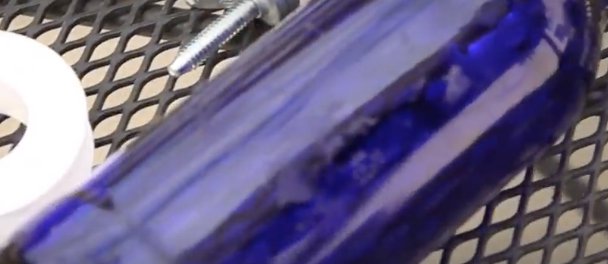
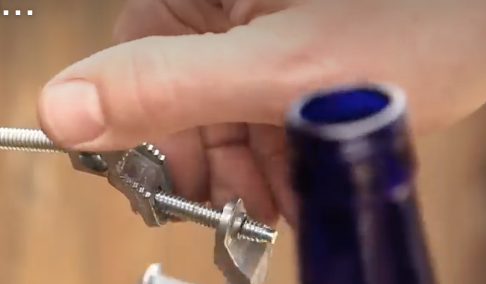
To do it yourself at home you will need the following supplies; 1 glass bottle, 2 grounding clamps, ¼ inch threaded rod, a roll of Teflon tape, ½ inch copper coupler and cap, and a replacement torch wick. Depending on how you want it to look and where it is going to be placed, you may need to shorten the threaded rod, so try to get a smaller one if possible or you will need to cut it. Also, make sure to empty out the bottles before you get started!
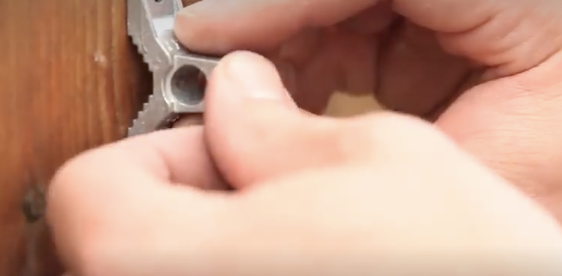
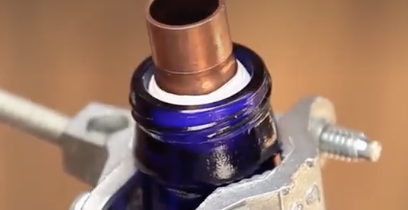
First, scout out a location for where you want to place the tiki torch. Attach one of the grounding clamps by screwing it into place and then attach the threaded rod to it. Then attach the second grounding clamp to the other end. Take a bottle and use the clamp to hold it in place. Grab the copper coupler and wrap Teflon tape around one end so that it fits securely in the bottle opening.
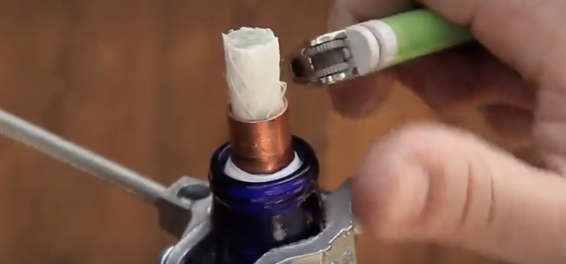
Make sure it is very snug and water tight before filling the bottle with torch fluid. Run the wick through the coupler and set it inside the bottle. When you are not using the torch remember to re-place the cap back on top of the wick/coupler to keep water out.
That’s it! In a few minutes your patio will look fresh and upgraded with these torches. The best part is that they look expensive and professionally done but they cost so little. Make sure you remember to save all the cool looking bottles you drink for this project!
Please Share With Family and Friends


