
She Gets A Toothbrush And Starts Plucking Out Every Bristle But When She Reveals The End Result? AWESOME!
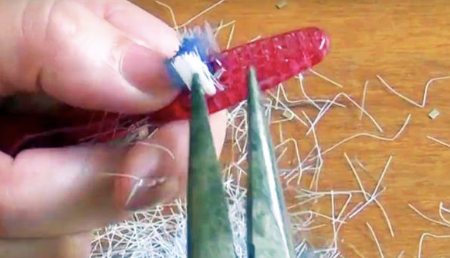
image via – facebook.com
Custom made jewelry can end up costing a pretty penny if you buy it at the store or online. Why not try making some one of a kind pieces at home that cost practically nothing and look just as beautiful as their pricier counterparts! With this tutorial, making your own arm candy can be extremely low cost, easy, and fun to do.
YouTuber Katrina Sherwood posted the creative method that she uses to make unique and inventive plastic bracelets on her blog “Katrinaosity.” The project is a hands-on way to re-use and recycle old plastic toothbrushes into trendy, colorful, 80s style bracelets, so you won’t waste or need to buy anything.
Even if you don’t have any old plastic toothbrushes laying around, they can easily be found at the store for well under five dollars. You can make lots of these and if you mess up it doesn’t matter, just keep going until you make the perfect accessory!
To create your very own bracelets you will need some plastic toothbrushes (the cheap kind work fine), needle nose pliers, a towel and oven mitts, heat resistant tongs, and a pot of hot water. To begin, start by first heating up the pot of water on the stove until it boils.
In the meantime, take the needle nose pliers and use them to rip out all of the bristles from the toothbrush heads. Once the bristles have been completely removed, place one toothbrush at a time in the boiling water for about 10 seconds or so. Using the heat resistant tongs, carefully remove the toothbrush and check to see how pliable it is with a towel or oven mitt protecting your hand.
If it bends enough to be folded into a bracelet shape that will fit around your wrist, it’s done. If it doesn’t, simply place it back in the boiling water for another 10 seconds or so, until it’s flexible enough to bend. The plastic will cool off quickly so you may have to re-boil it a few times until you get the toothbrush to bend into a wearable, desired shape.
These awesome looking, colorful, acrylic type bracelets are so easy to create and turn out beautiful. You can make a bunch and stack them, plus they can be custom made to match any outfit or look you are going for. Check out the video to learn more on how to make them and enjoy!
Please Share This With Family and Friends
An Awesome 4 Step Toothpaste Life Hack To Deal With Those Dull and Grimy Vehicles Headlights.
image via – facebook.com
When it comes to cars and maintaining them, many people are clueless about what to do or even where to start. Lots of things demand our attention from washing and waxing the paint job to changing the tires and oil. Some of the upkeep is easy and can be done by anyone, while other things are best left to a mechanic. This video falls in the former category and shows how anyone can clean their car’s headlights with just some toothpaste, a bottle of warm water, paper towels, and a bit of wax..
For obvious reasons, headlights are an essential part of any vehicle, and the cleaner they are the better you can see and be seen by other drivers. When headlights turn hazy and dirty, as they inevitably become over time, the light output from the bulbs ends up getting diffused. This makes the light beams appear dimmer, weaker, and therefore less effective. The lights end up covering a reduced area ahead and pose a potential safety hazard, which is the last thing anyone wants because driving is already dangerous enough.
If you noticed that your vehicle’s headlights have this issue then you have to try this quick and easy method to clean the plastic covering. This fix will work if your headlights are yellowing on the outside, pitted, and not smooth. If your car’s headlight is smooth on the outside, it won’t work.
You’ll need to use a type of toothpaste with a gritty texture to it, such as the ones that contain baking soda and peroxide or a whitening version. It’s also important to not use any gel formulas because only pastes work and if you need more grit try adding baking soda to it.
Start by rubbing a generous amount of toothpaste onto the headlight and to keep your hands clean you can use a toothbrush. Work it in really well and soon after the paste should begin to turn yellow as dirt and grime start to come off onto the brush. Next, grab a spray bottle filled with warm water and spray the light, then rub it off with a paper towel.
Apply a fair amount of pressure while buffing it away and when you’re almost done grab a clean paper towel to remove the last of the residue. Finish it off by applying a smidgen of wax to the headlight and wait for it to completely dry before buffing it all off. The wax will form a protective layer over the now clean light and help keep it from becoming yellow again so soon.
The older and more yellow the light, the longer you’ll need to rub the toothpaste into it. If the light is still hazy or you feel that it needs to be cleaner, simply apply more toothpaste and try again. The best part about this technique is it costs maybe a dollar or so, but if you have a tube on hand that’s the right kind of toothpaste then it’ll only cost you a few cents.
In comparison, store bought headlight restoration kits sell from anywhere between $15-25 so this is by far the cheapest way to clean them. Hopefully this trick will work for you and help to restore your car’s headlights to their former clear and shiny glory!
Be safe and and watch the video below for the full tutorial:
Please Share This With Your Family and Friends
I Was Confused When She Started Boiling Her Toothbrush. But When She’s Done It’s INCREDIBLE!
image via – youtube.com
Some people are just incredibly creative…I’ve seen some really great DIYs online, but this one is really something special. If you are a bracelet person, the video you are about to watch below, will show you a way to make the coolest bracelets with almost no expense.
YouTuber Katrina Sherwood posted an amazing way to make really inventive plastic bracelets on her blog “Katrinaosity”. If you have old toothbrushes lying around the house, you won’t need to spend a dime. If not, like Katrina, you can pick up really cheap toothbrushes for under five dollars.
You must be wondering how toothbrushes get transformed into trendy, chunky, acrylic bracelets, right? These 1980’s retro colorful accessories can be yours, or your teenage kids, with just a plier and a pot of boiling water! They are so easy and fun to make, as you will see in the upcoming video. Let us know what you think.
Will you be making one?
Please SHARE This With Your Family and Friends 🙂
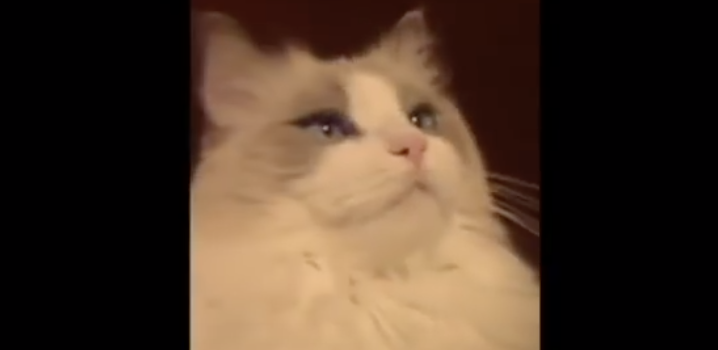
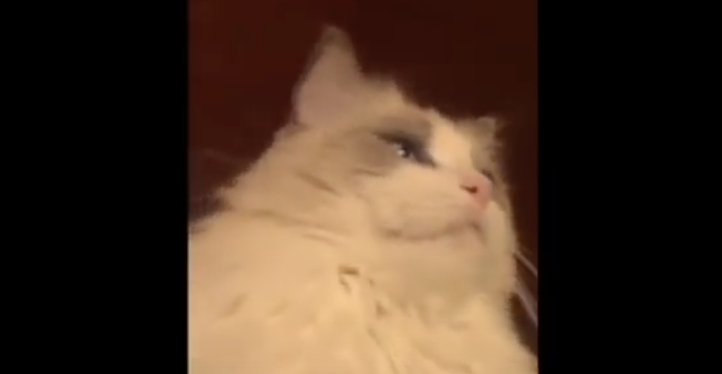
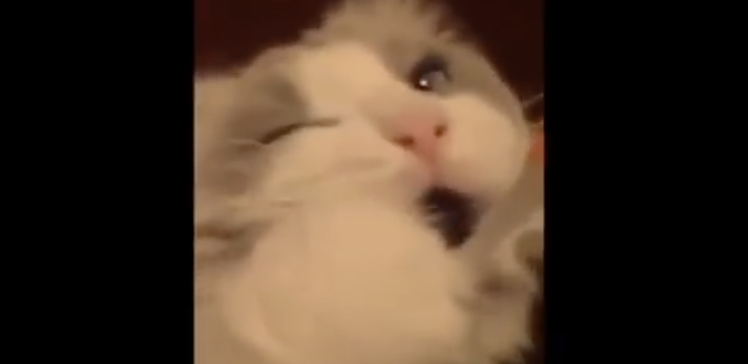
Video: Cat Gets His Teeth Brushed For The First Time. What The Camera Caught Is Hilarious!
Even if the only thing your cat hunts these days is tasty treats, toy mousies and catnip, he still needs healthy clean teeth and gums. Damage to your cats teeth, palate, tongue and gums can extend into other health risks for your cat. The good news is, this can be prevented by brushing your cats teeth!
The ASPCA recommends doing a breath test, go on take a sniff of your cat’s breath. If your cat’s breath has an extremely strong odor he may have a digestive disorder or gingivitis. They also recommend pulling back your cats lips and inspecting their gums. Make sure their gums are a nice coral pink. They should not be white, red, or swollen.

In the hilarious video below, a cat gets his teeth brushed for the first time by his human. Somehow, he loves it and even grabs for the toothbrush with his paw to place it in his mouth. Then as he is getting those pearly whites clean, he has an epiphany. He gets a far off look in his eyes, and it seems as if his mind has just been blown! Maybe he is pondering the meaning of life or Stephen Hawking’s theory of everything. Either way, this video is absolutely hilarious and I can’t stop laughing at that face. Enjoy! 🙂
Please Share With Family and Friends


