
When You See What Her Homemade Pore Strip Pulls Off Her Face You Won’t Buy One Ever Again!
Fact: Blackheads are gross and a pain in the butt to remove. That’s why people often turn to pore cleaning strips that promise to help pull dirt and oil out of pores. In reality, all the pricey strips ever seem to do is irritate and dry out the fragile skin on the nose area. Plus, they can be incredibly painful to remove and many a tear has been shed in the peeling process.
Instead of enduring more pain and wasting more money in search of a solution to this age old beauty problem, try a more gentle approach, like this 100% natural method. All that it requires is two simple ingredients that cost way less than $4 total, and since you don’t use a lot they can be used many times.
Chances are it’s much more effective than anything else you’ve tried so far at removing blackheads, and it’s incredibly cheap and easy to do in the comfort of your home.
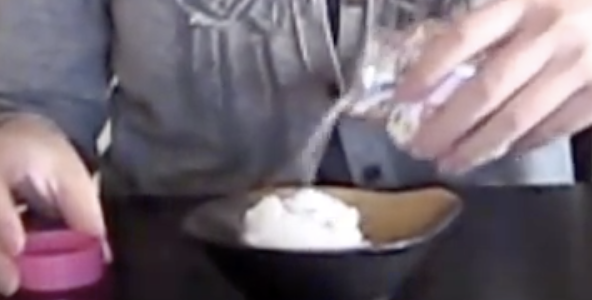
YouTube beauty blogger Michelle Phan shows how to make a simple pore strip-like treatment and explains all the steps and details. The solution she whips up contains only 2 basic ingredients; unflavored gelatin and milk.
For the milk part any type or percentage will do so long as it’s a regular, plain type of milk. Skip the chocolate and strawberry flavored kinds and definitely don’t use any almond varieties. This also requires a microwave safe container, a glass cup works well, and a clean paint or makeup brush that you don’t mind potentially ruining.
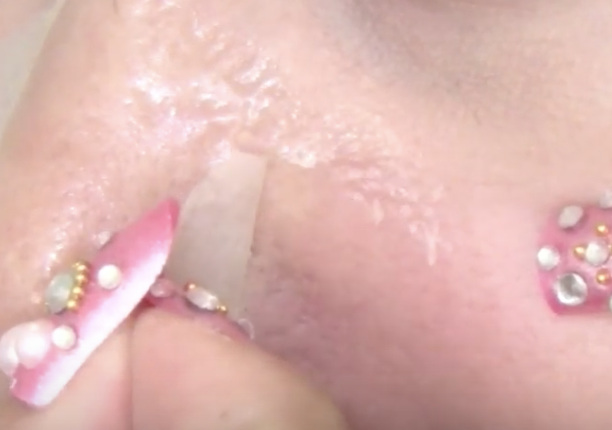
Begin by measuring out one tablespoon of milk and one tablespoon of unflavored gelatin. Pour them into the container and mix it up until it’s chunky, then stick it in the microwave for 10 seconds. When it comes out it should look more liquid and oozy. Wait a few moments for the solution to cool off a bit and then dip the brush into it.
Before you apply any to the delicate skin on your face, test it out on the back of your hand, that way you know it’s safe to put on. Now all you have left to do is brush the mixture onto any areas you want to clean and make dirt or oil free. Sit back, relax, and wait until it dries on your skin, which takes about 10 minutes or so.
To remove, simply peel it off when it has dried enough to easily do so. Finally, you may want to apply moisturizer afterwards, or whatever acne/zit cream or serum that you prefer to use, because the pores will be open and the skin will absorb the product much better.
Check the strip if you want to see what it actually picks up off your skin and out of your pores. All the dirt, oil, blackheads, old dead skin cells and grime will have peeled off along with the dried strip. It’s kind of nasty but it definitely puts into perspective how effective this easy DIY topical solution works. Plus, you’ll be happy to know all of that gunk is off your face.
The next time your skin needs a little revitalizing, try this out, your skin will thank you!
Please Share This With Family and Friends 🙂
She Places Marbles Inside This Sticky Mixture. But When She’s Done It’s Unexpectedly Brilliant!

It’s spring and almost summertime! Time to fill yourself with the life that is thriving everywhere. Fresh food, bright colors, vibrant cocktails, and sunshine are all in abundance this time of year. You can bring the spirit of summer into your home with fun do-it-yourself crafts like the one in this video.
It’s super easy to make these beach reminiscent coasters at home with just a couple simple materials and a little bit of time. You can even get creative and make whatever design you can imagine.
First, you start with a silicone coaster mold. Fill the molds with floral stones, of whatever color variety you choose, to decide how many stones you need for each mold. In the video she uses yellow, green, and blue, but you could use whatever colors you like or arrange them together to make multi-colored coasters.
Once you have your designs, remove the stones from the molds to get ready for the mixing of your concrete or cement. Follow the instructions on the package that you purchased. You will be mixing a number of parts concrete to the necessary parts of water.
For example, in this video she uses one part water to four parts cement, which she translated to a quarter cup of water to one cup of powder. Mix the concrete and pour just enough into the molds to cover the bottoms. Then, place your stones in your desired design and press them into place. Let the concrete dry and pop out your new coasters! These can also be used as colored tiles to spruce up your patio.
Please Share This DIY Project With Friends On Facebook
This Guy Pours Vinegar On This Weird Mixture. After I Tried It I’ll Never Buy It At The Supermarket Again!
These days Heinz is the leading producer and seller of ketchup. The company’s top spot can be attributed to clever marketing and always having their ketchup placed in prime locations on grocery store shelves. However, there is a way to make the tasty condiment at home and it will taste even better than the mass produced version.
By making ketchup yourself you can custom mix it into flavors that are more pleasing to your palette. Follow the simple recipe below for a quality alternative to the tasty dipping sauce, your taste buds will thank you.
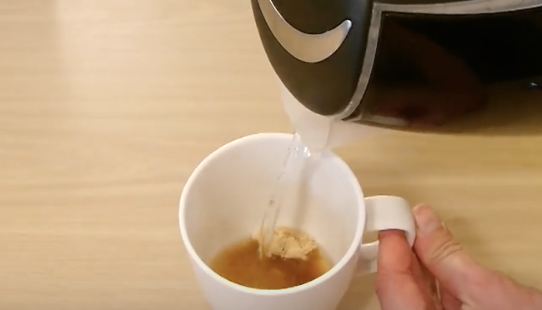
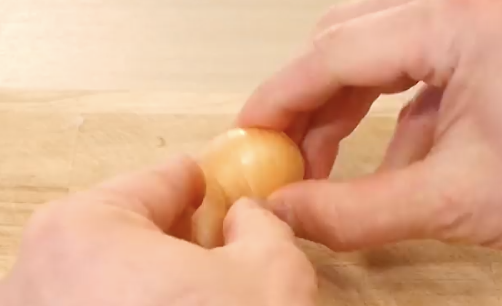
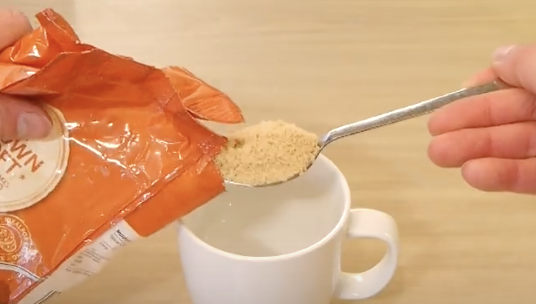
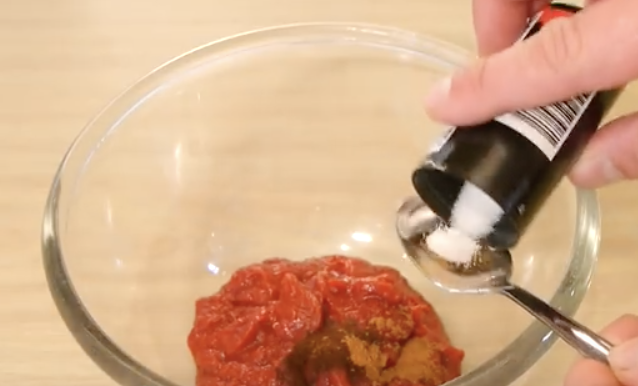
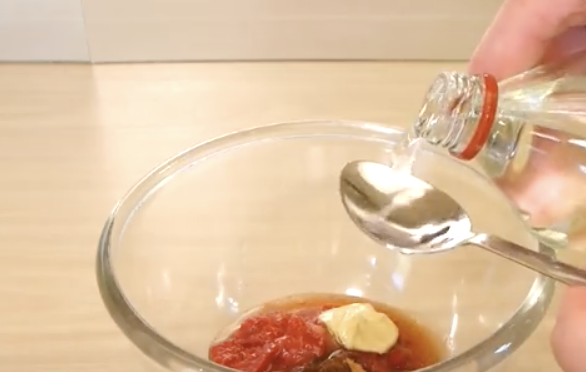
First peel a small onion and cut it in half. Place a heaping tablespoon of brown sugar in a cup, fill it about halfway up with hot water, then stir to dissolve the brown sugar. Once the water has cooled place a half of the cut onion into the cup and blend it until smooth with a hand blender.
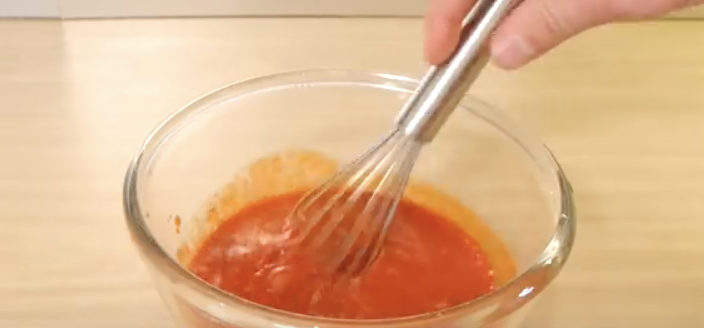
In small bowl combine a 200 gram jar of tomato paste with ½ teaspoon of mustard, ¼ teaspoon of ground cloves, ¼ teaspoon of ground cinnamon, ¼ teaspoon of salt, and 3 tablespoons of white vinegar. Then add in the sugar and onion mixture you prepared earlier and whisk it all together.
The simple recipe is very quick and easy to make and you can customize it in a number of ways. If you prefer thicker ketchup don’t add as much of the brown sugar and onion water, and for a more thin, runny ketchup, just add more of it.
You can also substitute vinegars, a lot of people like malt vinegar in it, or add in hot sauce for a spicy kick. Experiment with whatever flavors you like! When you’re done just pour the homemade ketchup into an old bottle, or sealed container, and store it in the refrigerator to enjoy later.
Please Share This Recipe With Family and Friends
This Woman Starts Pouring Milk Into A Plastic Bag. But When She’s Done YUM!
Shake and no-bake your way to fast, easy, homemade ice cream. All you need is a few basic ingredients and an appetite for frozen deliciousness to master this recipe. Best of all, it’s fun to do and a creative way to experiment around the kitchen with a new cooking method. If you have kids then try it with them and make sure to throw in a mini-science lesson because it’s a great way to learn!
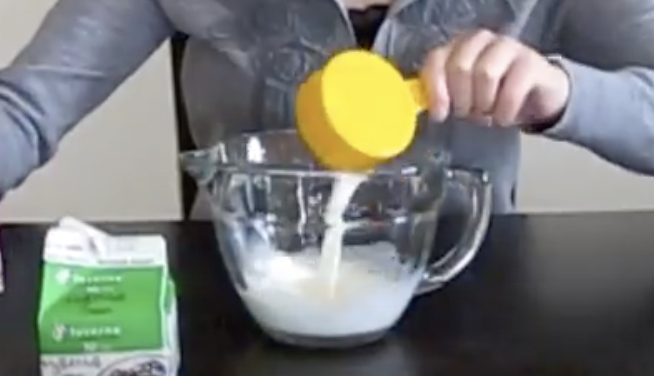
To shake up a proper batch of ice cream you will need milk, cream, sugar, salt, and vanilla extract. This style also requires the following tools and items to work; ice cubes, measuring bowls and spoons, a small plastic bag, a large freezer bag, and winter gloves.

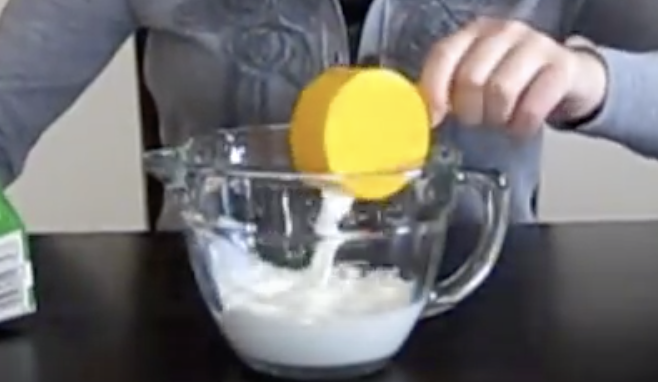
First, in a bowl combine a ½ cup of milk, ½ cup of cream, 3 tablespoons of sugar, and ½ teaspoon of vanilla extract. Carefully pour the mixture into a small plastic bag, squeeze all the air out, and seal tightly. Next, fill a freezer bag about halfway with 4 cups of ice then add in a generous amount of salt.
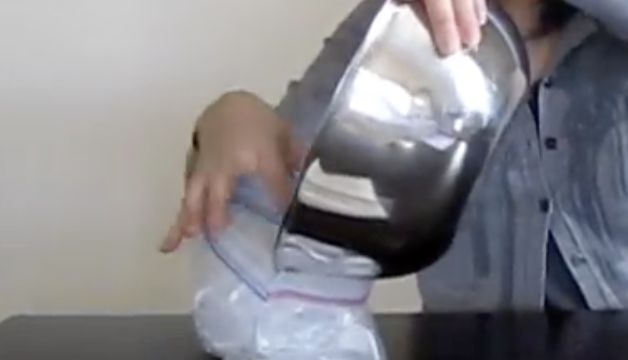
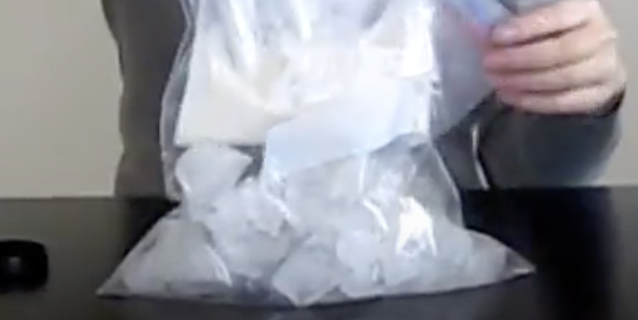
To speed up the process you can add about 8 tablespoons of salt. Place the small plastic bag into the larger one, seal that securely, and shake them very well for at least 5-10 minutes. It is recommended that you wear gloves for this part because it gets really cold. Remove the small bag and rinse off the salt so that it doesn’t contaminate the ice cream.
Now the good part!! Get a spoon and scoop the ice cream into a bowl, top with sprinkles or whatever add-ins you prefer, and eat it quick. This recipe makes about two servings and tastes delicious!

How does it work s quickly? This is the science behind it- The salt makes the ice cream freeze faster because it lowers the freezing point of the ice and melts it quicker.

Thus, the more salt the more energy gets taken from the ice, which results in a transfer of the melting ice’s coldness to the ice cream. That’s why you can shake your way to frozen, iced, creamy, tasty treats in a matter of minutes smile 🙂
Please Share This Recipe With Family and Friends
You Will Never Buy Donuts Ever Again After You See How Simple It Is To Make Them
Some people love donuts and their mouths water when they catch a whiff of the tasty high calorie treats. For those who want to indulge in them without feeling so guilty and heavy afterwords, this recipe is for you. It is a lighter, more healthy, version of a donut because it is baked instead of deep fried. YouTube channel OnePotChefShow gives us the how-to in this video and even shares their secret ingredient for making rich, moist, delicious donuts.
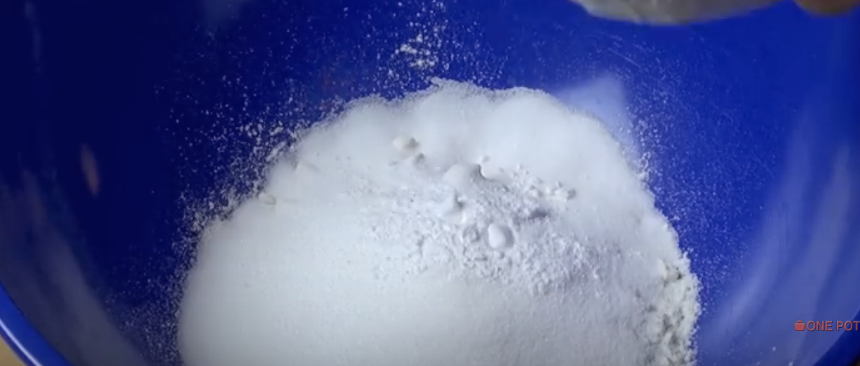
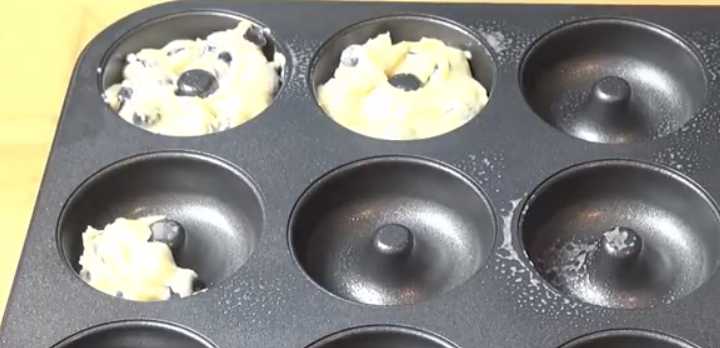
Gather up all the ingredients including: – 1 cup of plain all purpose flour – ¾ teaspoon of baking powder – ¾ teaspoon of baking soda – 1/3 cup of caster sugar – 1 teaspoon of vanilla extract – ½ cup of low fat vanilla yoghurt – 1 egg – 250 g (about 2 cups) of fresh blueberries (or strawberries, raspberries, blackberries, etc)
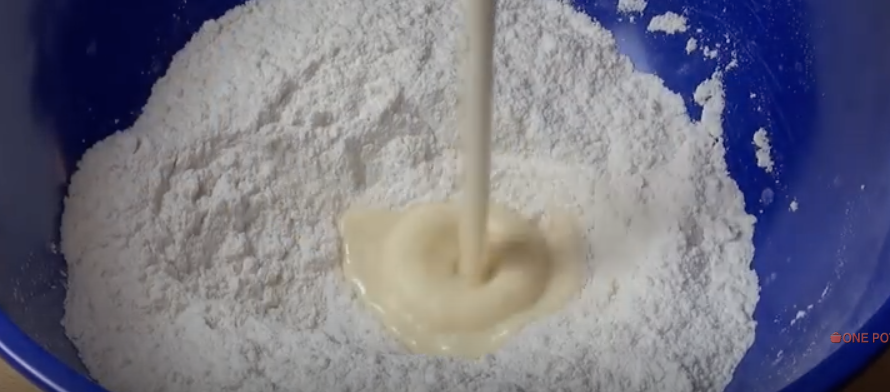
Mix together all the wet ingredients first then mix them with the dry ones. Add the berries in last and mix everything up. Spoon the dough into a donut tin so they are about three-quarters of the way filled and bake them for 10-12 minutes at 375 degrees or until golden brown. Once they have cooled sprinkle on a dusting of vanilla sugar and enjoy!
Please SHARE With Family and Friends


