
She Places Cookie Dough In Her Waffle Iron. The End Result Is An Unexpected Surprise Dessert!
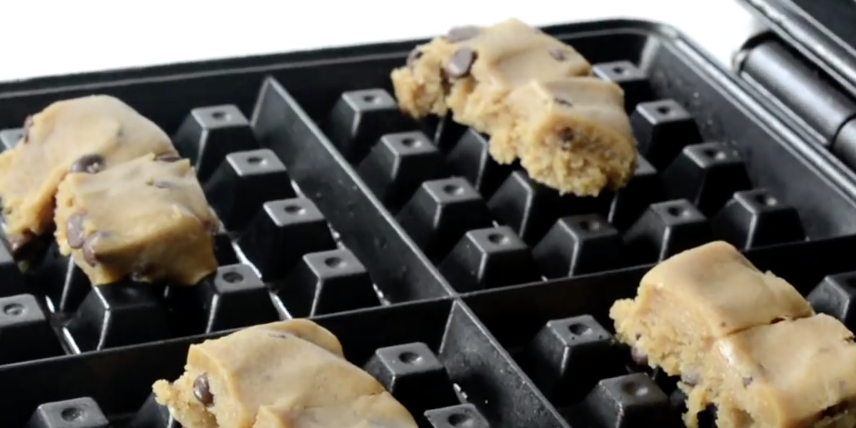
image via – youtube.com
Waffle makers are not just for making waffles. They are actually very versatile machines that can cook up a whole lot more than what they are named after. If you have one collecting dust in the kitchen drag it out and get some good use out of it once again.
Check out this video from Spoon University that shows delicious recipes anyone can easily whip up. In no time at all you can be enjoying tasty homemade treats, and even desserts, in just minutes.
The first recipe is for waffle pizza. Take some pizza dough and place it on the waffle iron, then brush olive oil on the top of it. Cook for 5-7 minutes or until golden brown and then add on sauce, cheese, or whatever toppings you’d like.
Next up is waffle cookies. Place a small lump of cookie dough on each of the waffle squares, cook for 3-5 minutes, and serve them with a cool glass of milk for the perfect snack. For a delicious waffle cinnabon break out some pre-made, store procured cinnamon roll dough and place one in each waffle section of the iron.
Shut the lid, cook for 3-5 minutes, and smear some frosting atop them while they’re still warm for a sticky, gooey treat. Perhaps waffle donuts sound more appealing to you. Take a regular old donut, place it on the iron, close it and cook for 2 minutes. The donut is now warm, crispy, and revamped.
Hate waiting an hour or more for brownies to bake? Whip up a batch from scratch or go the easy way and make the boxed type. Place a small scoop of batter in each section then close the lid and cook for 3-5 minutes. After they cool a bit remove them and sprinkle some powdered sugar on top.
Now you can enjoy a warm homemade brownie in just minutes! I made some of these and they turned out very moist and delicious. Best of all they can be made and cooked really fast. The waffle brownies were perfect for making ice-cream sandwiches with.
Just toss them in the freezer for a couple of hours, then scoop ice-cream onto one, mush another on top, and place back in the freezer. Check out the video and try this yourself!
Please SHARE These Waffle Iron Hacks With Family and Friends On Facebook
I Was Confused When She Put Peanut Butter In A Mixer. But When She’s Done A Delicious Surprise!
When it’s hot and sticky outside the last thing you want to do is spend time baking in the kitchen and making the house hotter than it already is. Instead, try whipping up a recipe that doesn’t require any cooking or heat at all. If you have a sweet tooth that needs satisfaction then this peanut butter pie is the answer.
It’s easy and simple to make and turns out a creamy, melt in your mouth, delicious treat that everyone will love to indulge in. The recipe can be made with creamy or chunky peanut butter and you can customize it by adding in other things such as crushed Oreo cookies or chocolate chips. Or you can switch up the type of pie crust you use and put other tasty toppings on it.
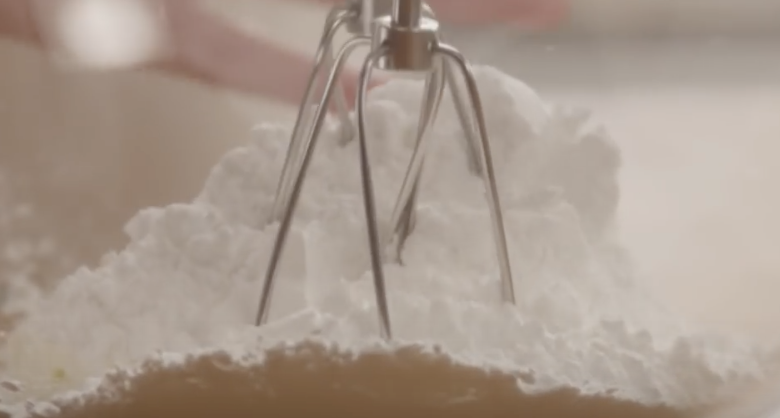
Best of all, you can make this dessert without ever having to put the oven on because it calls for freezing, so it’s perfect for these hot summer days. Start by combining one 8 ounce package of room temperature cream cheese with 1½ cups of confectioners sugar.
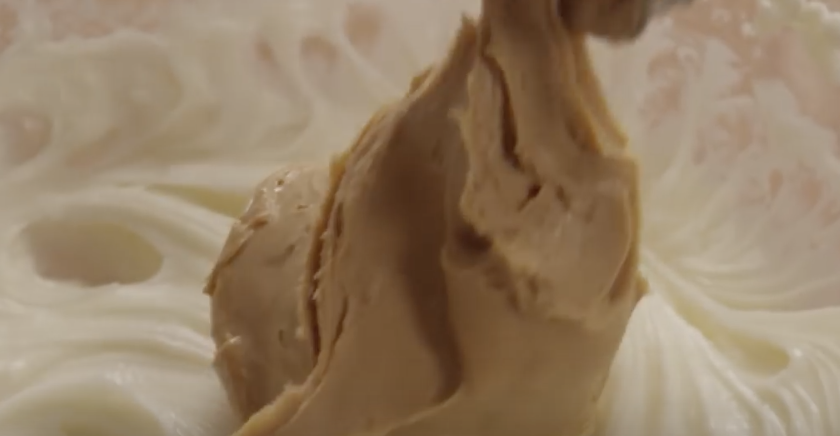
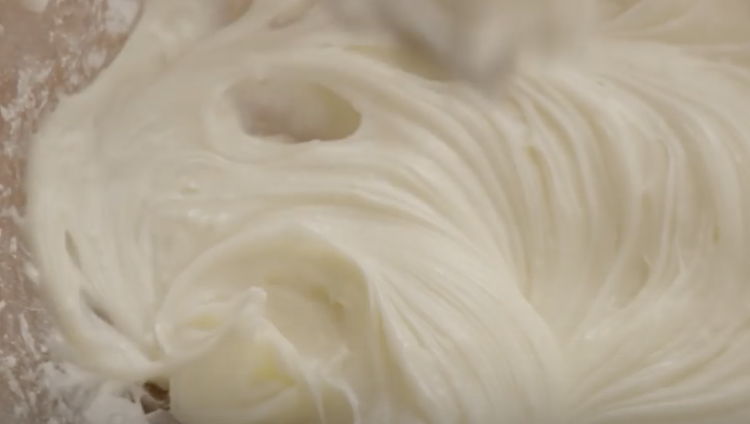
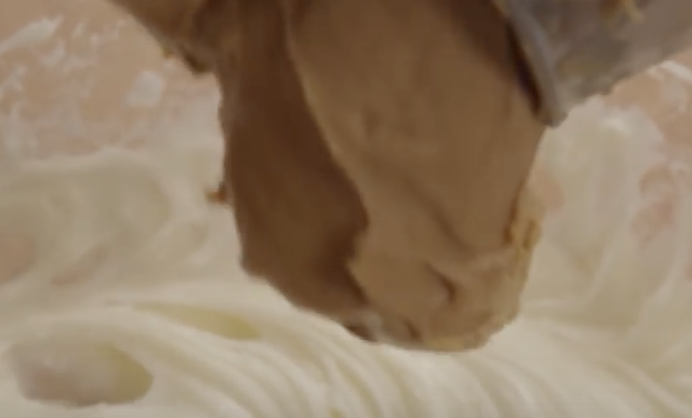
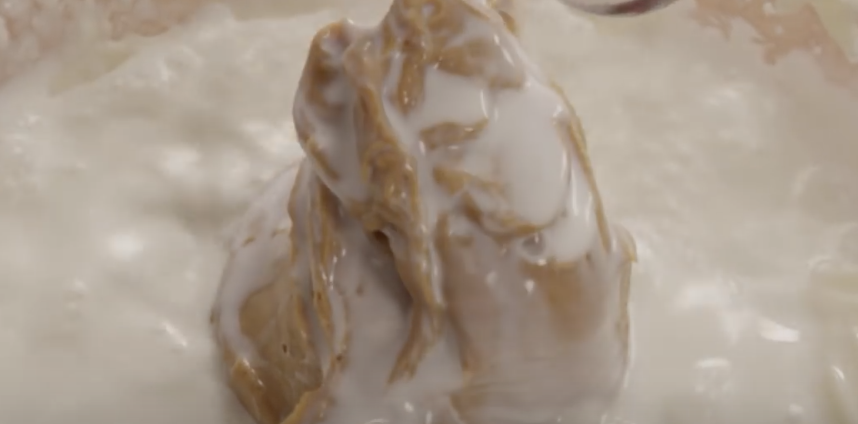
Blend them together with a mixer until smooth. Add in one cup of peanut butter and one cup of milk. Take the blender and beat the mixture until it’s smooth again. Next, add in one 16 ounce package of frozen whipped topping that has been thawed out and blend it in with a spatula.
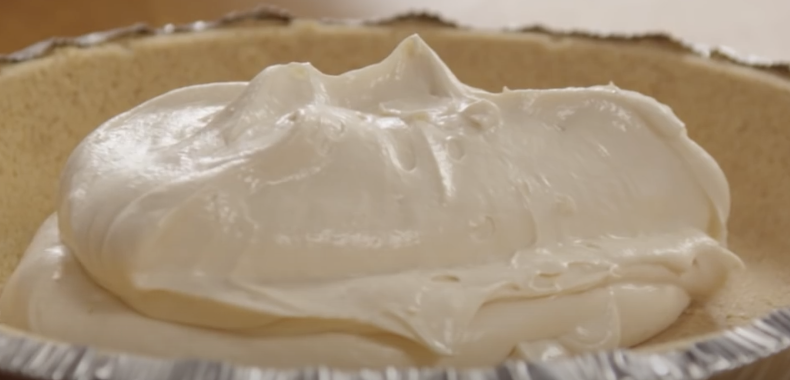
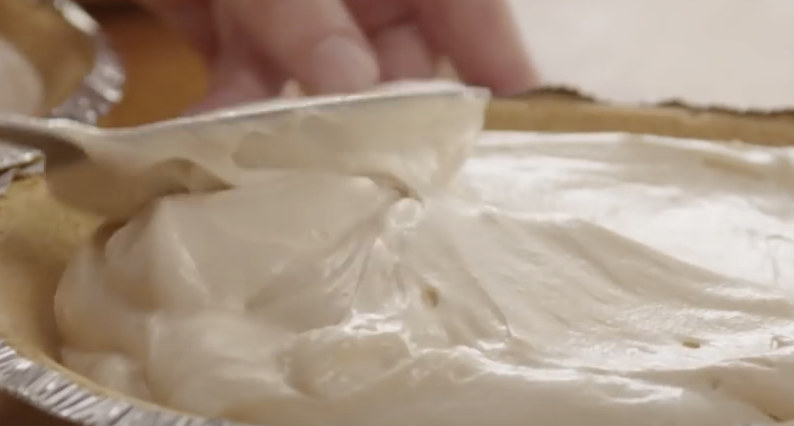
Afterwards, spoon the mixture into 2 nine inch graham cracker pie crust/shells, cover, and freeze for about 2 hours or until firm. This peanut butter pie takes about 20 minutes to make and 2 hours to freeze.
Once you pop it in the freezer you can go about your day and come back to it later for a cool, creamy piece of pie. We just tried this and it came out perfect. This is the perfect tasty treat for any occasion! Watch the video below for a more detailed recipe. What are you waiting for? Treat yourself!
Please Share This Recipe With Friends On Facebook
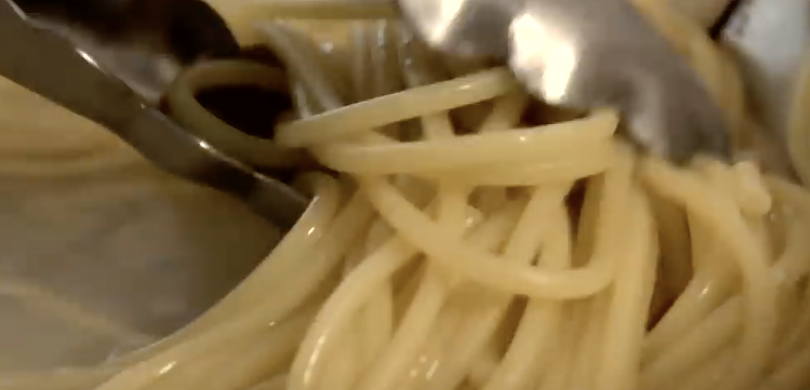
Apparently I’ve been Cooking Pasta Wrong This Entire Time. How Did I Not Know About This Earlier?
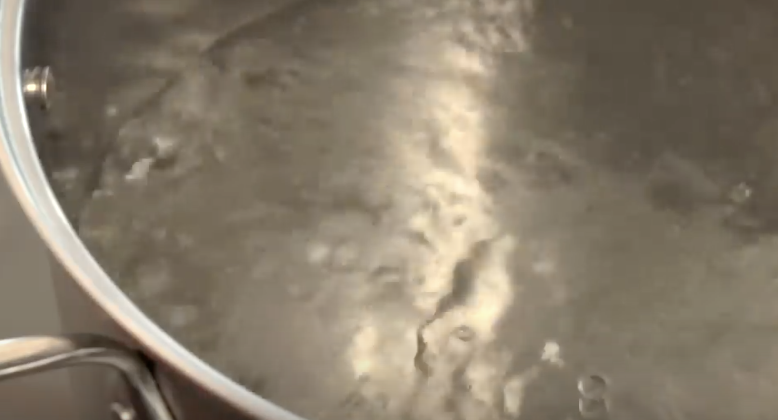
Even people who are not culinary aces know how to make pasta in the centuries old traditional manner. Most everyone starts the process off by putting a fair amount of water into a big pot. Some even add a couple of shakes of salt or a drop of olive oil to the water.
Then the pot is placed on the burner and heated until the water begins to boil, at which point the pasta is dropped into it and cooked until done. The problem with this way of cooking is that the pasta tends to stick together in mushy clumps that are unappetizing.
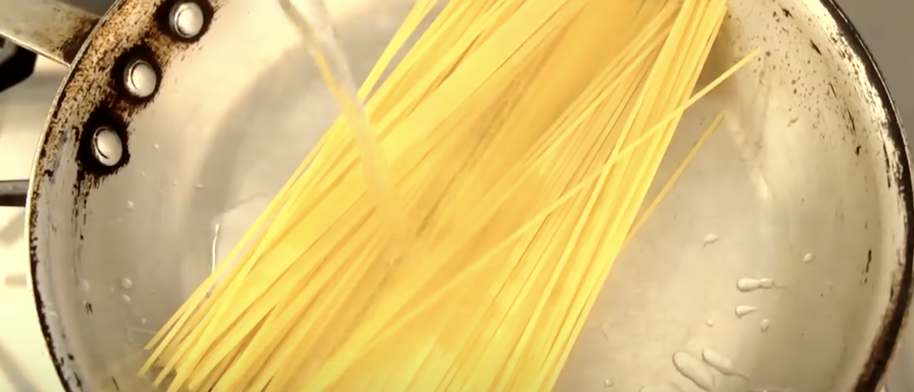
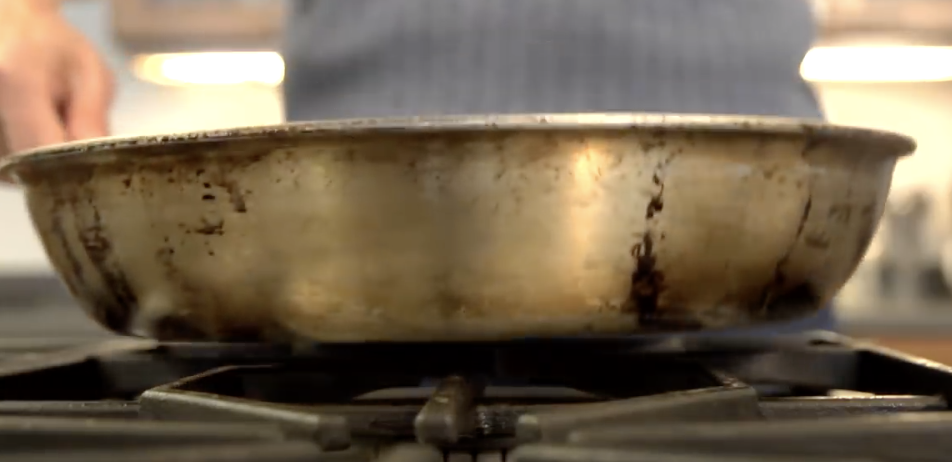
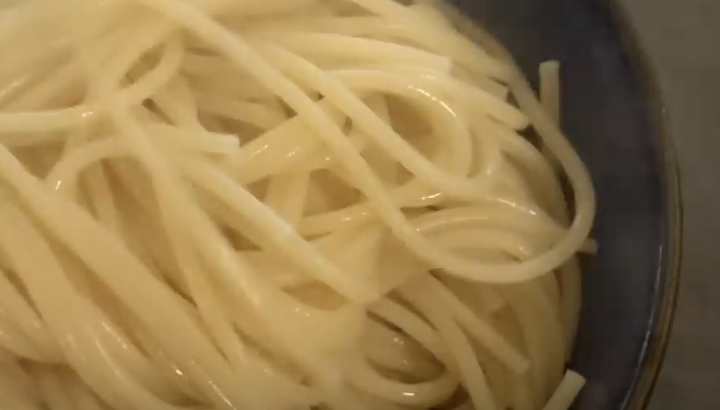
However, there is a better and more efficient way to properly whip up a delicious batch of the family favorite food. Cooking pasta with this alternative method eliminates the all too common problem of it sticking together in blobs, and instead leaves you with perfectly prepared noodles that everyone will actually want to dig into. It involves using less water and swapping out the bulky metal pot with a frying pan.
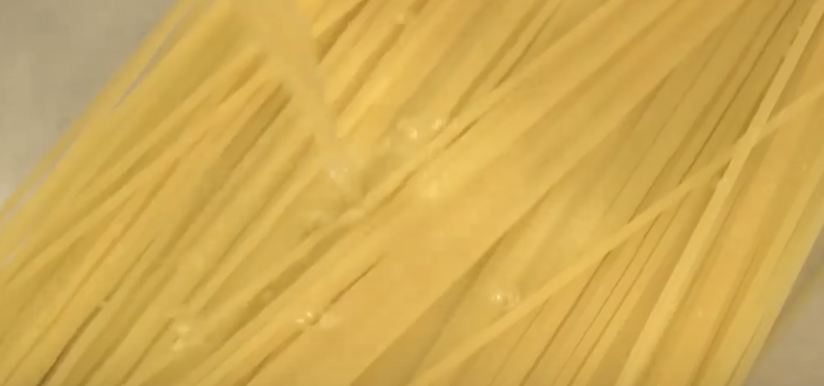
Start by placing the pasta in a large frying pan. Pour about a quart and a half of cold water in the pan and over the pasta. Turn on the stove and cook until the desired consistency is met. If you prefer al dente pasta, or a slightly firmer texture, less time is needed. You should end up with perfectly cooked pasta that lacks any clumpy stuck together pieces, because the cold water was added to the pasta before it began to cook.
You also will have a thick, dense liquid leftover from the water than remains. This can be used to make a variety of different sauces with and gives you further use of the leftover water that most people simply throw out. Check it out and share with others so that you’ll never have to endure lumpy pasta again!
Please Share This Trick With Family and Friends
This Guy Makes A Weird Slice Into These Raw Potatoes Before He Boils Them. The Reason Is Brilliant!
Potatoes are among the most popular and versatile food items that are readily available at any local grocery store. Just like rice, corn, and wheat, they rank among the world’s top grown crops and consumed foods. A potato can be transformed and prepared in many different ways and be served hot or cold. People love them mashed, baked, fried, hashed, steamed, and chipped.
One of the easiest and most basic ways to cook them is by boiling them in hot water until tender the whole way through. However, this leads to the biggest downside of whipping up a tasty batch of spuds, which is hands down having to scrub and peel them.
Their rough, pocketed skins are a pain to remove with a conventional peeler and if you have a bunch to get through it takes seemingly forever. This negative type of potato peeling experience can be forever banished if you employ a simple new method for doing the task.
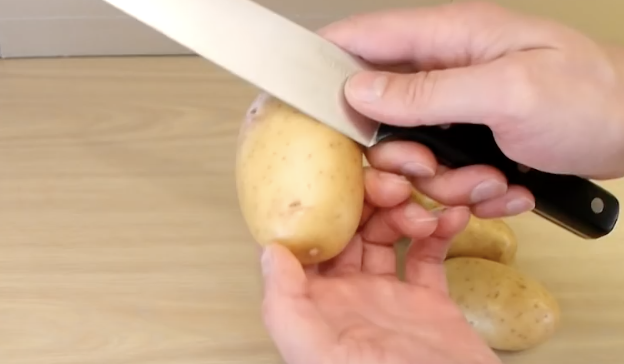
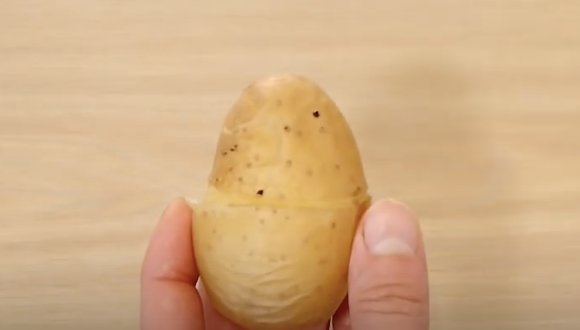
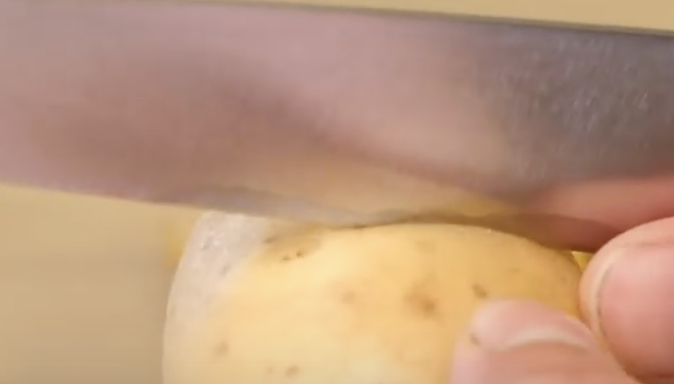
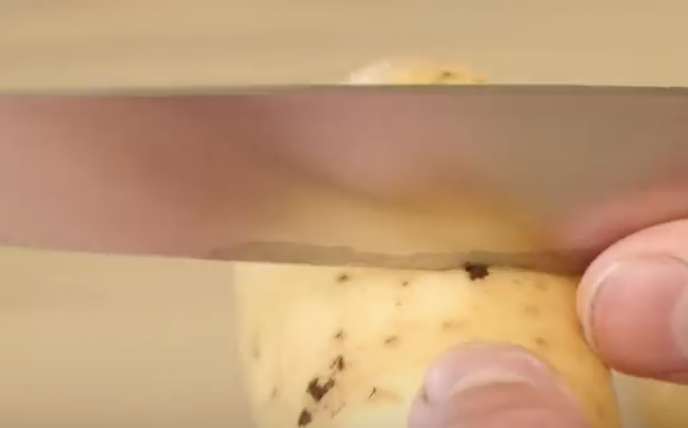
YouTube extraordinaire and life hack genius DaveHax shows us the light in his video on how to quickly peel a potato. Start by picking one up and carefully cut a skin-deep slice all around the center of it.
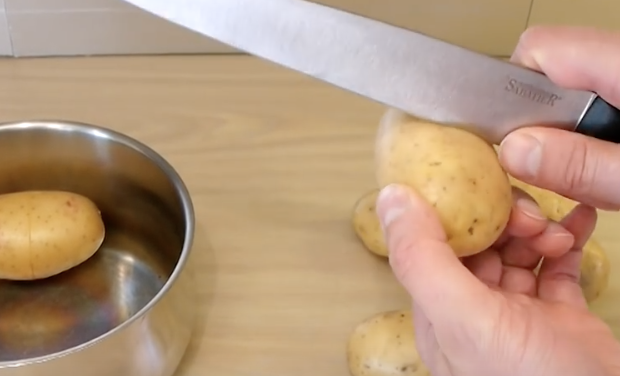
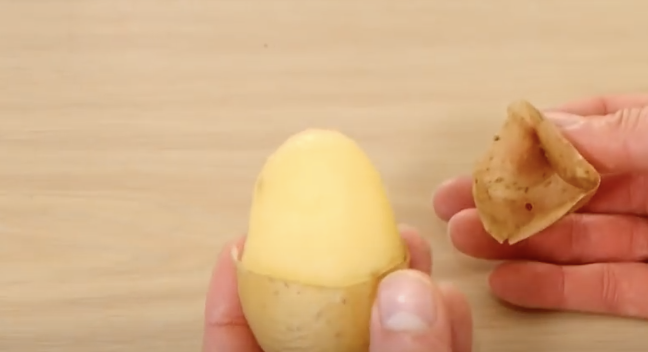
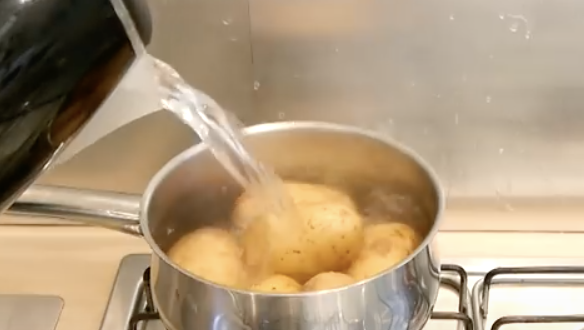
Try to ensure that the ends of the cut meet each other and don’t make it too deep, cut just enough to break the skin’s surface. Place the prepped potatoes in an empty pan, pour boiling hot water over them from a kettle, then crank the stove up to boil them further, and remove them once fully cooked.
Drain the hot tater water into a separate pan and run the potatoes under cool water until they are safe to handle. Grab one and gently pull the skin off, pulling outwards from where you cu tit earlier. The skins should all slide right off and the potato will still be hot and ready to eat.
Try this almost effortless peeling method the next time you’re having potatoes for dinner, or when you need to shave minutes off your dinner prep time, and pass it along to convenience others!
Please Share This Potato Peeling Trick With Family and Friends 🙂
Apparently I’ve Been Cooking Sweet Potatoes Wrong For My Whole Life. I’m So Glad I Learned THIS
Potatoes are among the most popular and versatile food items that are readily available at any local grocery store. There are many different types grown throughout the world, but one of the tastiest and most healthy varieties is the sweet potato. Sweet potatoes are exactly as their name implies; sweet.
The orange fleshed root vegetables are considered a superfood because they contain a lot of vitamins and nutrients, such as vitamins A, C, E, and B-6, as well as beta carotene, fiber, potassium, iron, manganese, and copper. The antioxidants found in them can help prevent cancer and heart disease, strengthen your immune system, and even slow aging. Plus, they’re fat free and cholesterol free! A simple sweet potato can be transformed and prepared in many different ways.
They can be served hot or cold and people love them mashed, baked, fried, hashed, steamed, juiced and more. Their only downside seems to be that it often takes a long time to thoroughly cook them. One of the easiest, most basic ways to cook any type of potato is by poking a few holes in the skin and tossing it in the microwave.
Press the preset “Potato” button and minutes later it’s done. While that’s the fastest way to cook them, it’s definitely not the tastiest. Oftentimes the skin and flesh gets rubbery or becomes kind of mealy and it’s just not the same as a slowly cooked, oven baked potato.
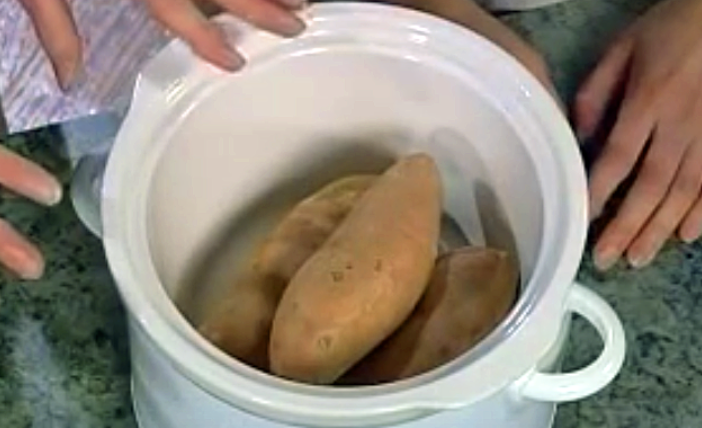
Instead of zapping them, try cooking a bunch of them at once in a slow cooker. In the end it’s just as easy as microwaving, but the potatoes will turn out much more delicious. JoAnn Rachor shows how it’s done in this easy to follow video she posted to her YouTube channel.
Start by washing a few sweet potatoes, making sure to scrub the skins well. There is no need to poke them with a fork for this recipe, just trim off any bad spots and then toss into a crock pot with a little water. In the video they used about ½ cup of water for 3 large sweet potatoes, if you cook a larger batch simply adjust the water amount up to about ¾ of a cup.
This doesn’t require a lot of water, just enough to steam and help cook them. Cook on high for about 2-2 ½ hours for a small batch and 3-3 ½ for a larger amount. While they’re cooking you’re free to go about your day and when you get back the potatoes will be done.
The insides will be evenly cooked, fluffy, and tender, while the outside remains firm. You can eat them right away since they’ll be warm and ready, or you can use them in another recipe that calls for cooked sweet potatoes. Try this practically effortless slow cooking method the next time you plan on having sweet potatoes for dinner.
Plus, if you need to shave minutes off a dinner prep time, cook them ahead of schedule and free up a lot of time and valuable oven space.
Please Share This With Family and Friends


