
This Guy Takes A Reflective Sun Shade And Puts It On A Piece Of His Shoe For a Genius Reason!
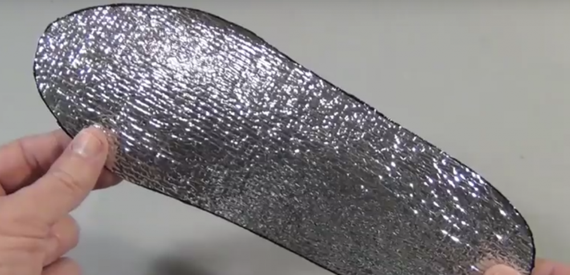
image via – youtube.com
Even though a lot of the United States winter is over, chilly days are still here, and there will no doubt be plenty of really cold days ahead. The one thing that will always make you suffer from the cold, regardless of how well protected the rest of your body is, are cold feet!
I buy warm winter boots, and those “smart socks” that are supposed to really insure warmth. If I’m outside for a prolonged period of time, I’ve even tried foot warmers that last for a while. However, I always end up with that awful feeling of my toes going numb, and then there is no getting rid of the chill.
The foot warmers require replacement, since they only work once, so when I saw this amazing heat insulating trick online I had to try it. In the video you are about to watch below, the IntenseAngler YouTube channel shows you how to make your own insulating shoe insert, that can be used over and over…and it actually works fantastically!
All you need to pick up is one of those reflective sun shields that people use on their car windows. He shows you how to cut the material for your winter shoes or boots; this material not only insulates from the cold but reflects body heat back to your feet.
The result is an amazing remedy for freezing cold feet and toes!
Please SHARE this with family and friends
Apparently I have Been Putting Band Aids On Completely Wrong For My Whole Life. I Had No Clue.
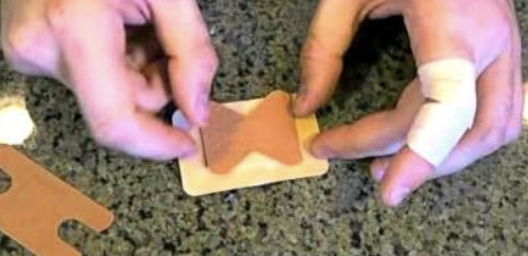
image via – youtube.com
What I love about the Crazy Russian Hacker, other than his accent and hilarious attitude, is that he finds solutions for things that are actually useful for most everyone. He targets those little annoyances or problems that always are a bother, and he solves the problem.
There is nothing worse than getting a cut in an awkward place, like the end of your finger that really needs band-aid protection. As you have probably all experienced, certain parts of the body, like this, just doesn’t hold a band-aid; they keep falling off.
Band-aids are made in all shapes and sizes that you would think would cover such issues, but as the Crazy Russian illustrates for us in the video below, people come in different shapes and sizes which sometimes requires a “custom made Band-aid”. Kids and adults, men and women…all have different size needs that this hack provides.
Watch the following footage as he shows us which shape Band-aid works best for customizing your needs, to get maximum coverage and flexibility. He has really come up with a great hack for those “hard to cover areas”.
Let us know if you ever tried this technique!
Please SHARE this useful hack with your friends and family
He Takes A Lighter And Holds It Under His Key. The Reason Is Genius But a Little Scary!
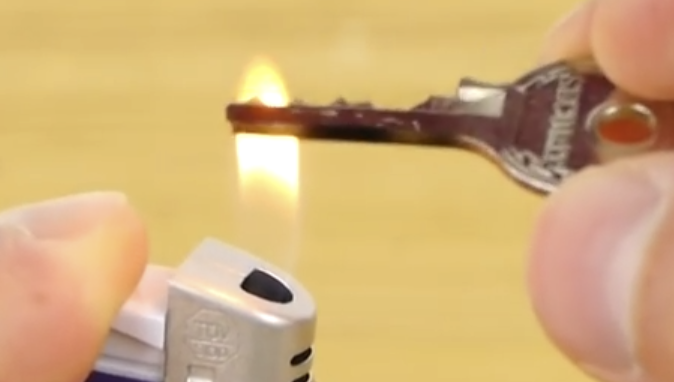
image via – youtube.com
When it comes to keys, they often get misplaced or lost and many seem to disappear when you need them the most. Some of us are vigilant and make copies to have on hand in case we ever lose them, but most people don’t bother to get a spare made.
It’s a minor inconvenience to go to a hardware store and have one made, yet people put it off and eventually forget about getting it done until it’s too late. If you have ever been stuck with a lock and no key to open it, then you know how frustrating and hopeless the situation can be.
The only options you really have are to break the thing open, try and cut the lock, hire an expensive locksmith, or give up on it. At that point, it’s more than likely that the thought “why didn’t I make a stupid spare key for this?” is going through your mind.
Now you can make a spare key in the comfort of your home, without going to the hardware store or spending any money. YouTube’s very own MacGyver, the man with a solution for just about anything, DaveHax, shows how to cobble up a spare in no time at all.
The basic items you will need are the original key, a lighter, a tin can lid, a piece of tape, and scissors. The type of key you’ll end up making is more of an emergency, last resort type of spare to have on hand. Check out the video for an easy to follow tutorial and read on for more information on how to DIY.
Take the original key and place a flame underneath it. A candle or lighter works best for this, and if you hold the key with a pair of pliers you’ll reduce the chances of burning your fingers. Hold the key over the flame until it’s coated black and then place it somewhere safe to cool off.
Meanwhile, take a strip of tape and carefully place it onto the key and then peel it off. This picks up the black soot and makes an exact copy. You can clean off any remaining black left on the original key by rubbing it with a paper towel.
Next, take a lid from a can of food, place it flat on a table, and stick the tape onto the lid. Grab a pair of sharp scissors and carefully cut out the key, making sure to cut it as close and accurately as possible, without cutting yourself on any sharp edges.
When you’re finished you should have a replica key that matches up exactly with the original. To ensure that it works, test out the copy you made on whatever lock it goes to.
You may have to wiggle it gently to make it fit, so be careful no to bend or break it because the key you make is going to be much thinner than the original.
Please Share This Key Trick With Family and Friends
She Breaks Her Window Blinds Purposely. But What She Creates Is An Unexpected STUNNING Surprise!
Many people love decorating their houses and making it as cozy and comfortable as can be. Interior design is hugely popular and many retail stores are dedicated to the art of interior decorating. They offer everything from rugs, mugs, and vases to the kitchen sink.
However, many of the items found in stores are expensive and only available in limited styles. This is especially true when it comes to window coverings and blinds. While the options run from basic to fancy, the cost increases exponentially as you move up from mini blinds to silk curtains or cedar paneled shades.
If you want gorgeous, custom made window coverings it’s going to cost you, unless you make them yourself! The folks at Better Homes and Gardens made this easy to follow tutorial on how to turn basic mini blinds into beautiful roman shades.
It’s a much more affordable alternative to ordering custom ones and all it requires is a few things that you likely already have on hand. Those items are; white faux wood blinds, thick upholstery fabric, mod podge and a small container for it, a foam brush, pencil, scissors, clothespins, tape measure, and an iron.
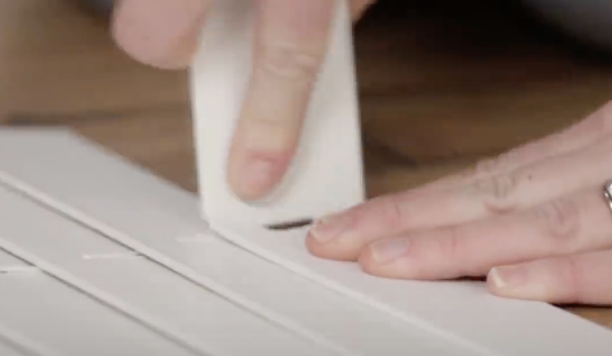
Measure how long the blinds need to be before you begin, then lay them on a flat surface facing down. Extend them out to the desired length and cut away the string that connects all of the slats, aka the ladder string, on both sides. Be very careful to avoid cutting the single, thicker cord that moves the shades up and down, because you’re going to need it.
Each slat is going to be 7 inches apart, to figure out how many slats you’ll need simply take the length of the window in inches and divide it by 7, then snap off any extra slats you don’t need. Next, take the fabric and lay it on a flat surface, place the blinds atop it and evenly space out the remaining slats.
Use the tape measure to ensure that they’re approximately 7 inches apart, this way the blinds will fold up neat and evenly.Measure the fabric so that it extends 2 inches beyond the edge of the slats and 2 inches beyond the top and bottom as well.
If you need to, iron the edges so that the fabric will form a more even hem. Make sure that the blind operation, the part where the strings come out of the top and extend down from, is placed on the back of the fabric. Remove the stopper, located at the end of the top bracket, and use a pair of scissors to cut a notch in the fabric so that it’ll wrap neatly around that end.
Break out the foam brush and use it to apply a coat of mod podge to both the end of the bracket and the fabric. Wrap the piece of glued fabric around the top of the bracket, press it down firmly and secure it with clothespins while it dries.
Moving down each side, apply glue to the end of each slat and the fabric portion that extends out beyond it, then fold the fabric over and onto the end of the slat and secure with more clothespins. At the bottom of the blinds take the fabric and roll it over so that it forms a clean edge. Brush the bottom bar with mod podge and glue the fabric into place, securing it with clothespins.
Allow the glue to dry completely before removing all the clothespins, and at that point they’re ready to be hung. The shades will still be operational like normal mini blinds, but a lot more appealing and better looking. Plus, things won’t get snagged or hung up in them, (like cat paws!). Best of all, they can be customized to your exact tastes at a fraction of the cost of what you’d end up paying retail.
If you want to give your house or just one room an instant upgrade, try this out!
Please Share This Blinds Hack With Family and Friends
Her Clever Trick For Putting On Eyeliner On Perfectly Every time Is Impressive. This Is So Simple.
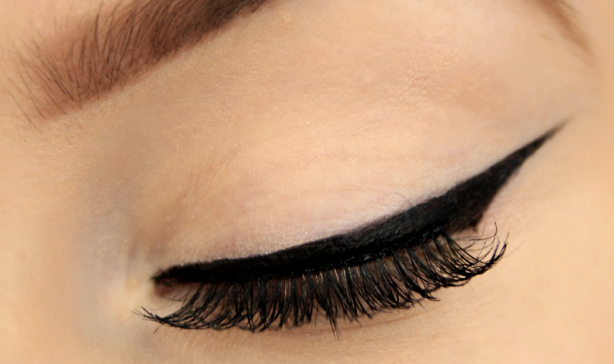
Being able to create the really dramatic look of winged eyeliner, without the help of a makeup artist, would really be a great achievement. The video you are about to watch below, offers an easy-to-follow tutorial, that will allow you to create the nighttime dramatic eye-popping look!
This YouTuber shows you a way to do this in a really sophisticated, tasteful way. She uses a felt-tipped eye makeup pen to place dots in strategic spots along the rim of the eyelid, that will be connected in order to create the outline that will finally be filled in.
Once you have connected the dots to create the outline for the “cat eye”, it’s time to fill in. This can be done with a gel or liquid liner, depending on what you are most comfortable working with. Finally, you can use those pointed q-tips that you have always since in the pharmacy, to clean up any messy edges or do some blending.
Just watch the footage below that takes you through each step, and then try it for yourself. The method is foolproof, and you will find that it is fun to create this look. Let us know if you try it and are happy with the results.
Please SHARE This With Your Family and Friends
Apparently I’ve Been Peeling Potatoes Wrong This Whole Time. THIS Is The Only Way It Should Be Done
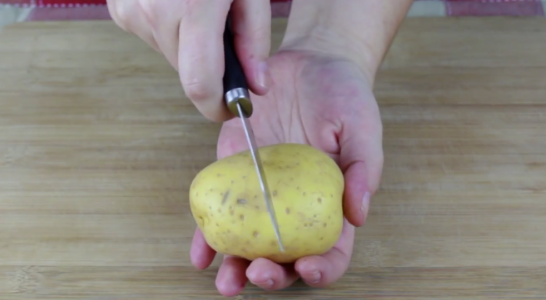
Everyone loves the delicious POTATO. It is truly one of the most whole and nutritious foods that has gotten the bad rap…of being fattening. This is untrue, and has to do with the condiments or other foods added to the potato which make it fattening.
Many people hate the drudgery of peeling potatoes, which in actuality shouldn’t be done, because most of the nutritional elements as well as the flavor lay right beneath the potato skin. So, what to do? The video you are about to watch below, contains one of the simplest yet best food hacks I’ve seen.
With a single move, you will see how to get by the drudgery of peeling an “uncooked” potato, retain the flavor and nutritional value that the skin offers, while eliminating it from your palate. It is so simple and offers you the best possible result. Let us know what you think.
Please SHARE this with family and friends


