
He Takes A Knife And Slices It Through This Popcorn Bag. But What He Makes Is Brilliant!
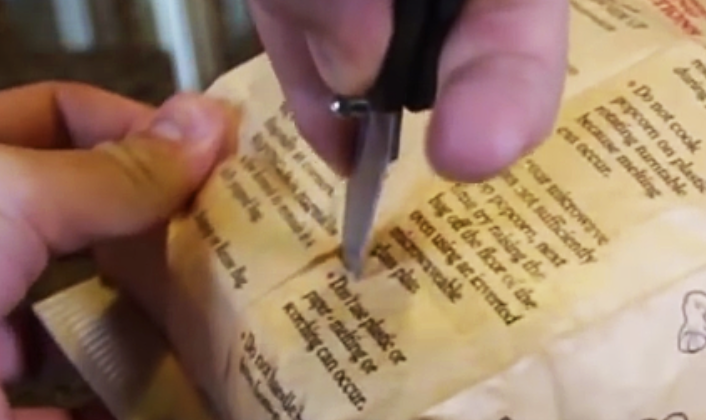
image via – youtube.com
Microwave popcorn is one of the easiest and most convenient snacks to make. All you need to do is stick the bag in the microwave the right side up and press the preset ‘popcorn’ button. A few minutes later it’s done and ready to be scarfed down.
While at first glance it may seem like there is no way in which the process can be improved upon, there are always ways to make things better and microwave popcorn is no exception. Leave it to everybody’s favorite, YouTube’s Crazy Russian Hacker, to figure out the top hacks in which to go about making awesome popcorn.
Firstly, when most people go to reach into a bag of freshly popped popcorn they usually do it from either of the two ends. That means they end up sticking their fingers down into the greasy, buttery, salty, and sometimes cheesy bag to fish around for their snack and end up getting their hands all dirty.
Instead, open the bag from the side by laying it flat and using a knife to cut the entire side off. This makes it easy to reach all the popcorn without coating your entire hand in grease. Another issue is there are always a few kernels that fail to pop in the bag and no one likes biting down on a hard piece.
To easily get rid of them just shake the bag with the heat vent side facing down over a trash can. The unpopped pieces will make their way out of the bag and fall into the garbage where they belong. If you ever find yourself with popcorn kernels but no way to pop them try making your own bag popping system.
Take a brown paper bag and fill the bottom with the kernels, then add in a little pat of butter and whatever seasonings you like, rumple and close the bag and stick it in the microwave. Be careful to watch the bag as it pops and make sure you don’t overcook it.
This way works just as well as the prepackaged versions. This method also works with a glass bowl and a glass or microwave safe plate. Simply combine all the ingredients like above into the bowl and then place the plate over the top so it is covered.
Place it in the microwave, press the popcorn setting and watch it pop. Be careful removing it because the glass will be super heated. Finally, to modify a bag of popcorn you can cut open a slit on one side and pour in seasonings or add more butter to it that way.
Then take a piece of paper tape (not plastic) and cover the slit, microwave, and open from the side to enjoy. Making it this way ensures that the popcorn will be tastier and better suited to whatever preferences you may have.
Get creative and try new taste combinations, who knows, you could end up making the best popcorn of your life!
Please Share These Popcorn Hacks With Family and Friends 🙂
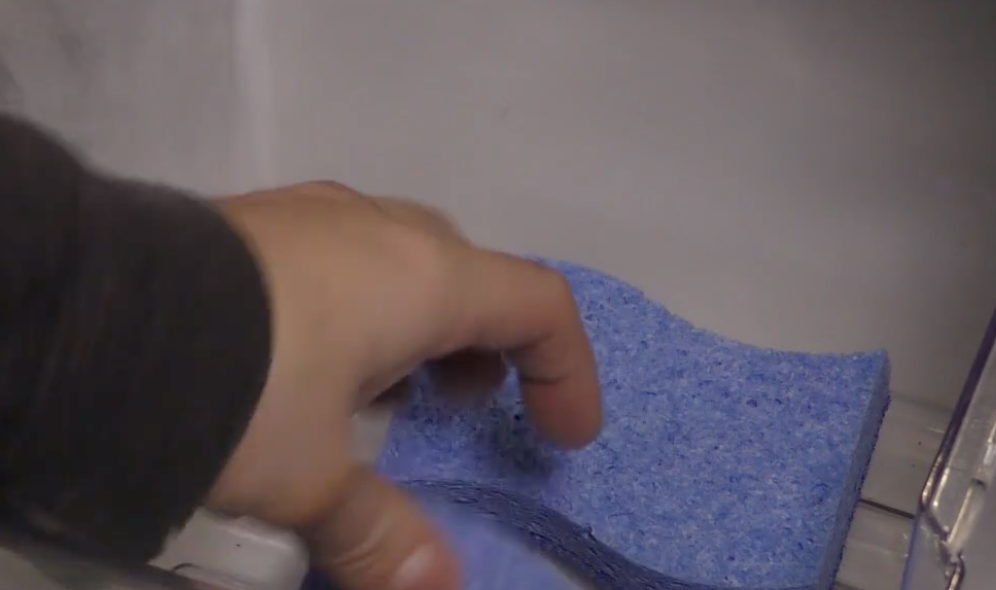
This Guy Puts 2 Sponges Inside His Refrigerator. The Reason Is Brilliant!
I consider myself to be pretty strong in the housekeeping department, but never cease to be amazed at all the “tricks of the trade”that are out there on the internet, that I’ve never even heard of! I love finding really useful life hacks, like the ones you are about to watch in the video below, that are really clever and innovative!
The simple life hacks, brought to you by HouseholdHacker, offers EIGHT great ideas that are beyond simple, and just make life easier… and who doesn’t like that? These tricks are simply amazing and will help to make your household chores less painstaking. The footage will give you a step-by-step tutorial that I hope you will find as useful as I did.

For full instructions watch to see how to:
– QUICKLY AND EASILY PEEL NUMEROUS GARLIC CLOVES AT ONCE
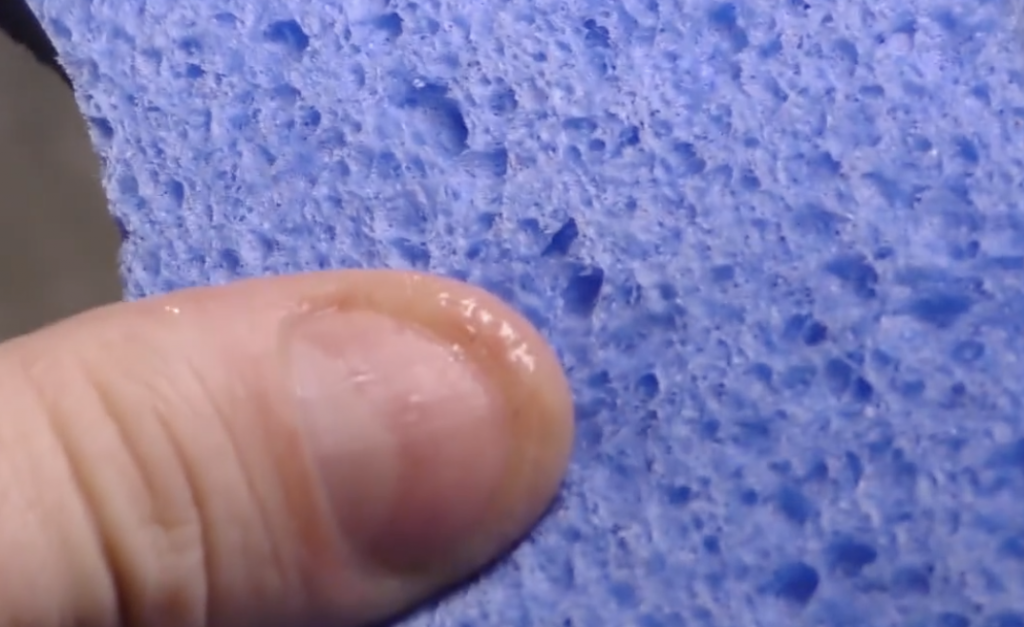
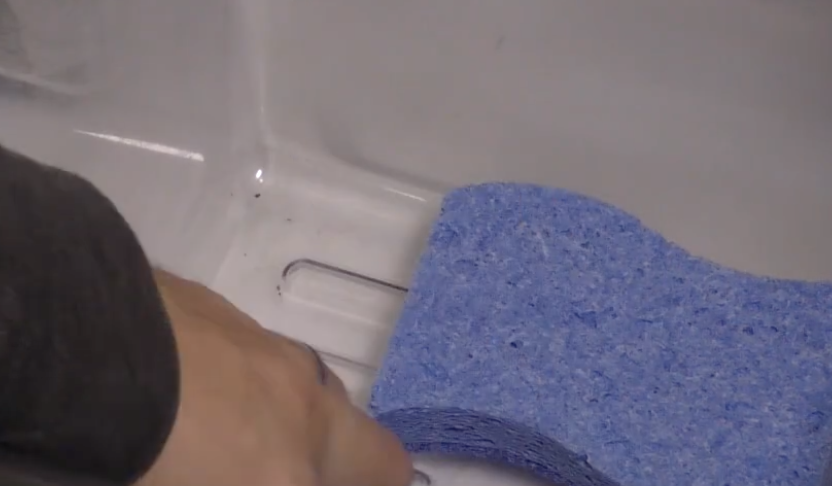
– HOW SPONGES IN YOUR VEGGIE BIN, WILL KEEP YOUR PRODUCE FRESHER AND CRISPER, FOR A LONGER PERIOD OF TIME
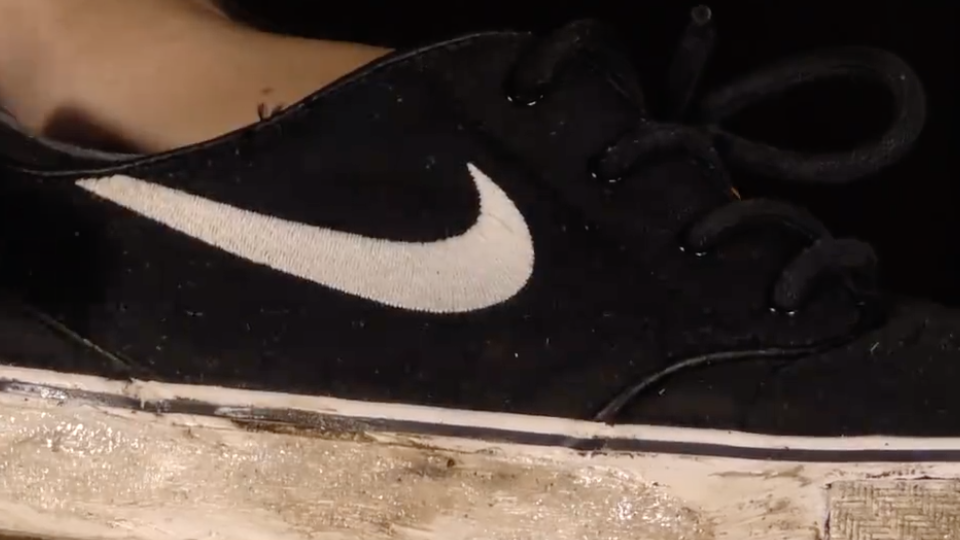
– KEEP SNEAKERS CLEANER WITH TOOTHPASTE
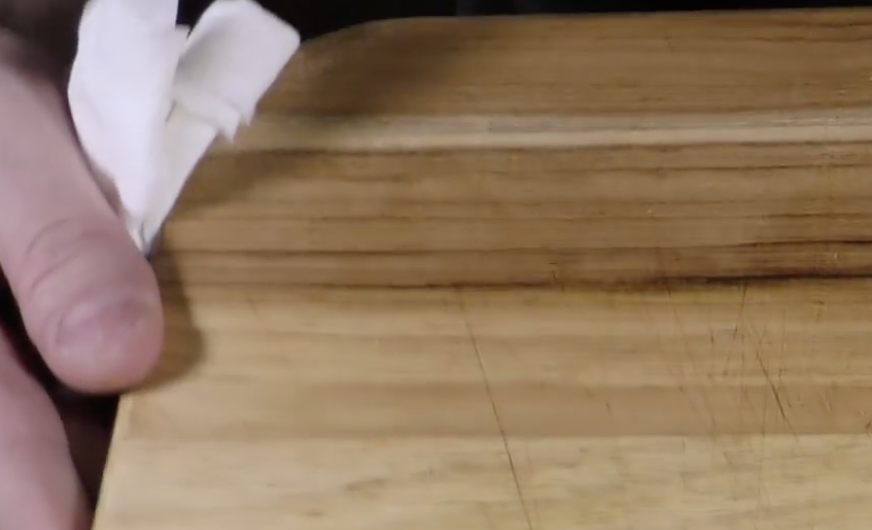
– BEST WAY TO DISINFECT AND ELIMINATE CUTTING BOARD ODORS
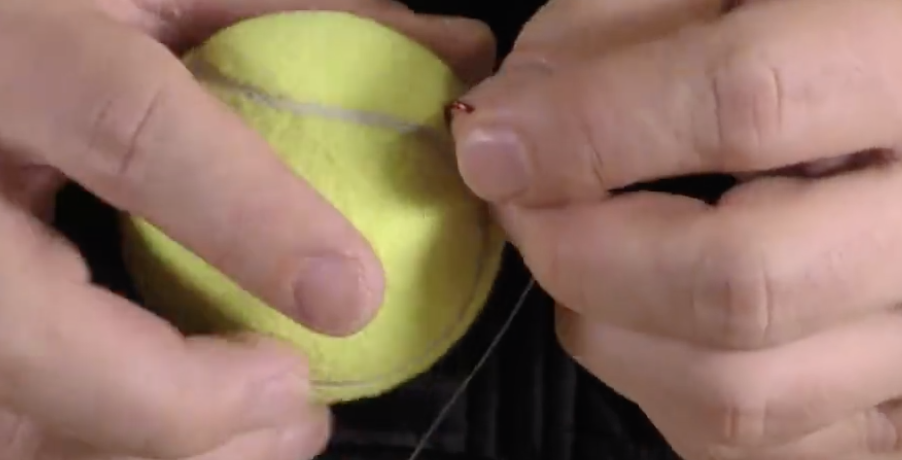
– USING TENNIS BALLS FOR LAUNDRY AND AS A PARKING GAUGE IN YOUR GARAGE
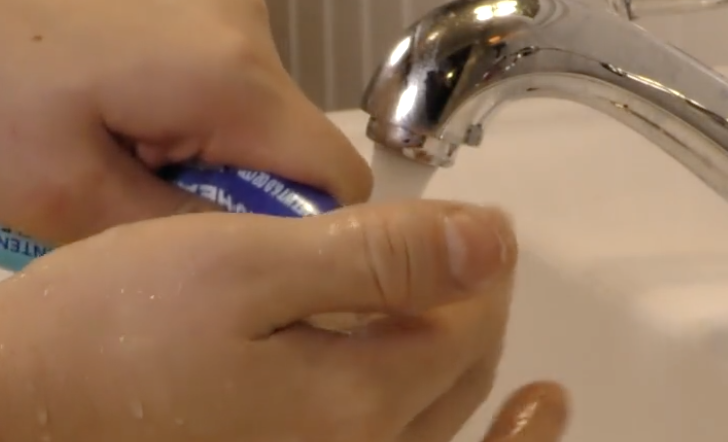
– GETTING RID OF SMELLS FROM YOUR HANDS (LIKE ONIONS AND GARLIC) WHEN SOAP DOESN’T DO THE TRICK
– BEST WAY TO REMOVE ALL REMNANTS OF STICKERS THAT ARE TOUGH TO REMOVE
Please SHARE these HELPFUL HOUSEHOLD HACKS with your friends and family 🙂
You Won’t Get Poison Ivy Again Even If You Come Into Contact With It After You Learn THIS Trick
Poison ivy earned its foreboding name because the vines of the plant creep and climb up things and can be highly toxic to humans when they come into contact with skin. When that occurs most people develop an allergic reaction and an extremely itchy, painful, uncomfortable rash breaks out!
While a small minority of people have a high threshold for poison ivy and never develop a reaction, most others are highly sensitive to it. If they make even slight contact with the plant, like barely brush against it, they are bound to break out. That’s why the best way to prevent a poison ivy rash is to avoid the plant in the first place, but that’s not always possible. If and when you ever do come into contact with poison ivy down the line, you need to know the following information. It can help minimize your risks and save you a lot of pain!
First off, poison ivy reactions are caused by urushiol which is found on the stems and leaves. Urushiol is an oily resin that sticks to everything and so whatever comes into contact with the oil can further spread it all around. Say for example you drive over poison ivy plants, it will get on the tires and then if you touch the tires it can get on your skin. Other more common items that urushiol may contaminate are gardening tools, rakes, chainsaws, and clothing.
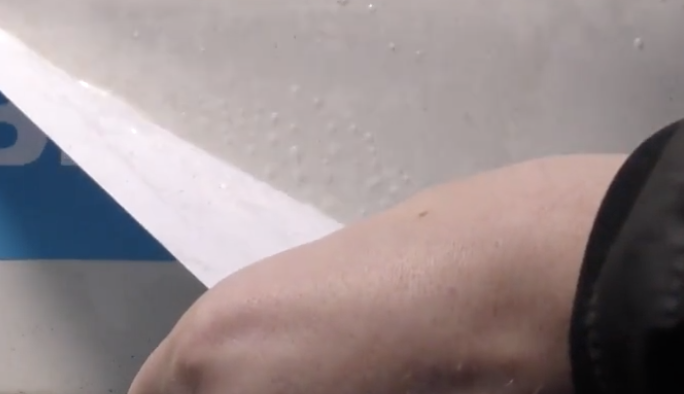
Next, if you ever think you may have touched poison ivy then you need to know Jim Brauker’s tip on how to minimize the potential of it turning into a gross, nasty rash. The scientist and wildlife enthusiast explains the best technique for this and demonstrates it himself in the accompanying video. He explains that if you come into contact with poison ivy you need to wash the oil off your skin within 2-8 hours. The sooner you wash the better and even if you’re unsure about whether or not you got any oil on you, wash the area no matter what. Use cold water, soap, and a washcloth to help get it completely off your skin.
The key to this trick is a washcloth, so make sure you use one, because it provides the friction necessary to scrub and lift the oil off your body. Use it on all contaminated areas and a loofah or towel will also work just as well at picking up and removing the oil. As for soap, it doesn’t matter what kind you use, but never wash with hot water!! It causes pores to open up and that will allow the urushiol in.
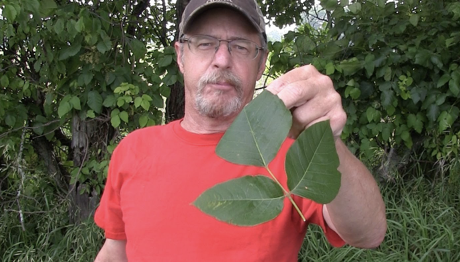
Poison ivy rashes are no laughing matter and in a perfect world we’d all avoid the plant in the first place. To help you do that, here’s what you need to know on how to identify it:
“Leaves of three, let them be. Leaves of five, let them thrive.” The first half of this old saying is a helpful way to remember how to identify a poison ivy plant, the second part serves to prevent other similar looking vine-type plants from being confused or wrongly associated with it. Other sayings provide more details on how to identify the plant, two of which include; “longer middle stem, don’t touch them” and “hairy vine, no friend of mine.” Out of the three total leaves it’s the middle one that has the longest stem and the vines will have tons of small ‘hairs’ that help it stick to things as it climbs. This is important to know since the leaves die and fall off in the fall/winter but the stems, roots, and vines can still all give you a rash because they also contain urushiol oil. Other things to look for are glossy leaves with smooth or toothed edges and in late summer the plants sometimes grow white berry clusters.
Hopefully you never have to use Jim Brauker’s poison ivy removal method, but if you do you’ll be glad you took the time to check his video out! Pass this tip on to the gardeners, hikers, nature enthusiasts, and the people most likely to run into poison ivy in your life, and stay safe!
Please Share This Trick With Family and Friends
Are Ants About To Mess Up Your Year? Try THIS Simple Trick To Get Rid Of Them Immediately!

Spring and Summer are almost here, at least for half the earth, and with it comes great outdoor activities and freedom from the cold! However, there are some annoying things that come along with summer treats, that could use a clever remedy. YouTuber Grant Thompson has come up with 10 SUMMER LIFE HACKS, that you don’t want to miss in the video below!
You will be amazed at the cool tips he’s come up with, from getting rid of ants naturally by making homemade corn meal, to ridding your home of fruit flies which are everywhere during this season. We all love hamburgers on a bun, but it’s usually a messy eating experience, often embarrassing when you are out with friends…he’s got a trick that’s foolproof!
Every kid loves a popsicle…but ohhh those sticky hands..Thompson has the cutest trick for that one! Going to have a relaxing day at the beach and getting to go into the water together is always a problem…how do you keep your valuables secure and hidden? This hack is great!
These and 5 other Phenomenal Hacks are offered in the footage you are about to watch. Let us know which are your favorites.
Please SHARE Summer Life Hacks With Your Family and Friends! 🙂
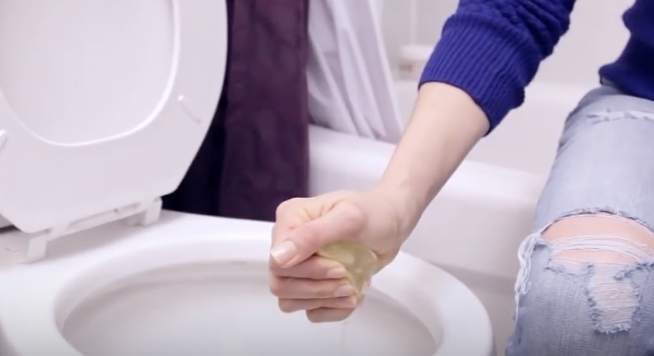
She Sprinkles Salt On A Lemon Then Squeezes The Juice Into The Toilet. But The Reason Is Brilliant!
We all know that lemons add great flavor to foods and drinks. We have learned extensively about their health benefits, providing a multitude of anti-inflammatory and anti-cancer benefits. At the center of the greatness of the “Mighty Lemon” is it’s concentration of Vitamin C.
However, this video that you are about to watch, is not about the health benefits of lemons. Rather, it shows 10 ways in which lemons can be used as a house cleaning tool, that are just amazing. Not only do they do the job, but leave everything fresh smelling.
It is the acidity in the lemon juice, and the grease-cutting oil contained in the skin, that give lemons such efficient cleaning properties.
The 10 ways to clean with a lemon included in the video below are as: A Fridge Freshener; Microwave Steam Cleaner; Grater ‘De-Cheeser’; Scourer for Wood Cutting Board; Descaling the Hot Water Kettle; Glass and Mirror Cleaner; Toilet Bowl Cleaner (with coarse salt); Soap Scum Remover; Sparkling Chrome and Faucets and a Garbage Disposal Deodorizer.
Watch the video to see exactly how easy it is to use lemons for these purposes!
Please SHARE these Lemon Cleaning Hacks With Your Family and Friends
He Dips A Lighbulb Under The Faucet. But When He’s Done The Most Unexpected Surprise!
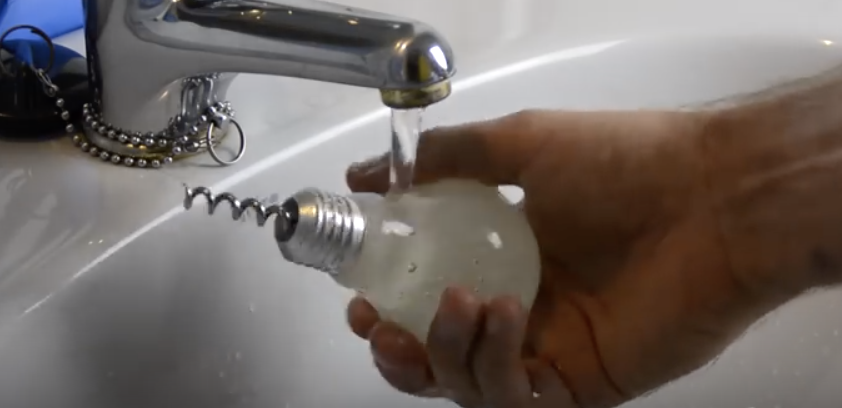
The next time you replace an old light bulb don’t throw it out. Instead, reuse and recycle it to make a bunch of cool, new, handy things. This video from YouTube’s Shake the Future channel will show you how to make 5 different things from an old bulb. Check it out and read on below for more information on the projects covered in the video!
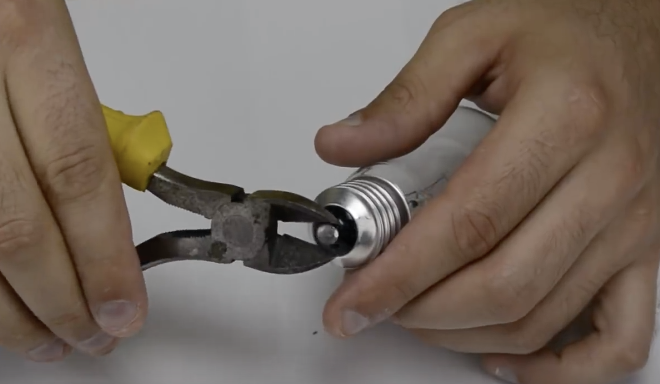
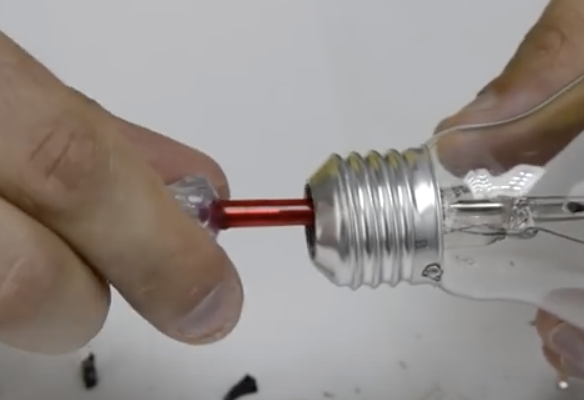
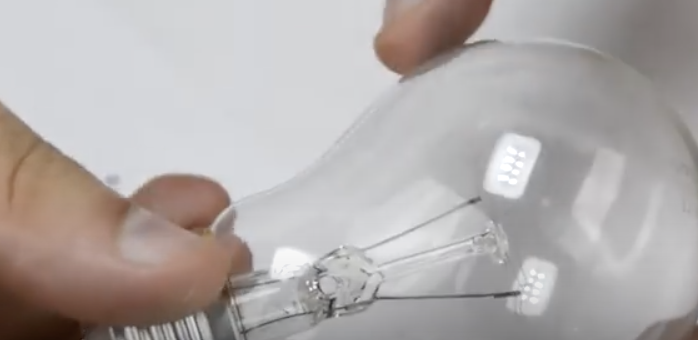
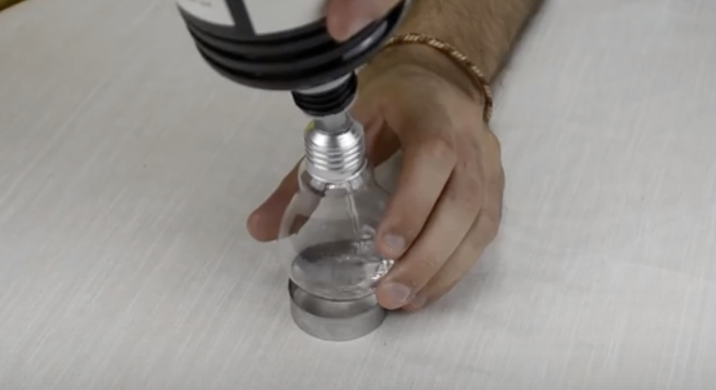
Make sure to use protection and wear safety goggles and gloves. The last thing you want is sharp glass fragments flying into your eye or a cut finger! To prepare the bulb use a utility knife and separate the contact from the surrounding black glass on the bottom. Take a small flat head screwdriver and twist it around the black glass until it breaks, remove the rest with pliers.
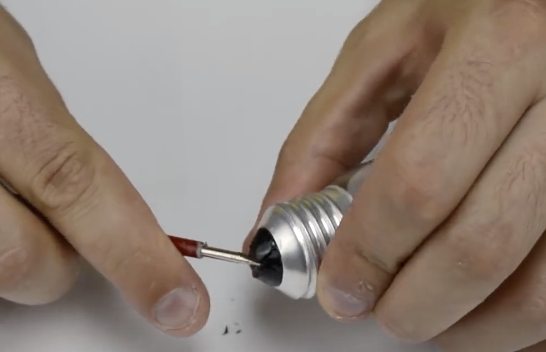
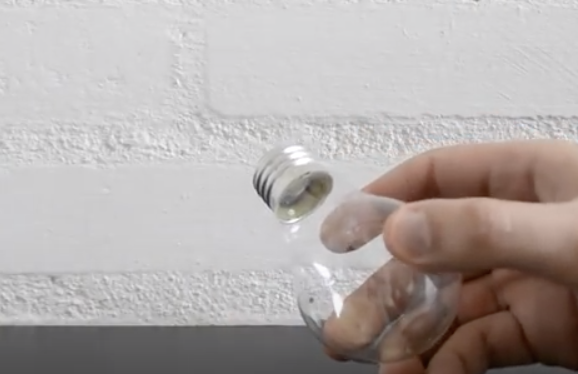
Reach into the bulb and break the stem with a small flat head screwdriver, then use a bigger one to loosen and break the inside filament. Empty out everything and if you need to make the hole bigger slowly apply more pressure to the surrounding edges. Wash out the bulb, let it dry, and now you can use it for a variety of things.
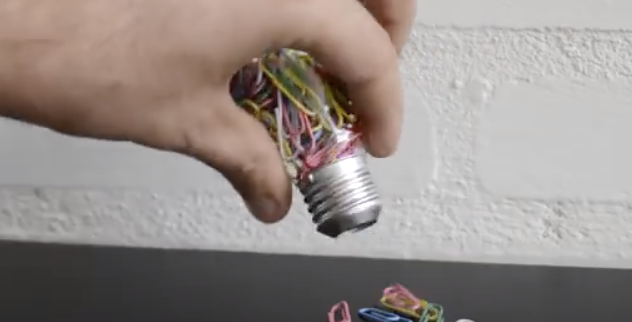
The first way in which you can use an old light bulb is as a handy paperclip dispenser. Place some paperclips inside and shake it upside down when you need one. It also makes a neat flower vase. Fill the bulb halfway up with water, stick in a flower or two, then place it on a small round cookie cutter to stabilize it.
For this next project you only need to remove the bottom of the bulb. Take a solar garden light and glue a string to it, then glue the bulb to the light so it forms a base. Hang it in a sunny spot and voila, you have a new solar light. Alternatively, you can make a light bulb torch.
Use a high temperature sealant to attach a washer to the bottom of the bulb and place it on a cookie cutter base before filling with paraffin based fuel. Insert a wick, wait 10 minutes to soak up the fuel, then you can light it. Make sure to never leave this unattended!
Finally, make a cool corkscrew by removing the worm, the pointed metal helix part, from an old or cheap one and place a small screw through the bottom hole. Fill a light bulb with InstaMorph, a mold-able plastic product, place it in the oven to melt then remove it and top off with more InstaMorph.
Put it back in the oven to melt again and repeat this until it’s filled with melted plastic. Push the worm into the bulb opening and hold it in place for 10 minutes while the plastic cools. Once it has cooled further you can run it under cold water to speed up the process. Finally, when it’s completely cooled off take a hammer and break the glass, now you have a light bulb corkscrew!

Please Share These Light Bulb Hacks With Family and Friends 🙂


