
This Guy Takes An Old Splintered Wood Pallet and Cuts It Up. The Final Result Is Incredible!
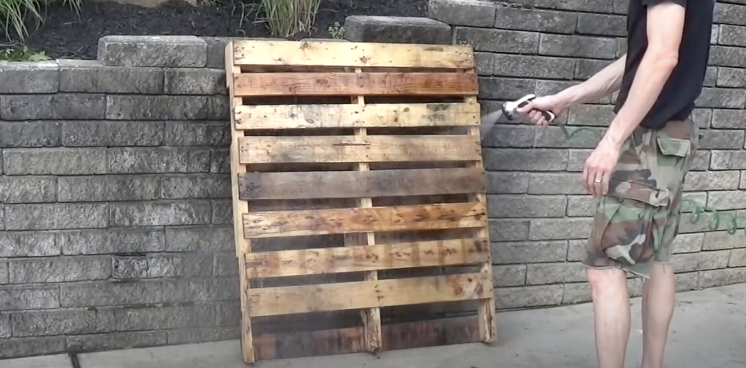
Wood pallets are ideal for moving and storing heavy items and also burn well in bonfires. Now they can be re-worked into beautiful, creative, and functional wine racks with the step by step guidance found in Joe Lydic’s YouTube video. The DIY project turns out a storage shelf with rustic appeal that’s perfect for storing wine glasses, bottles, openers, corks, and whatever else you can fit on it. Best of all, you can usually procure wood pallets from local landscaping companies for free..
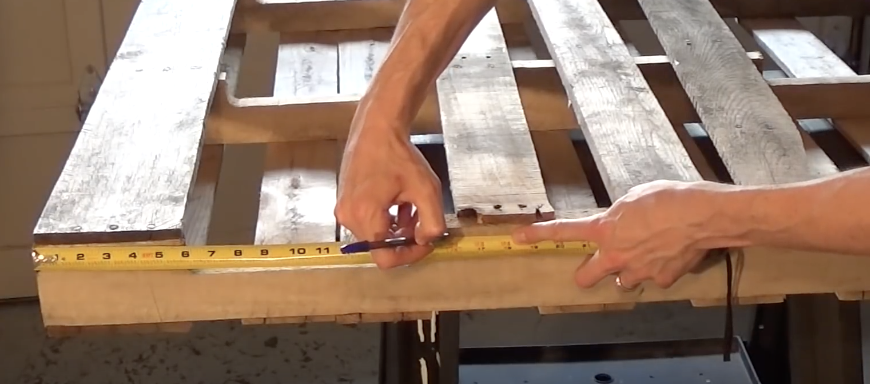
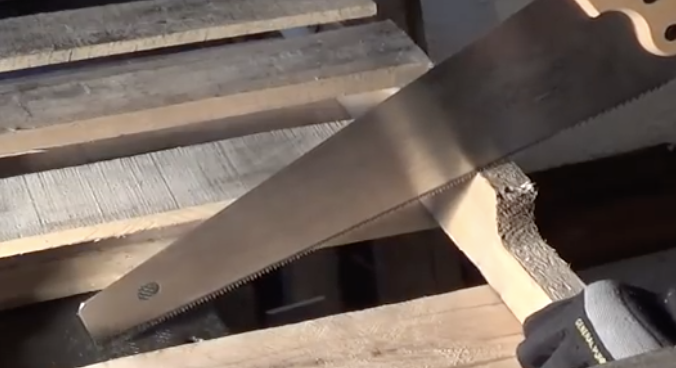
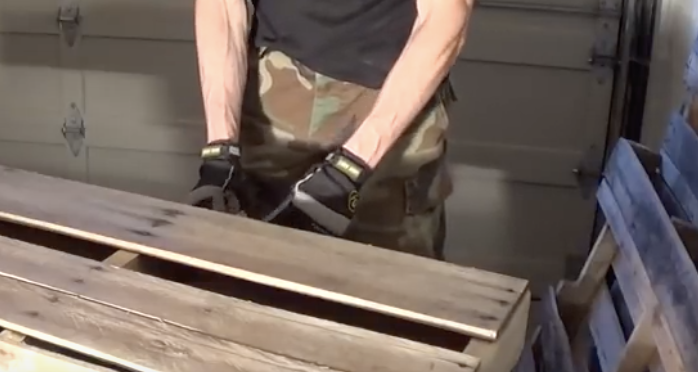
For this project all that is needed are some nails, wood glue, measuring tape, a hammer, a saw, sander or sand paper, a level, and a wood pallet. Begin by hosing off the pallet to get rid of any dirt or dust that may be on it. On the side of it you will see a cut out area, just above that (an inch or so) measure out a line for where you will make a cut. In the video this is 16 inches in from the side edge, and be sure to mark each of the 3 main supporting pieces at the same spot. Take your saw and cut all three of them off then sand the edges of where you made the cuts until smooth.
Next, take an extra slat of wood from the pallet and nail it to the top where you cut/sanded, checking to ensure it sits level. Lay the piece on its side and measure the width and height of the bottom opening (18”x3½”). Take another extra slat and measure out those same dimensions so when cut it fits snugly in the bottom of that opening. Move it onto its other side and hammer in some small finishing nails to secure that bottom piece.
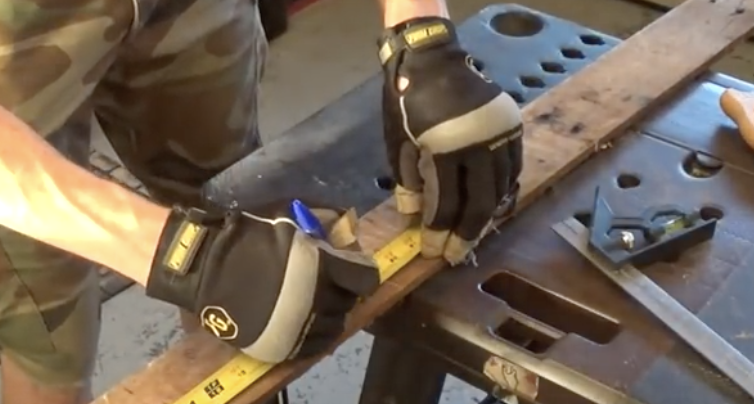
Next, cut 2 small sections off another extra slat (1”x3½”) and nail one onto each bottom end of the wine rack. Take another slat, place it across the top, and set wine glasses on to see how far apart they need to be spaced so they don’t hit each other (5”). Mark off the distance across the top piece, drill a hole at each mark, and cut a slit from the edge inwards to meet that hole. This is where the wine glass stem will slide into place and be held on the rack. Check that the glasses fit, then glue the top on the 2 small end pieces, and finish with a few nails. Sand over the entire rack until smooth and you’re done! The final piece has bottom slots for wine glass storage, a middle shelf for bottles, and extra space on top. It has a rustic and unfinished look but you can always paint or varnish it to your taste.
Please SHARE With Family and Friends
This Man Passed Out In The Middle Of A Busy Road. But Just Keep Your Eyes On What His Dog Does.

When a man fainted on the street in Guizhou, China, his loyal dog stayed right by his side. Amidst the busy and bustling crowds the small cream colored pup kept up his guard against any and all who approached the unconscious man. Even when the police and paramedics arrived he stayed put, and tried to fend them off, but was driven away so they could attend to his owner’s urgent medical needs. The poor dog wanted only to guard and protect his best friend but as long as he was still within sight it was okay that he be forced to back off.
Understandably, the man’s best friend was distressed at the sight of him sprawled out on the ground. The confusing turmoil surrounding them must have been overwhelming. Between the strange people staring, approaching, and trying to help and the loud sirens, lights, and men in uniform, any animal would be stressed by the sudden turn of events. Thankfully, the anxious puppy was allowed to ride in the ambulance and accompany his owner to the hospital. It would have been so sad if he wasn’t and the two were separated.
The dog’s reaction and how he stood guard over his helpless owner is further evidence that dog’s are intensely loyal, unfalteringly protective, and man’s best friend. It makes me wonder if my cat would do the same….Check out the video to see the dog’s heartwarming behavior.
Please SHARE With Family and Friends
This Pup Finds The Most Perfect Giant Stick Ever But What He Does At The Bridge Is PRICELESS
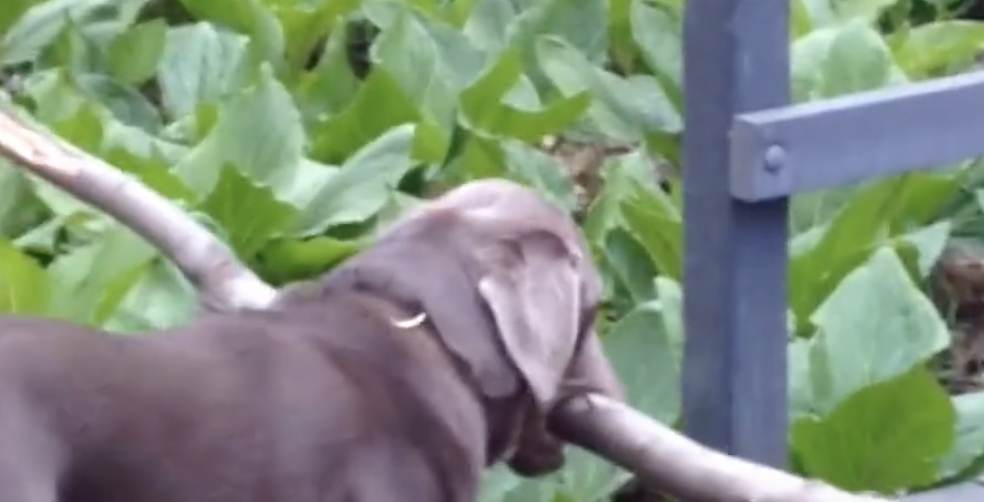
Dogs love sticks and this dog found a nice big one in the woods. It is perfect to play with and fits well in his teeth and mouth. There is only one problem. He has to cross a narrow bridge and get the stick over to the other side, but the stick seems to be too long and big.
The poor pooch, who is called Theo in the video, seems at first disheartened when several of his attempts fail to yield any results. We can see on his cute face his thought process as he tries to work out a way to get the stick across. He whines and tries one way before backing up and making another attempt.
With his human companion urging him on, and a few trial and errors to learn from, he eventually figures out a method that works. Share and watch the triumphant moment on the video below!
Please SHARE With Family and Friends
WATCH: When She First Put Cinnamon Buns On The Waffle Iron I Was Confused. But When She’s Done YUM!
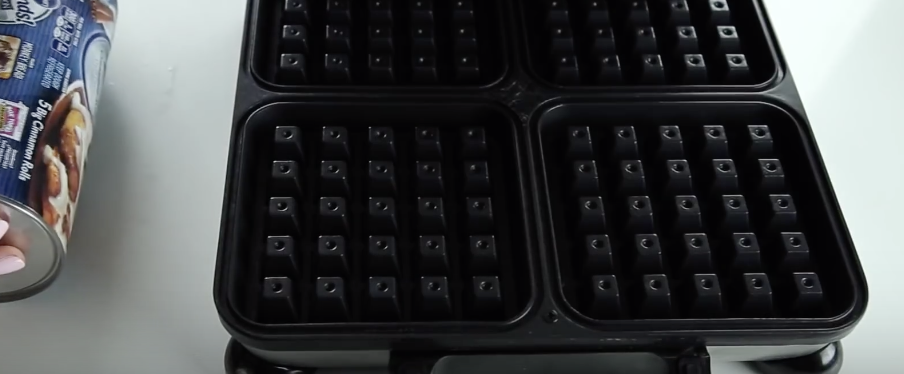
Waffle makers are not just for making waffles. They are actually very versatile machines that can cook up a whole lot more than what they are named after. If you have one collecting dust in the kitchen drag it out and get some good use out of it once again. Check out this video from JumbleJoy that shows delicious recipes anyone can easily whip up. In no time at all you can be enjoying tasty, homemade desserts worthy of any 5 star restaurant.
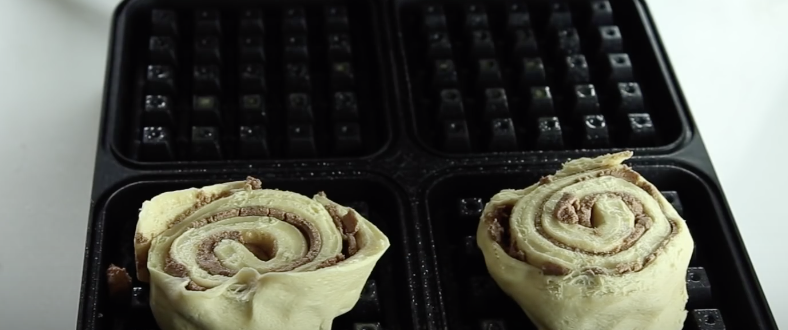
The first recipe is cinnamon rolls. Heat the waffle iron to medium and coat it with a non-stick cooking spray. Break out some pre-made, store procured, cinnamon roll dough and place one in each waffle-section on the iron. Shut the lid and cook for about 1-2 minutes depending on how fast your waffle maker works. Remove the heavenly smelling rolls and serve them with butter, frosting, or whatever else you’d like.
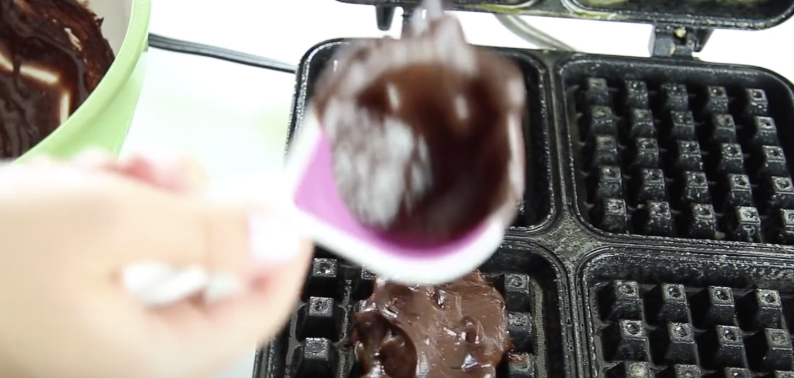
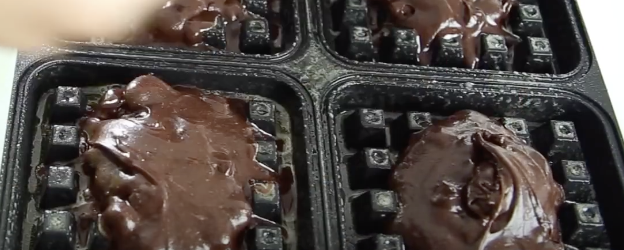
The next recipe is for the chocolate lovers out there. Whip up a batch of brownies from scratch or go the easy way and make the boxed type. Heat iron to medium, coat with cooking spray, and place a small scoop of batter in each section, then close the lid. Cook for 3-4 minutes and allow them to cool before removing.

The last recipe is for a cake batter waffle. Heat iron to medium, spray with cooking oil, then mix up your favorite type of cake, whether it be boxed or homemade, and place a small scoop into each waffle section. Cook for 2-3 minutes and allow them to cool before removing, then serve with fresh fruit, frosting, ice cream, or whatever you fancy.
I made some of these and they turned out very moist and delicious. Best of all they can be made and cooked really fast. The waffle brownies were perfect for making ice-cream sandwiches with. Just toss them in the freezer for a couple of hours, then scoop ice-cream onto one, mush another on top, and place back in the freezer. Check out the video and try this yourself!
Please SHARE With Family and Friends
This Cow Was Saved Right Before He Was Going To Be Put Down. Now Watch His Daily Ritual.
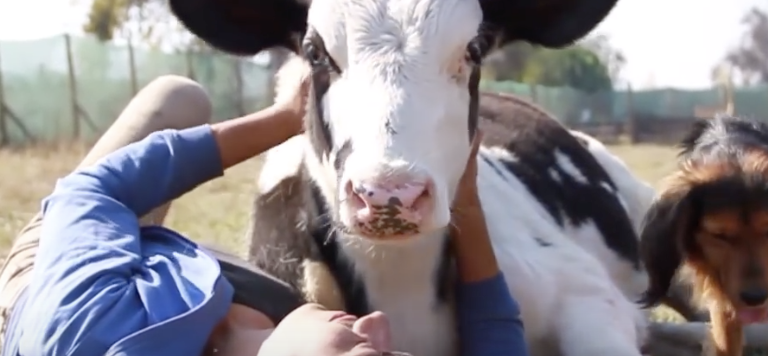
For the first part of his short life Salvatore, a beautiful black and white cow, only knew sickness and despair. He was held in a tiny box and kept under inhumane conditions on a dairy farm in Chile. His eventual fate was to be killed, slaughtered, and sold as veal. That was before the rescue organization Animal Libre stepped in and saved him. Today Salvatore lives on a farm sanctuary called Santuario Igualdad Interespecie. His life has taken a dramatic turn for the better and he has quickly made new friends with a boy and his dog.
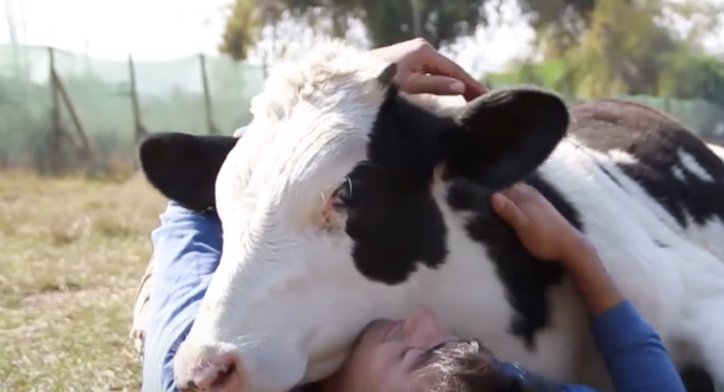
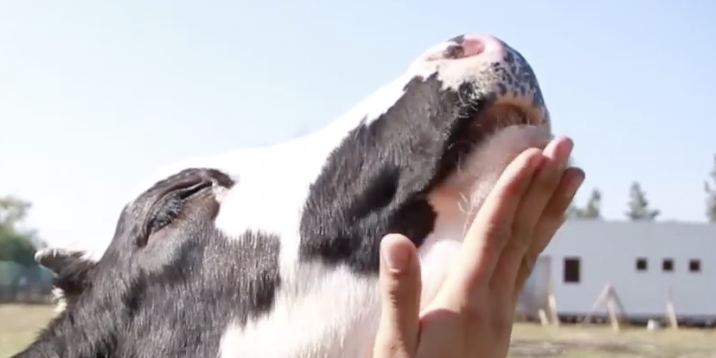
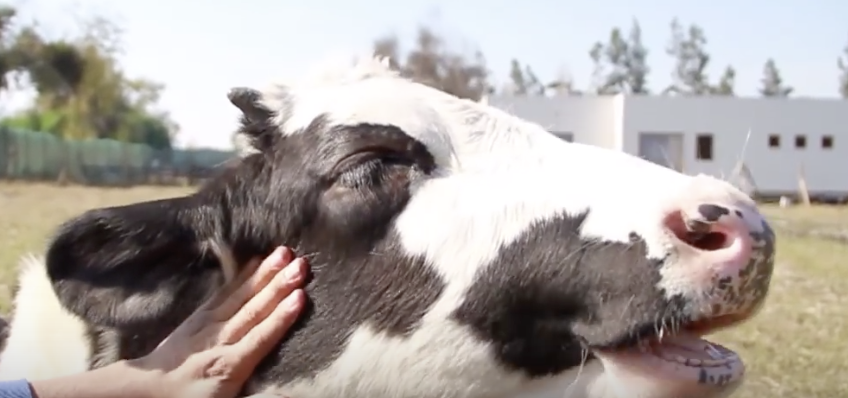
The group often hangs out together, laying in the grass, taking in the sunshine. They cuddle up close and Salvatore gets his much loved chin scratches and hugs. You can see the big smile spread across his cow face and how much he enjoys his new home. It is truly a happy and unique sight to behold- a boy and his dog…and his cow!
It is sad to think that this loving, gentle cow was once destined for the slaughterhouse. Thanks to the work, volunteers, and mission of dedicated groups like Animal Libre and Santuario Igualdad Interespecie, animals like Salvatore get second chances to live long, fulfilling, and happy lives.
Please SHARE With Family and Friends
This Guy Cuts An Old Tin Can Up. When He’s Done It’s Perfect For An Emergency Situation!
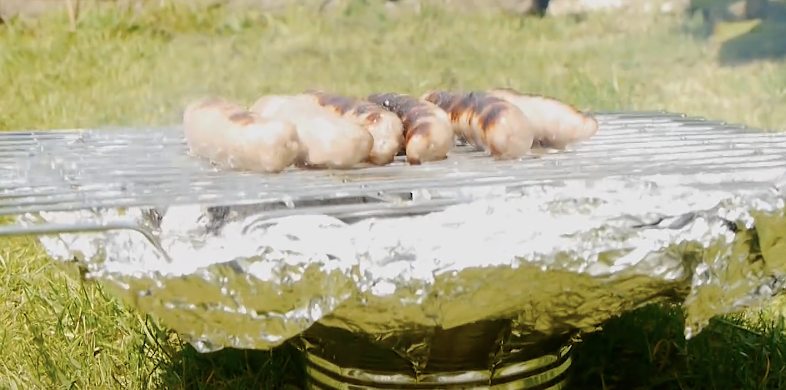
If you ever may need to MacGyver up a BBQ grill on the fly, check out this video for the best way to do it. This DIY project comes in handy for those who enjoy hiking and camping, but don’t want to haul a heavy, expensive, and bulky camp grill along with them. It also comes in useful when the power goes out and you get hungry. Forget having to eat cereal and crackers and instead grill up a nice juicy steak before it spoils in the fridge. Also, it puts to good use things you’d normally throw out, like tin cans. By re-using and recycling them into cheap and easily made BBQ you can make clean up a breeze and safely dispose of the ashes in seconds.
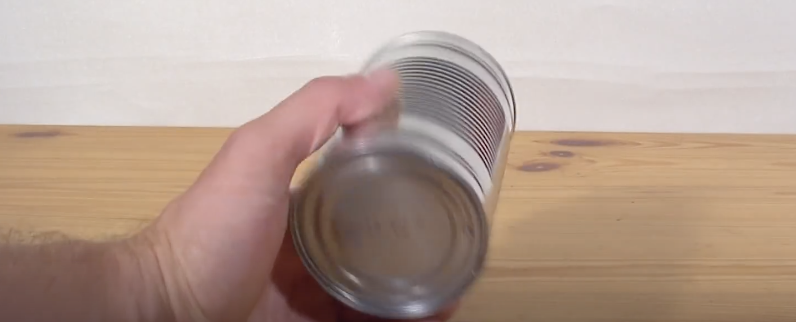
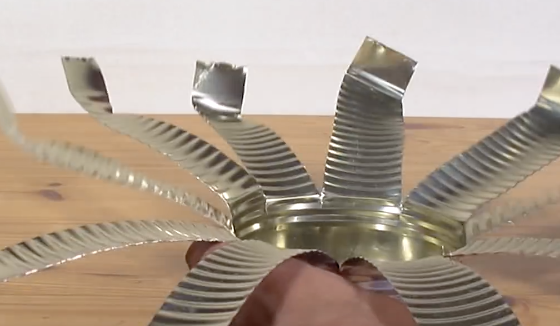
All that this simple little BBQ requires is a tin can, scissors, tinfoil, a metal grate and five minutes or less of your time. Start by taking a tin can, remove the lid, then grab a pair of scissors and cut strips down the sides, leaving about an inch or so uncut towards the bottom. The larger the can the better since it makes it easier to cut, more stable, and will better hold the coals later on. Next, bend the strips down and out all the way around the can (refer to the video for a visual). Be very careful when handling this because the edges are extremely sharp. After, line the can with tin foil so that you form a bowl shaped type of container out of it. With that, the constructing part is now done.
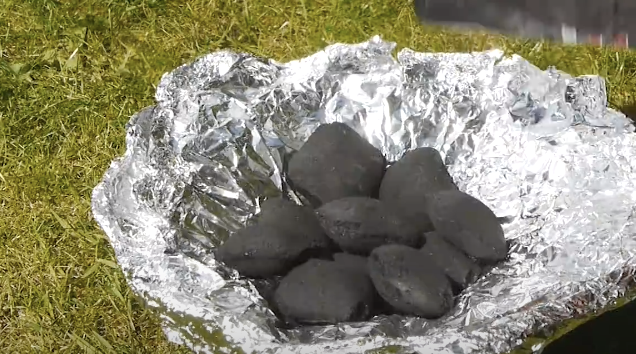
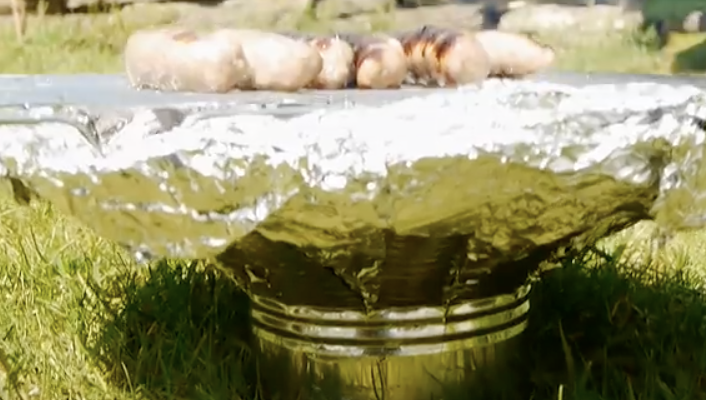
Place the grill somewhere safe, flat and outdoors before adding charcoal and lighting it. After the coals have heated to the right temperature spread them out on the foil and place a grill rack over the top. DaveHax, the man who made this video, used the rack from his oven, but you could also use a cooling rack or other similar metal-type grate. With the rack in place you can now throw a shrimp on the barbie, or grill whatever delicious meats, veggies, and fixings you desire.
This DIY tin can BBQ is versatile and useful in all sorts of situations. Plus, it may even prove itself out to be very useful one day. Check out the video for more detailed instructions and to get a better visual idea of what it will look like at each step. Enjoy!
Please Share With Family and Friends


