
She Weirdly Put Biscuits On The Bottom Of A Muffin Tin. But She Creates An Unexpected Tasty Surprise!
There is a right way and a wrong way to go about doing almost everything. Then there are all the ways that fall in between those two ends, and that’s what is covered in this Allrecipes YouTube video. It features a novel way for you to use a muffin tin to bake a variety of delicious treats that your whole family will love and appreciate.
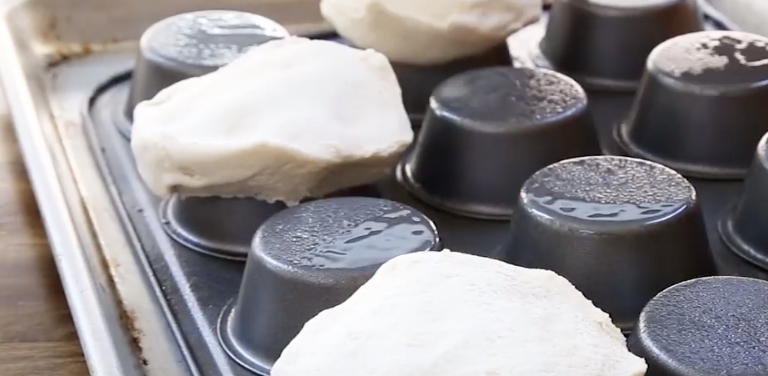
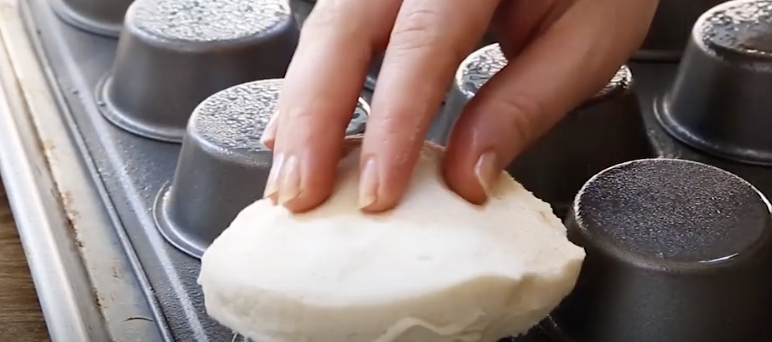
The awesome idea shown makes you think outside the muffin tin, and shows you how to switch up how you normally go about using the classic bakeware. Instead of putting dough in the little slots right side up, flip over the tin and use the underside of the moldings to make different types of edible food bowls. Get creative and imagine all the different ways you could use this technique to bake stuff, and below are some of the recipe ideas covered in the video.
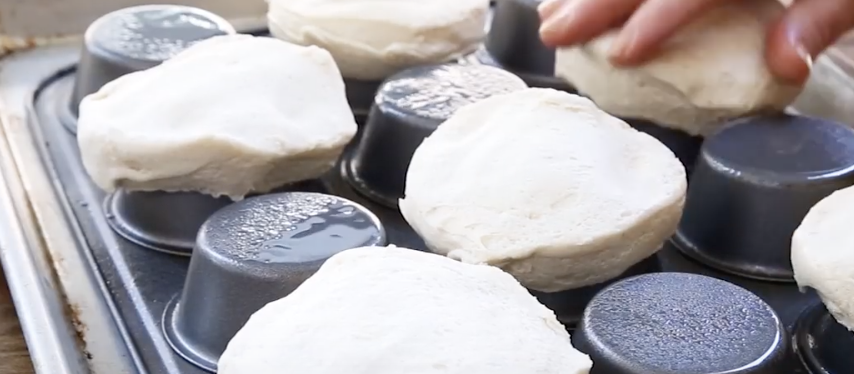
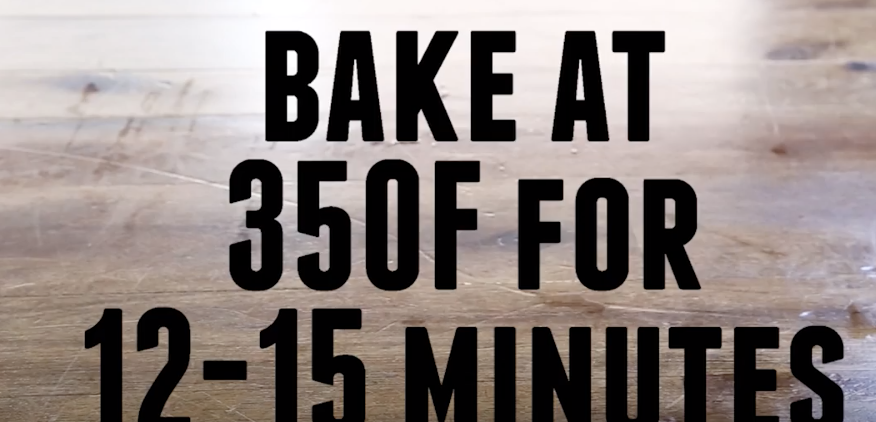
The first recipe shown is for biscuit bowls. Coat the overturned side of the tin with cooking spray, then take some biscuit dough and smush it over the muffin slots on the bottom of the tin. Pop it in the oven at 350 degrees and bake them for 12-15 minutes.
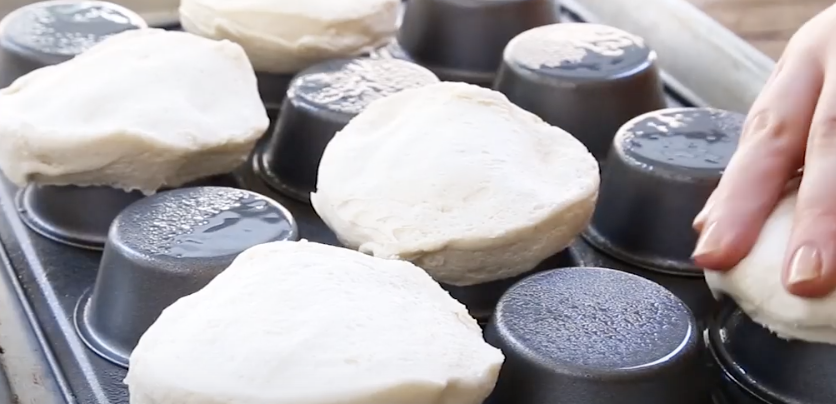
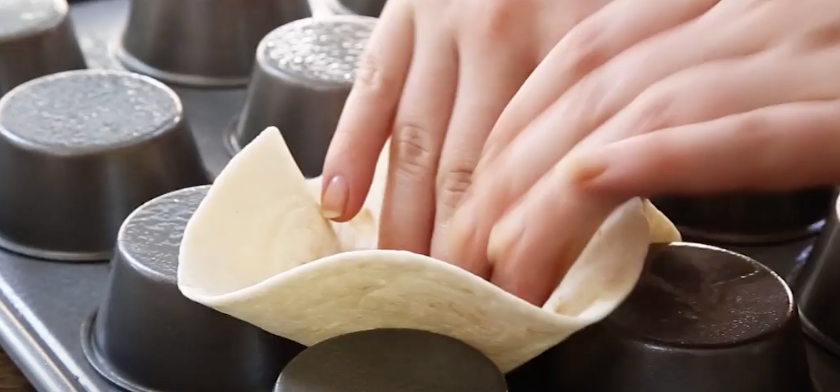
Now you have tasty little biscuit bowls that are perfect for holding hearty soups like loaded potato soup with cheddar or different chowders, as well as dips and chili. The next recipe is for taco bowls. Coat the underside of the muffin tin with cooking spray and then insert soft tortillas in between the muffin slots so that they form a nice bowl shape.
Bake these at 350 degrees for 10 minutes and then fill them up with taco fixings like meat, cheese, lettuce, tomato, salsa, guacamole, or whatever you prefer.
Please Share These Muffin Tin Kitchen Hacks With Family and Friends 🙂
I Was Confused When He Melted Old Soda Cans. But The End Result Is An Unexpected Surprise!
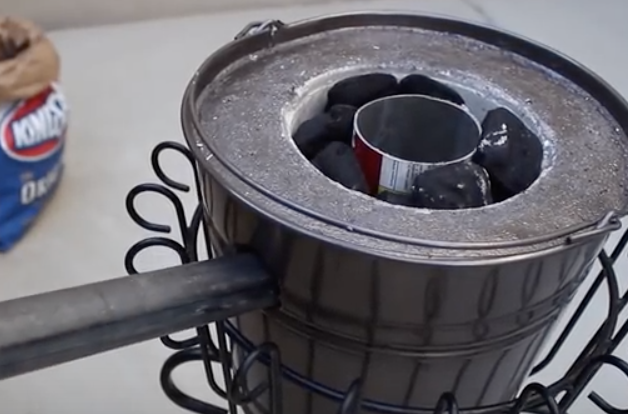
Using a mini metal foundry and charcoal briquettes you can make aluminum cans into little metal muffins. Insert a crucible, which you can make out of a steel fire extinguisher, on top of five charcoals in the foundry. This will ensure the cans melt quickly. Then place a one inch steel pipe into the air supply hole on the foundry.
To get the fire hot enough to melt cans attach a hair dryer with couplings to a PVC pipe and the steel tube. Support the blower to keep the angle into the foundry. This will keep the walls from cracking and extend the life of the unit.

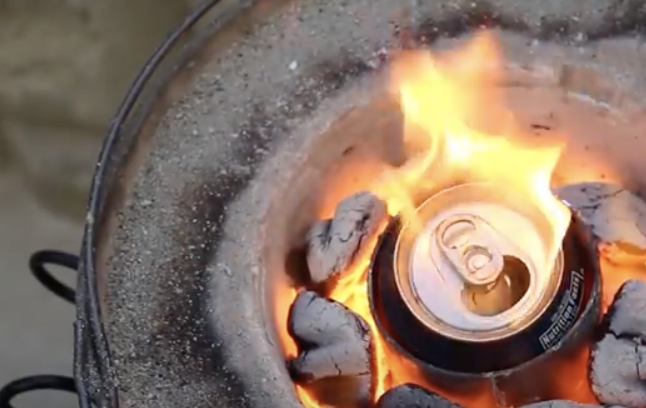
Fill the foundry with charcoal around the crucible and light the coals most efficiently with a propane blow torch. Once the coals are burning, set the hair dryer to the low setting and cover the foundry with a cover made with a can sized hole in the center.
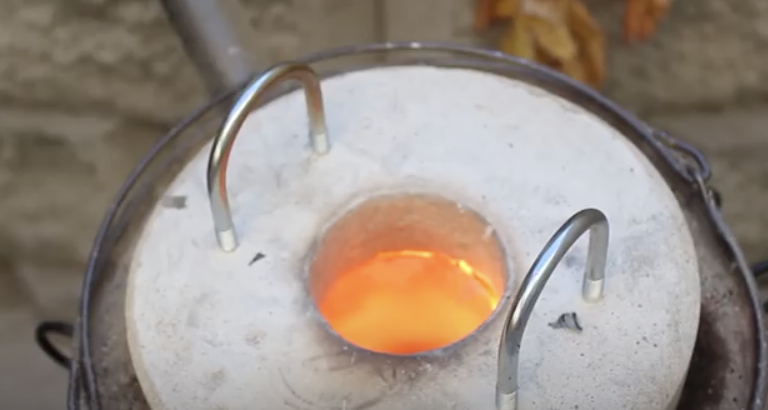
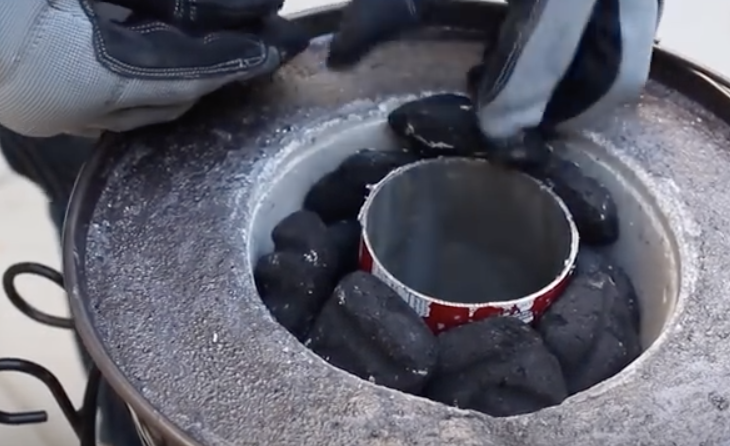
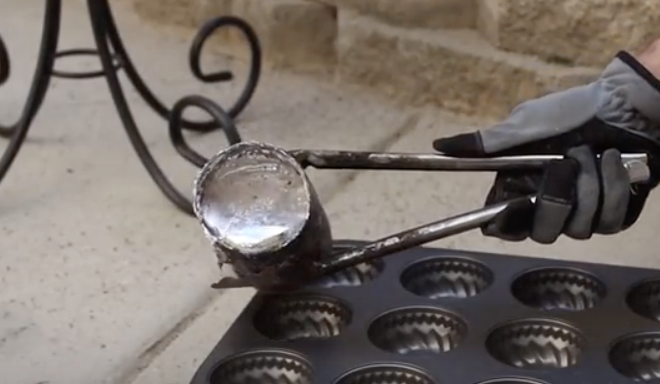
After ten minutes, the fire should be hot enough. The crucible will be glowing orange and over 1000 degrees Fahrenheit. Use steel tongs to remove the cover and place cans into the crucible and watch them liquefy in just seconds. If you crush the cans first to insert them through cover, less metal will be oxidized. It will take 38-45 cans to make 1 pound of melted aluminum.

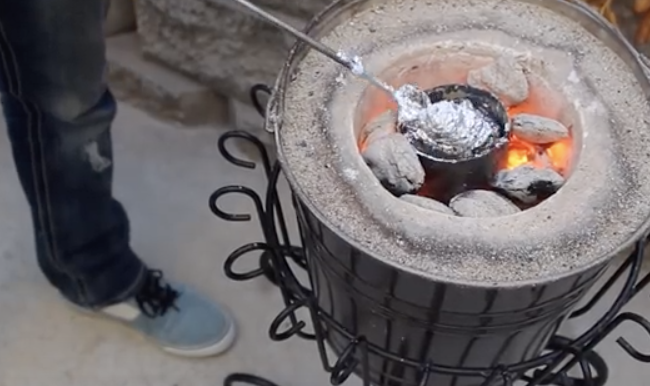
Once the container is full, carefully remove it with steel tongs. Slowly pour the liquid into a steel mold. The gunk in the container will stay behind and act as a strainer to let just the liquid through.
You can use non stick pans to make small metal ingots but be informed that the non stick will burn off in flames during the first use. Once the liquid is poured out, tip the container over and tap it onto a cement slab to remove leftovers. As long as the crucible stays clean, it can be used right away.
The aluminum will be hard after a minute or two but it is still hot enough to ignite paper on contact. At this point you can pick up the aluminum with tongs and cool it in a bucket of water. The water will instantly boil, but after about ten seconds the aluminum should be safe to touch. When you want to make something, melt some ingots for 5-10 minutes in a hot, clean crucible.
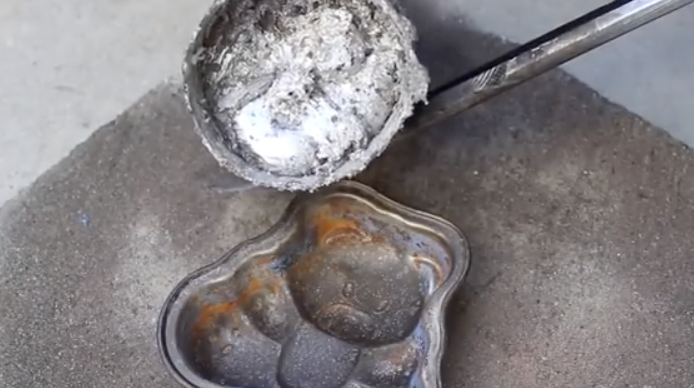
Bury your mold of choice in a five gallon bucket of sand with the opening of the mold uncovered. Pour the molten aluminum into your mold, which will likely burn in flames depending on what it’s made out of. Let the apparatus cool for ten minutes and pick up the aluminum with channel locks to see what you’ve created!
Please Share This With With Your Friends and Family! 🙂
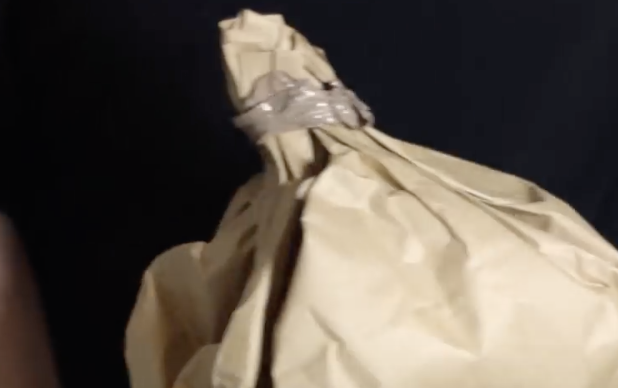
How To Keep Wasps Away Using A Brown Paper Bag. I’m So Happy I Learned THIS

Wasps are scary little flying devils that no one wants to be around. They can suddenly become aggressive and if you get stung by one it hurts like hell. If you have a problem with a bunch of wasps hanging around your house and patio areas then you have to check out this video.
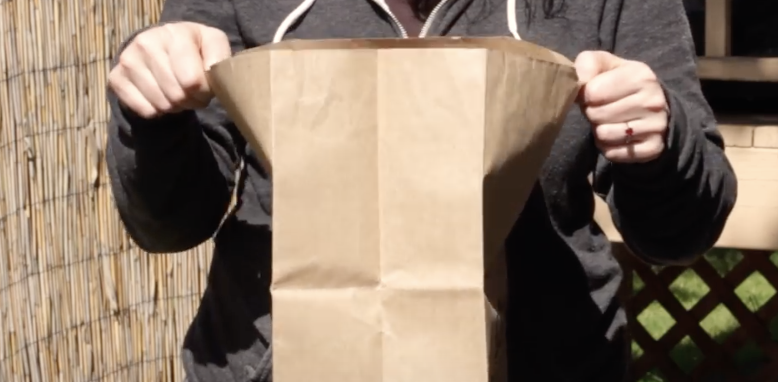
It’s from Household Hacker and it shows a really simple method for keeping wasps away from you and your family. It costs nothing and is a lot safer than using harsh, toxic, expensive chemical sprays, like Raid. All you need is a brown paper bag, some newspapers, tape or string, and a minute or two of time.

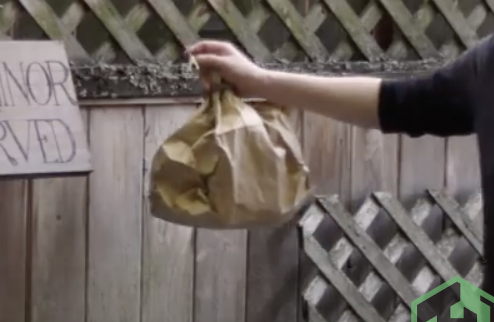
Take the brown paper bag and stuff it with some newspapers or more paper bags. Tie the top off with string, or tape it closed, then crinkle up the bag so that it resembles a wasp nest. Hang it in an area that you wish to keep wasp-free and you’re done!
Wasps will stay away from the vicinity of the fake paper bag nest because they don’t like confrontation with other wasps. When they see the bag they are tricked into thinking a lot of other wasps have claimed the area and so they won’t dare come in any closer.
It’s that simple. So the next time you notice wasps flying around and putting you on edge, don’t kill them, grab a brown paper bag instead! Life can go on for you and the pesky flying creatures peacefully.
Please Share This Wasp Trick With Family and Friends 🙂
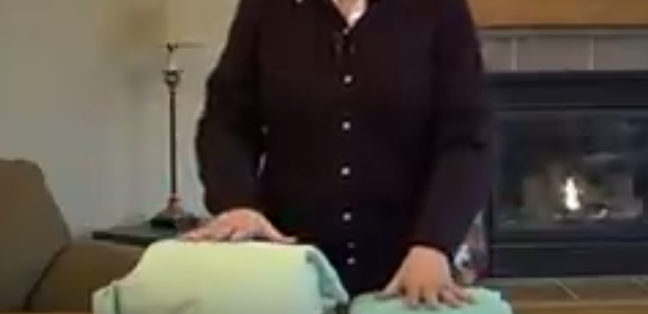
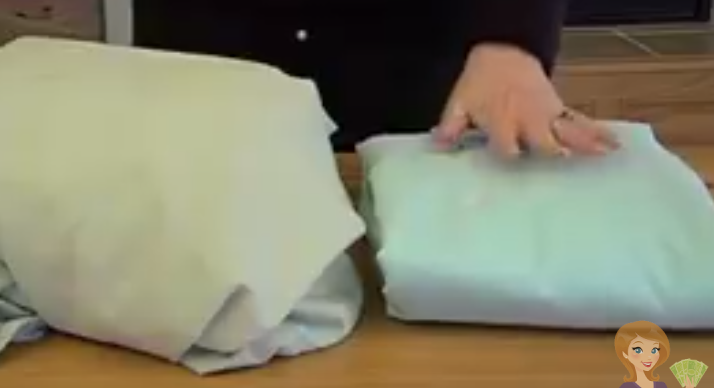
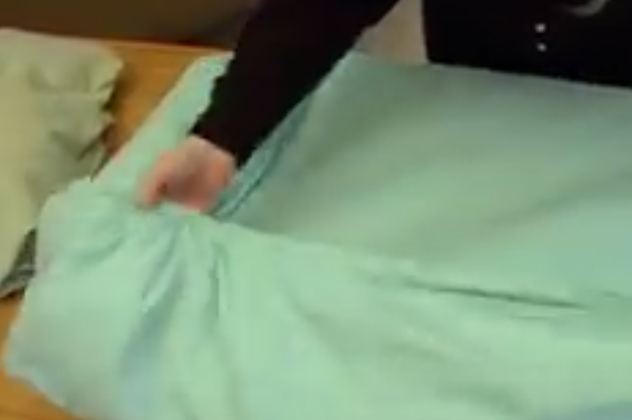
The Most Simple Way To A Fold A Fitted Sheet. How Did I Not Know This Earlier?
I don’t mind folding most laundry, because I have figured out the way that works best for my needs for each item. There is one notable exception: the dreaded fitted sheet! My experience folding most laundry consists of daydreaming while mindlessly accomplishing the task at hand.
The experience of folding a fitted sheet, on the other hand, consists of pulling my hair out after the sheet looks worse after folding it than it did before, even though I have tried ten different ways! Then I just give up and shove it in with the other sheets, whilst cursing whoever came up with the idea in the first place.
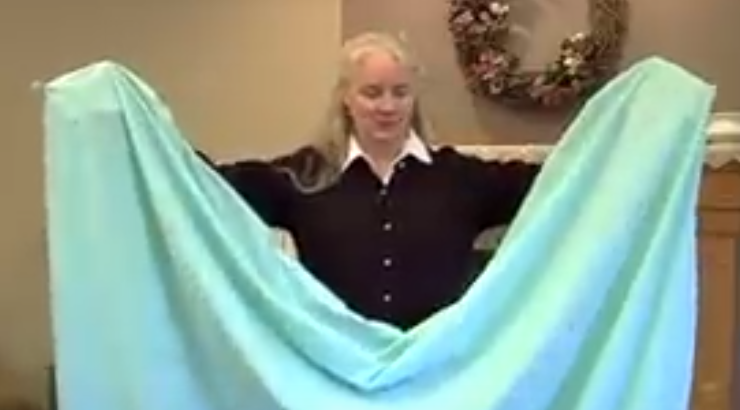
But that was before this video came along and saved my life. Or at least my hair. And maybe my sanity. If you have ever tried to fold a fitted sheet, you will benefit from the nifty trick shown in this video. It is surprisingly simple, and after a few practice runs to get it down, it becomes as easy as folding a t-shirt.

Ever since I learned this trick, I actually look forward to the fitted sheets! I relish in the feeling that I am taming a beast that is the bane of the laundry folder’s existence.

Watch the video, and in less than two minutes you will be a new person, one who smiles when you come across that fitted sheet in your laundry basket. How many tries did it take you to get it right? Do you have any other laundry tricks? Please let us know.
Please Share this trick with your friends
Apparently I’ve been Cooking Pasta Wrong This Entire Time. How Did I Not Know About This Earlier?
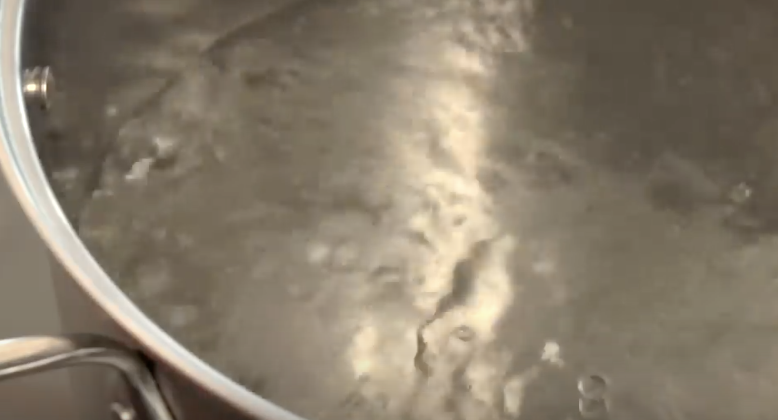
Even people who are not culinary aces know how to make pasta in the centuries old traditional manner. Most everyone starts the process off by putting a fair amount of water into a big pot. Some even add a couple of shakes of salt or a drop of olive oil to the water.
Then the pot is placed on the burner and heated until the water begins to boil, at which point the pasta is dropped into it and cooked until done. The problem with this way of cooking is that the pasta tends to stick together in mushy clumps that are unappetizing.

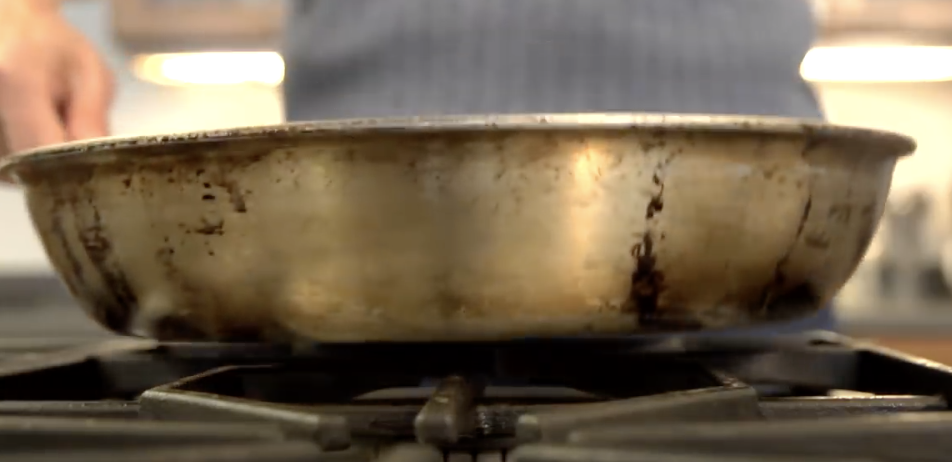
However, there is a better and more efficient way to properly whip up a delicious batch of the family favorite food. Cooking pasta with this alternative method eliminates the all too common problem of it sticking together in blobs, and instead leaves you with perfectly prepared noodles that everyone will actually want to dig into. It involves using less water and swapping out the bulky metal pot with a frying pan.
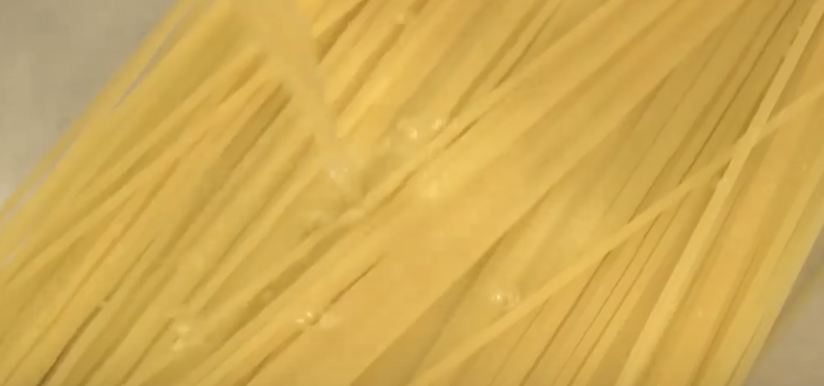
Start by placing the pasta in a large frying pan. Pour about a quart and a half of cold water in the pan and over the pasta. Turn on the stove and cook until the desired consistency is met. If you prefer al dente pasta, or a slightly firmer texture, less time is needed. You should end up with perfectly cooked pasta that lacks any clumpy stuck together pieces, because the cold water was added to the pasta before it began to cook.
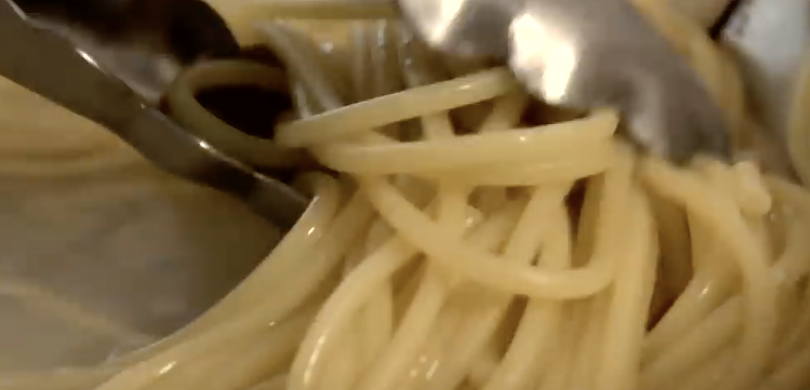
You also will have a thick, dense liquid leftover from the water than remains. This can be used to make a variety of different sauces with and gives you further use of the leftover water that most people simply throw out. Check it out and share with others so that you’ll never have to endure lumpy pasta again!

Please Share This Trick With Family and Friends
She Puts Red Lipstick Under Her Eyes. But When She’s Done It’s STUNNING!

Having dark under eye circles is a beauty issue many people can’t quite solve. The unsightly dark areas make a person look tired and worn out even if they aren’t. Some people end up spending a small fortune on different kinds of concealers, blemish sticks, and powders that promise to cover up and mask the circles. These products usually don’t work as well as we hoped for and the search for a solution carries on.

A little known beauty secret for making any unsightly dark spots on the face area disappear is to use red lipstick. It sounds odd and far fetched to rub makeup meant for your lips anywhere else but on them, but it actually works wonders.
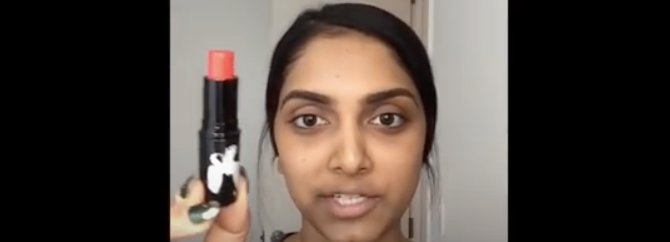
In a straightforward instructional video, Deepica Mutyala shows how to mask dark under eye circles using red lipstick in addition to your regular makeup routine. She explains that women who share her skin tone should use a bright orange-red colored lipstick to even out any dark circles and neutralize the face. Start with a makeup brush and dab it on the lipstick.
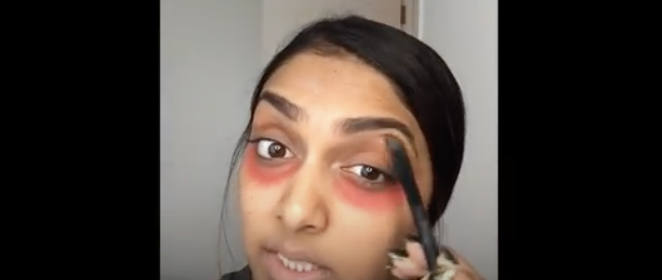
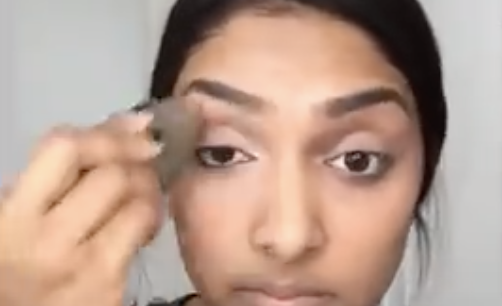
Then apply it to the eye area, underneath and around them, or anywhere else on your face that may need color correction and neutralization. Once you have evenly applied the lipstick you can begin to put on the rest of your makeup as you typically would. When you put concealer on over the red lipstick it’s best to use a beauty blender type of applicator to really make sure that it all blends well.

When finished, the lipstick and makeup you applied over it should mask the dark spots to a point where they are not at all noticeable. In comparison to normal concealers, the lipstick covers dark eye circles so well that even a slight hint of darkness won’t show through.

Try it yourself and see how well this trick works, after all there is nothing to lose, and chances are you already have a red lipstick laying around at home. For some of us out there, this beauty tip could change our appearance, and lives, for the better. So grab your red lipstick tonight, smear it on your face, and be amazed at how such an unlikely solution actually works!
Please Share This Tip With Family and Friends


