
He Skins THIS Watermelon In a Strange Way. But When He’s Done My Jaw Dropped!
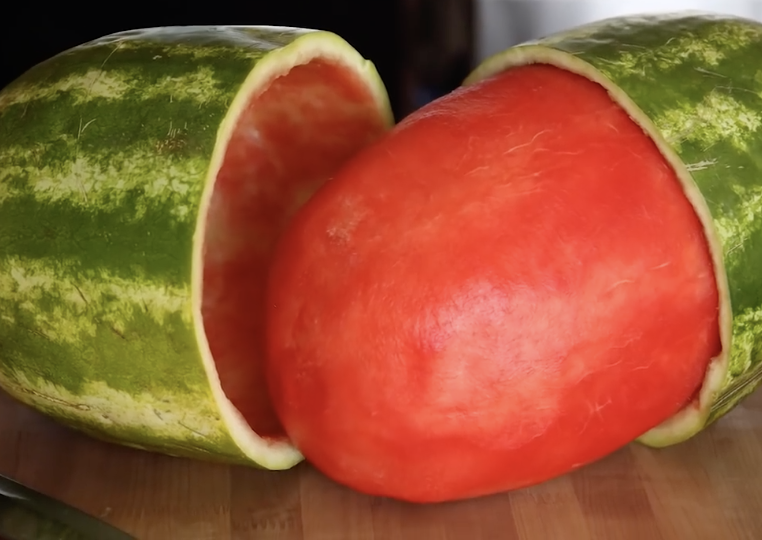
When life hands you watermelons, go to town on them and carve them up. Better yet, skin one and then stick it in another for a really cool party-melon trick! This video will show you exactly how to do just that and it’s really not that hard. It’s the perfect way to go about bringing food to a party with a little extra pizzazz.
So step up your food game, quit being so boring and bland, and give this a try. All that it requires is two watermelons that are similar in both shape and size, a sharp knife, and a brand new dish scrubbing pad. When it’s all done you’ll have the perfect snack to bring to any picnic or party.
Start with one of the watermelons and skin it by making a bunch of cuts along the sides to remove the rind and any green pieces. Basically, at this part you want to cut it in a similar fashion to the way you would cut up a pineapple.
Go over it a second time with a sharp knife to further remove any white spots and to even out the surface. In order to make it really smooth you will need to take a brand new dish scrubbing pad and sand down the fruit until it is all nice and pink.
For the second watermelon, simply cut it in half and gut it. Make sure to thoroughly remove and scrape all the pink from the insides so that the other watermelon can fit inside of it.
Now all that’s left to do is to make sure the two fit together. If they don’t, make any necessary adjustments and carve down the fruit further, then try again to see if it fits. Also, be sure to refrigerate the whole piece if you are not eating it until later.
Now you can wow friends, family, and strangers with your neat, skinned, watermelon type-egg creation. Not only is it cool to look at, it also cuts down on the mess later on. Once you slice it and eat it up there aren’t any leftover rinds to deal with. Make one today or for this next weekend!
Please Share This Watermelon Party Trick With Family and Friends
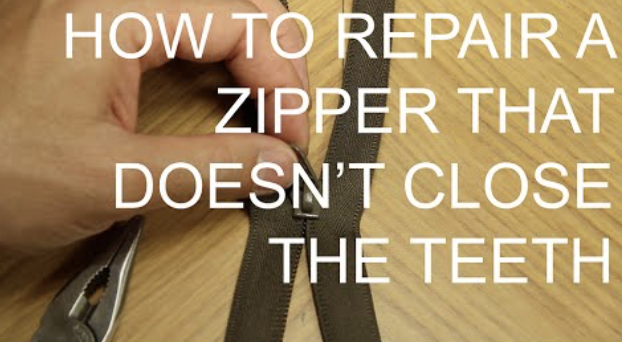
Do You Have A Broken Zipper That Just Won’t Close? This Unexpectedly Easy Trick Will Fix It Instantly!
There is nothing worse than having a zipper break on a favorite article of clothing, especially when you have gotten dressed and are ready to go out. You have no time to start figuring out what to change into and need a quick fix. Impossible? No!
Even worse than a broken zipper on clothes, (which can be changed), is a break on a suitcase as you are all packed and getting ready to leave for the airport; same nightmare with a purse or backpack. We have all had that “Oh Nooo” moment.
Zippers can be so frustrating to fix, or having them replaced is so costly…until now! The video you are about to watch is the ultimate gift, as it demonstrates a quick and simple solution for the dreaded broken zipper; a DIY that I tried on the broken zipper of my purse. It was fixed in 4 minutes!
Believe me, I am no Ms. Fixit, and I was able to do this after watching the video once, and then one more time to follow the simple steps. If you watch carefully you will be able to fix almost any broken zipper. All that was required was a needle nose pair of pliers.
It was literally like magic! I’m so happy to have found this solution to what has been an extremely annoying and costly problem. Works like a charm every time. Let your friends know about it!
Please SHARE This Trick With Family and Friends
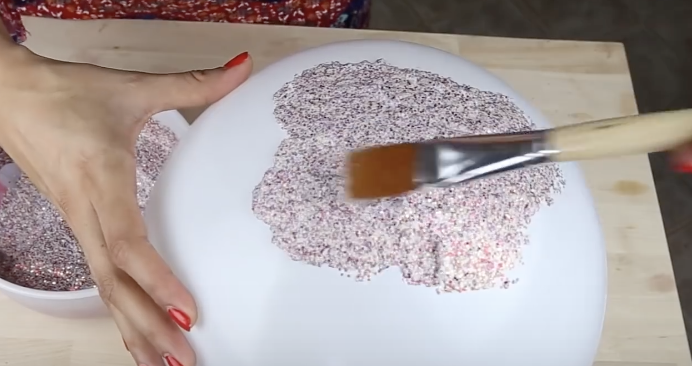
I Was Confused When She Was Painting Glitter On A Balloon. But Then She Pops It For An Unexpected Surprise!
If you are a crafty type of person who enjoys doing all sorts of do-it-yourself things then you likely have a lot of extra craft items on hand, especially glitter. Glitter is the perfect material that adds a little extra flair to practically anything.
It usually doesn’t take much, perhaps even just a pinch will do, to take something from boring to wow with the help of a little sprinkle of glitter. As such, if you have an abundance of different colored and textured glitter on hand you can easily use it up with this awesome glitter bowl project.
It’s a simple and neat craft idea that anyone can do and the perfect way to spend quality time with friends, family, and especially young children. It will get them away from TV and the internet and more involved with creating homemade things.
All this project requires is 2 cups of glitter, 1 cup of Mod Podge, a balloon, a paintbrush, and a bowl. Start by mixing up the glitter and Mod Podge together in a bowl so that they are well blended. Blow up the balloon, tie it off, and place it in the bowl with the tie facing down to give it stability and keep it in place.
Paint the glitter mixture onto the balloon surface, making sure to coat it as evenly as possible. Paint half of the balloon to make a bowl shape, or try out different designs. You can customize the bowl, such as by scalloping the edges or making it curve in uneven, distinct ways.
When you have finished painting the balloon set it aside and allow it to completely dry for at least 24 hours. When the time is up you can turn it over, pop the balloon, and remove any of the leftover rubber or latex pieces that may be sticking to the inside of the bowl .
You will be left with a soft, custom made, glittery bowl that is perfect for use as a catch-all. These glitter bowls are not the most durable or strongest bowls but they can hold a variety of little things. You can use them in the bathroom to hold hair ties and clips or whatnot.
They come in handy when placed in a location where things tend to accumulate, such as near the sink or an entrance. They make great holders for knick knacks and spare change as well. Alternatively, you can stretch one of them over an existing, harder bowl to give it a new and updated look.
There are many more ideas and uses for these neat and easy glitter bowls, and maybe you have the perfect use in mind for them. Check out the tutorial to see exactly how it is done and try it yourself!
Please Share This DIY Project With Family and Friends 🙂
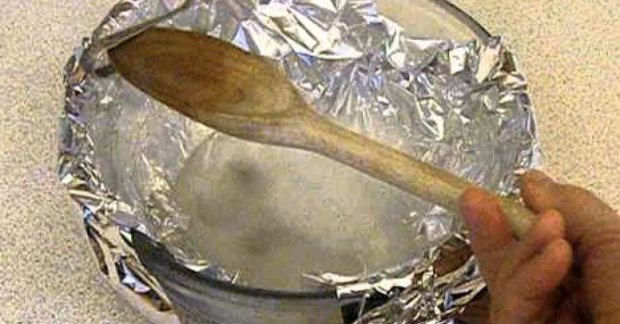
An Unexpected and Easy Way To Make Tarnished and Grimy Jewelry Look Surprisingly New With Stuff Already In Your Kitchen!
If you wear a lot of silver jewelry, that you constantly find becoming tarnished and unwearable, you will want to watch the following video. I know I don’t have the time to constantly run to the jeweler to have my stuff cleaned. Not only does the following alternative work for cleaning silver jewelry, but for any silver serving items or home accessories that you suddenly realize are tarnished.
What is great about this remedy is that it requires very little elbow grease. To clean your silver at home, all that is required are the following items: a glass bowl, aluminum foil, salt, baking soda, boiling water and dish detergent. For proportions of each item just watch this easy to follow DIY.
There is a miraculous chemical reaction that occurs within 10 minutes of soaking in the aluminum covered bowl; the bicarbonate of soda and the foil chemically attract to loosen the grime from the silver! Watch how easily your silver shines as it is removed from the liquid mixture and dried off with a cloth or paper towel.
An old toothbrush can be used to get into any small crevices. I tried this right after watching this video and Voila! It really works! It actually works safely for all metals.
Please SHARE this with family and friends
He Pours Boiling Hot Water On His Dented Bumper. Now Watch What Happens To The Dent!
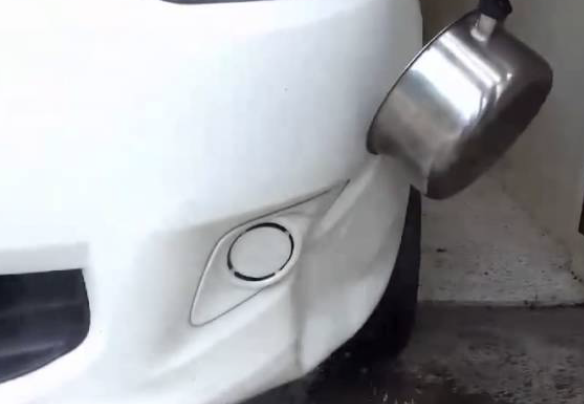
Who wouldn’t like to save on the expense of bringing your car to a body shop when your bumper has been dented without any damage to the paint. There are plenty of auto body repairs that you can take care of yourself, but the DIY approach you are about to watch in this video is so simple with incredible results!
Using a pail or teapot of boiling water, you will see how miraculously this guy fixes a dent to perfection. Probably using rubber gloves for the safety of your hands would be advisable. He pours a good amount of hot water on the outside of dent. I’m watching, and can’t imagine where this is going!
He then reaches into the wheel well while the urethane is still hot and malleable, and pushes the bumper out to it’s original shape (This is best done on newer cars that have urethane rather than the metal on much older cars). It just pops right out, looking exactly as it did before the damage.
How does that magic occur? The heat causes the plastic of the bumper to expand, allowing for flexibility that enables you to pop it back into shape. Pouring a pot of cold water on it once it’s been reshaped will quickly cool it down, shrinking the plastic back into place and setting it in it’s repaired position.
Please Share This With Your Family and Friends
Apparently This Is What Happens When You Eat Garlic On An Empty Stomach In The Morning!
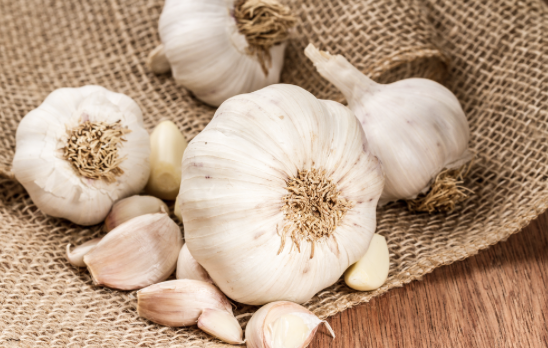
If you want to ward off evil spirits and vampires, hang a clove of garlic around your neck or on the door of your house. Ancient wisdom, myths, and old wives tales all tell us that by doing so it will help to keep such dark forces at bay.
While that may or may not be the case, garlic is regarded as a well known powerhouse of a food that can help keep us healthy. The pungent bulbs provide our bodies with numerous health benefits when eaten and ingested or used as a topical solution.
If you eat garlic first thing in the morning, before breakfast and on an empty stomach, you can help strengthen and heal yourself. The following are some of the many health benefits that your body may naturally derive from it. Firstly, it is thought to be an anti-cancer food.
It’s recognized by the National Cancer Institute as potentially having anticancer properties, although more studies are needed to determine how and why. Its anti-cancer link may be due to the fact that it helps relieve oxidative stress. This means its natural antioxidant properties aid our bodies in removing damage causing free radicals and thus provide protection against them.
Garlic also reduces both blood pressure and LDL cholesterol levels. Studies have shown it lowers the “bad” type of cholesterol that puts people at increased risk for heart attacks. Which leads us the fact that it helps prevent atherosclerosis, the narrowing and hardening of arteries that decreases blood flow and leads to blood clots and heart attacks.
In a similar ‘vein’ garlic promotes overall circulatory health because it acts as a natural blood thinner, making it easier for our hearts to pump blood, and reduces the risk of clots.
Furthermore, garlic helps stabilize blood sugar. Studies show it increases the amount of insulin available in people with diabetes and thus helps regulate the amount of glucose in the blood. Other associated benefits are that it improves impotence, prevents yeast infections, helps our bodies absorb minerals, cleans and reduces fatty build up in the liver, acts as a natural antibiotic, and protects against osteoarthritis.
Oh yeah, and garlic is excellent at boosting your immune system because it’s packed with nutrients like fiber, Vitamins C and B6, potassium, and calcium. If you ever have a cold skip the meds and instead pop some garlic since it has been proven to help reduce the severity of symptoms associated with the flu and common cold.
There you have it, some of the many ways that garlic can benefit your body, health and mind. Many people find that eating it raw is nearly impossible to stomach, since it’s so potent, and that cooking it makes it much more palatable and brings out the best flavors it has to offer. Below is a recipe for oven roasted garlic. Now you have no excuse to not eat more of this super-food!
Preheat the oven to 400 degrees. Take a bulb of garlic and remove the dried, papery outer skin. Carefully cut off the top of the bulb with a sharp knife. Take a piece of tin foil and lay it flat, place an equal sized piece of parchment paper directly on top of the foil, and finally place the garlic atop the parchment paper.
Drizzle the garlic bulbs with olive oil and wrap them up neatly and tightly in the foil. Place them on a pan in the oven and roast for 1 hour. Remove, unwrap, and allow the garlic to cool. Gently squeeze the garlic bulbs to remove the cloves and serve or use them right away. You may also place them in a covered storage container and keep them for a few days in the refrigerator.
Please Share This With Your Family and Friends


