
The Way This Guy Cleans His Pots Is Totally Brilliant. How Did I Not Know About This Earlier?
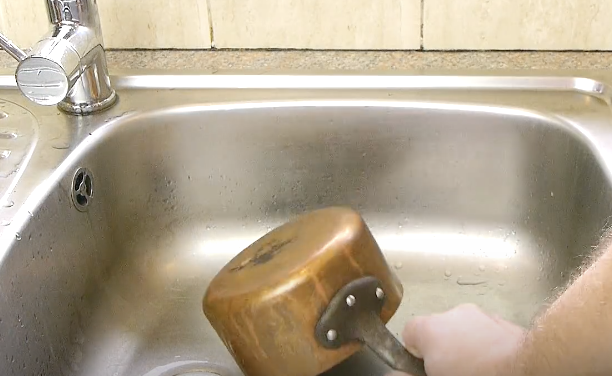
Got dirty dishes? Clean them up! Forget the times when you scrubbed and washed dirty pots and pans that were caked with crusty cooked on food and grease. The stubborn and hard to clean messes won’t drive you insane anymore. YouTube’s DaveHax shows us how to easily clean dirty, old, tarnished copper pots and pans with a simple and effective method. Plus, it’s cheap and can be done with just two items that you may already have on hand or can pick up at the store for only a few dollars!
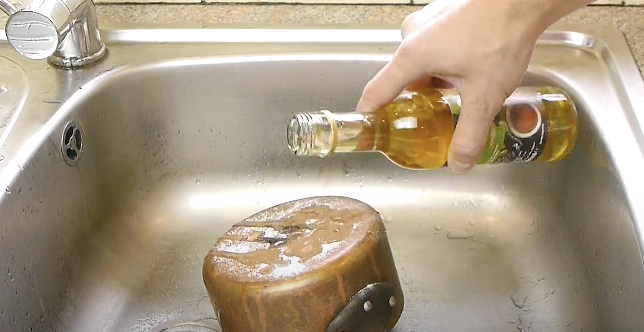
The two magic ingredients to this scrub are white wine vinegar and table salt. Begin by placing a dirty pan upside down in the sink and coat it with salt. Pour some white wine vinegar over it, but try not to wash off the salt, and if you do wash off too much just add more salt. Allow it to sit for at least 15-20 seconds and you should see it already starting to work, breaking through the dirtiness, and brighter cleaner spots will begin to appear.
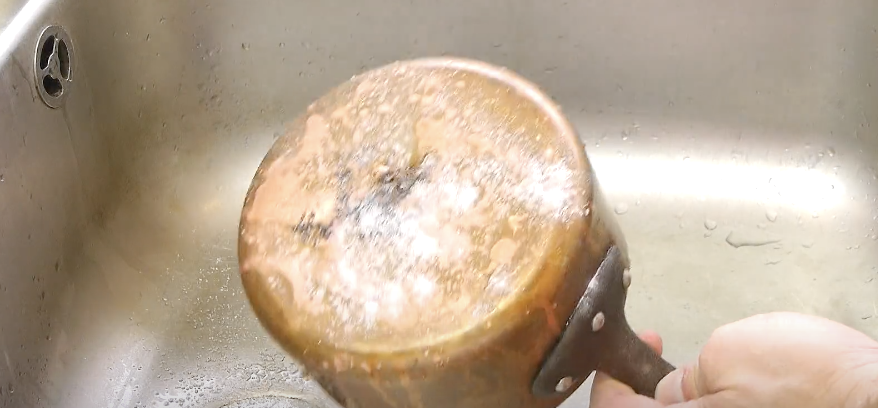
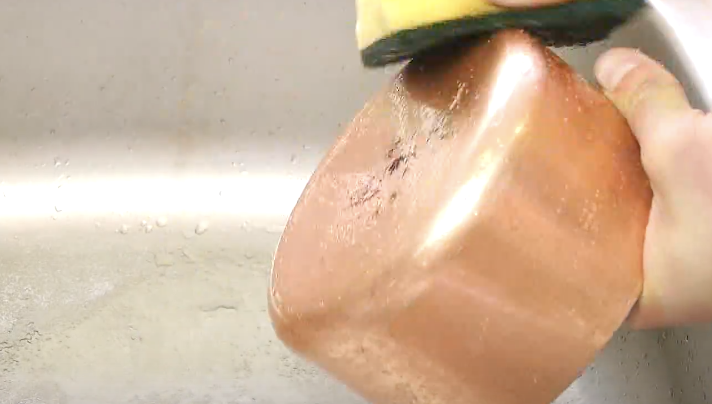
Next, pour some vinegar on a scrubbing sponge and scour the pot all around the bottom and sides. In a few seconds the grimy tarnish will rub off. If you need to add more salt and vinegar, go right ahead, and keep scrubbing until it is completely clean. When it looks like new again you can rinse with water and be done!
Please SHARE With Family and Friends
He Weirdly Starts Rubbing This Potato All Over His Grill. But The Reason Is Brilliant!

Now grilling season just heating up it’s the perfect time to get some bbq life hacks. Food just seems to taste better when it’s barbecued to a perfect smoky finish right on a hot grill. One downside to cooking directly on the grate is that certain foods tend to stick to it. Often, a slab of juicy steak will adhere to the hot metal and dislodging it can be a pain in the rear. Even worse is when it’s burgers that stubbornly stick to it and attempting to move them causes the meat to fall apart.
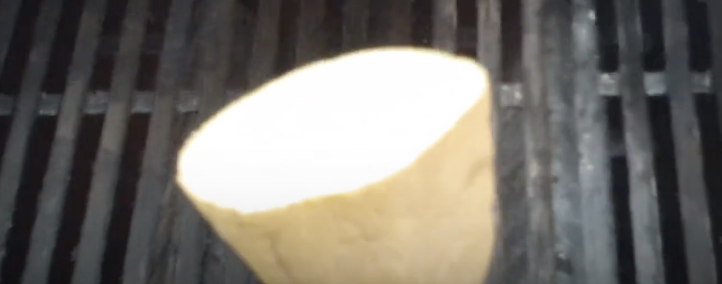
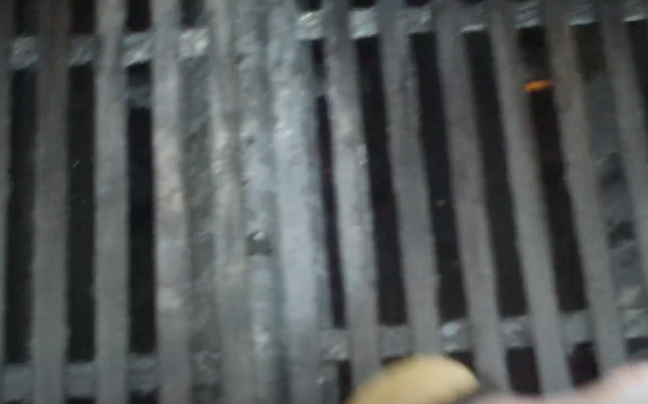
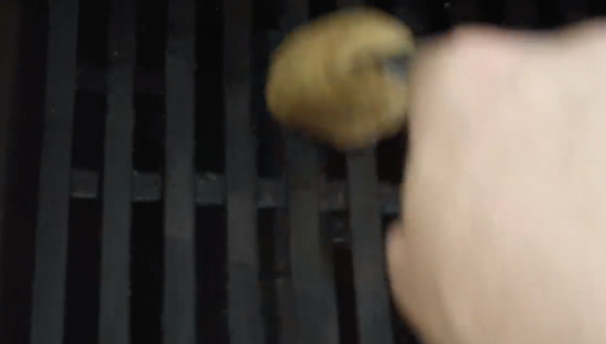
Thankfully, there is a way to prevent the frustrating grill-stick problem, by treating your grill surface and making it non-stick. All you need is a potato, a fork, and a grill. Start by heating up the grill until it’s nice and hot. Then cut the potato in half and stab one of the halves with a fork so that the white fleshy side faces out. Place the cut open side of the potato down on the hot grill and rub it back and forth across the entire area. You should hear a pleasing sizzle sound and only need to go over the metal grate several times to create a non-stick coating.
How does this work? The starch in the potato gets pulled out when heated up and transferred to the hot metal surface, where it forms a non-stick barrier, perfect for grilling on. Overall it’s an effective, easy, non-toxic, and non-messy way to quickly prepare your grill and stop food from sticking on. Check out the short video for more information and make sure to share this tip with friends and family, enjoy!
Please SHARE With Family and Friends
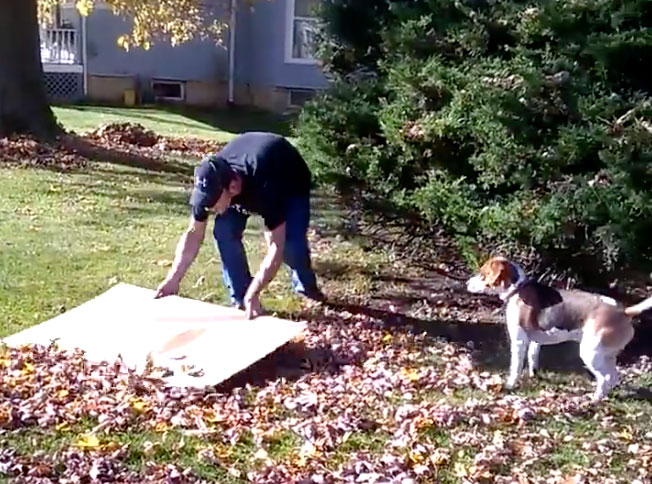
An Awesome and Time Saving Leaf Raking Hack Everyone Should Know This Autumn.
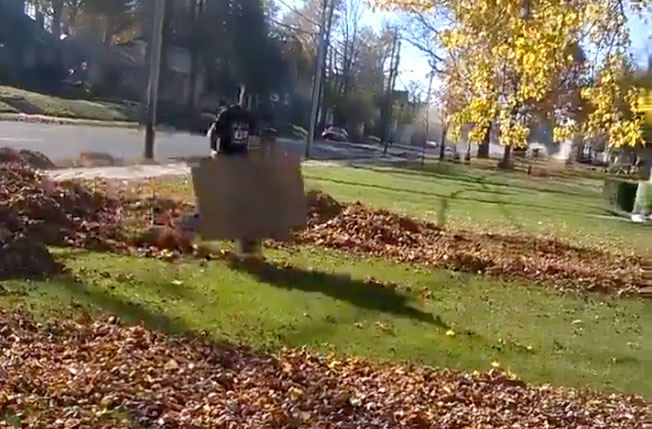
image via – facebook.com
I don’t know about you, but Fall is one of my favorite seasons, coming in a close second to Springtime. The transition from the heat of the Summer to the crisp air of a beautiful autumn day, with the awesome color changes of the leaves, is simply magical. Before we know it, all that uncomfortable heat and humidity from summer will dissipate into a nice cool and pleasant fall vibe. The air begins to smell so fresh and autumn-like as the leaves begin to slowly change from green to yellow, orange and red revealing a stunning mix of beautiful hues and saturations as nature goes through it’s natural cycles.

As these magnificent leaves flutter to the ground giving off an earthy intoxicating smell, we get to walk through their crunchy texture, so reminiscent of the best days of childhood. Unfortunately, as adult homeowners we can’t just let the leaves stay on our lawns and driveways waiting for the cover of snow. We have to deal with the drudgery of clearing them week by week, only having more fall, until the cycle ends.

Some people still ‘take to the rake’ in order to remove leaves, making the back breaking effort that takes hours. Still others have gone to the expense of purchasing a leaf blower as an alternative. If you find neither of these choices appealing, the following Video Below that you are about to watch is totally for you.
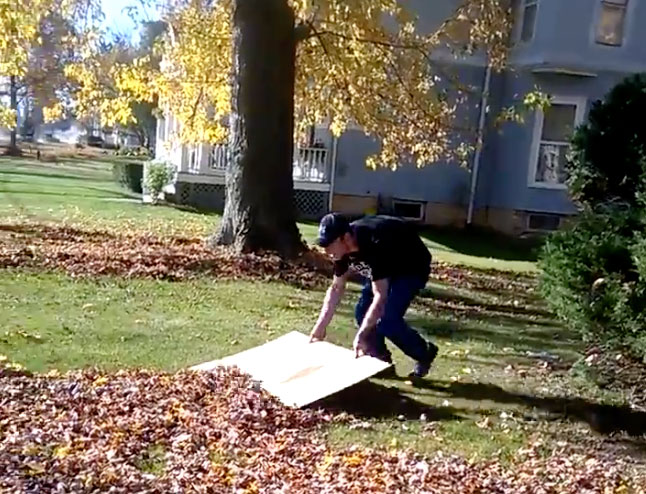
I’m always amazed that simple and clever solutions to problems are out there for so many things, and through the ease of the internet we get to see things that never occurred to us. In the following entertaining footage you will watch a guy who came up with a technique that gets rid of huge sections of leaves on his lawn quickly and easily, while he still gets some healthy exercise, and has many more hours to spend on his weekend having fun!
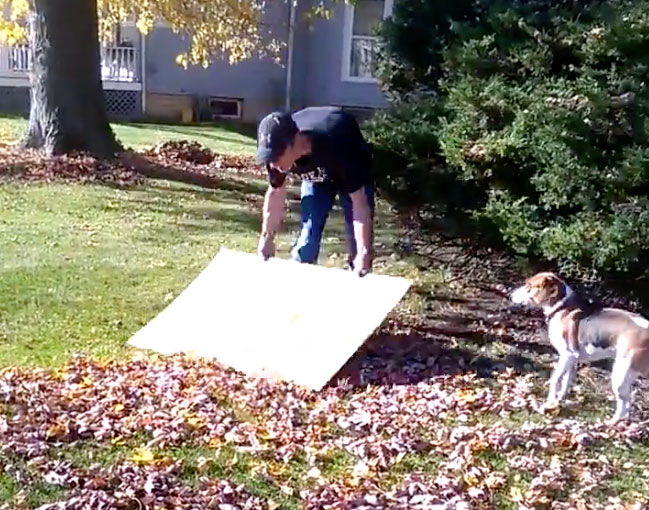
It’s no joke, ingenious and laugh out loud funny…one of those things that begs the question, “Why didn’t I ever think of that?” Note: if video doesn’t play on your tablet or phone turn it horizontal and it will begin to play..
Watch the video below for the full leaf raking life hack tutorial:
Please SHARE this UNIQUE Leaf Raking Hack With Your Family and Friends 🙂
Husband Kept This Stump On Their Lawn For 2 Weeks. Then Shows His Awesome Enchanted Fairy House!
image via – facebook.com
It’s always sad when an old tree dies on my property, that needs to be cut down…and the left-over stump can be an eyesore. Mimi and her husband faced this unsightly stump right in their front yard, after her husband cut down the dead tree. The video you are about to watch below, was posted by Mimi, who came up with the most creative and charming idea for that unsightly stump. Luckily her husband is handy with a saw and woodworking, and was willing to implement Mimi’s adorable idea! He was about to turn this old stump into something awesome.
She takes us through the steps and exact inexpensive materials, that were purchased at Lowe’s hardware and the Dollar Store, that went into their creation. With a little bit of imagination, some amazing hand skills and a clear vision they pulled off one of the cutest and adorable little fairy houses I have ever seen.
Together they transformed an ugly stump into an inviting and adorable “Gnome Tree Stump House”, that adorns their front yard, and has incredible detail. It gives them pleasure each day and has been enjoyed by friends and neighbors alike. I really want one of these at my house but I’m not sure if they are doing this as a business or just as a hobby for fun!
Watch the video below for the full story:
Please SHARE This With Family and Friends
His Neighbors Were Pissed When He Dug This Hole In His Yard. But What He Transforms It Into WOW!

image via – youtube.com
In terms of DIY home improvement projects, this one takes the cake. It’s a concept that’s catching on fast all across America and many a homeowner would love having one of these in their own backyard. It’s an underground room built right into the Earth so that when completed it’s hardly even visible.
You can use the extra space for whatever you’d like and turn it into an underground shelter or a storage area for food and wine, the possibilities are endless. Wayne Martin constructed one himself in his backyard and recorded each stage of the process so that anyone could see what it takes to make one.
It takes a lot of muscle, hard work, and it’s definitely not for beginners but the challenging project can be highly rewarding and last for years, if it’s done right. Here’s what he did…
First, he bought a 20 foot shipping container for a couple thousand dollars and sealed off the doors before installing a smaller, inward swinging door on one end. Next, he dug a large hole in the ground that was big enough for the container to sit in and left enough space all around it for adding in extra supports later on.
The next step he took was hiring a septic company to safely do the heavy moving and placement of the container down into the hole. With the box in place, he moved on to the entry way and put in concrete steps that gave him access to the underground door.
After a little more dirt removal it was time to reinforce the underground room. Even though the container is made out of metal, it’s very thin sheet metal, so it’s not as sturdy as most people think. If he were to simply pile on dirt it’d buckle under the weight and over time the entire thing would rust through and collapse.
That’s why Wayne reinforced the container by building a separate framework around it, upon which he placed heavy duty corrugated metal across the top. To strengthen the entry opening, he welded re-bar supports around the rim before putting down a row of cinder blocks and filled them with concrete.
Wayne also had to make the space livable and to ensure proper ventilation he installed two 12 inch air vents at each end. Several smaller PVC pipes were also installed to run wires and utilities through. With all that out of the way, the project was ready to be covered with 6 inches of poured concrete.
Then he finished the steps and filled the area back in with quality dirt so that he could eventually plant some trees and plants on top of it. There were also a couple of cosmetic and safety-related things left to do, like stuccoing the rock walls near the door and adding a handrail or some type of barrier around the entrance edges, but the major building was done.
All he had left to do was build whatever he wanted inside and he chose to turn it into a wine cellar with plenty of storage space, racks, wood floors, and overhead lighting. By the time he was finished the only visible part remaining was the entryway into the ground.
If a person were to glance over the area they’d never know what was in his backyard! The final cost of Wayne’s wine cellar project ended up being $12,500 for materials and hiring a couple of outside contractors. However, he did the majority of the work himself and used his own tractor, so that kept the cost down a lot.
Have you ever seen anything like this? Let us know!
Please Share This With Your Family and Friends
I Thought It Was Strange When He Put A Sock Filled With Cat Litter In His Car. But The Reason Is Brilliant!
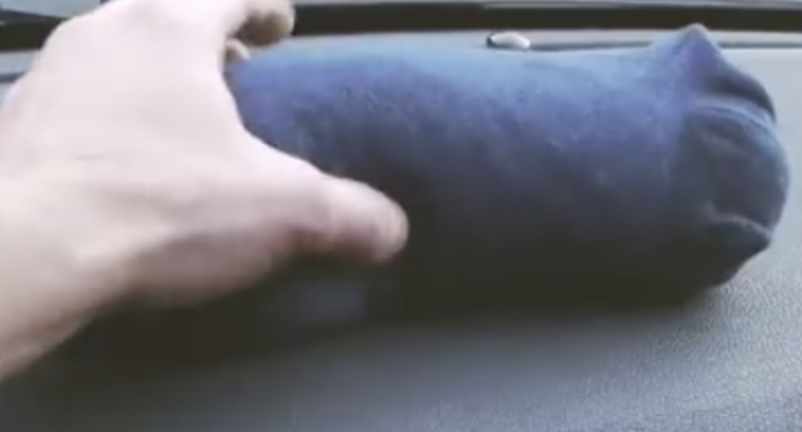
image via – youtube.com
As Autumn begins, we enjoy the temperate weather and the beautiful colors of the changing leaves. It’s time for some back to school shopping, some cool weather, hoodies, bonfires and of course pumpkin spice. However, before we know it, freezing cold mornings will be upon us. There is nothing more frustrating, than running late to get the kids to school or getting off to work, because you can’t move until your window’s defrost!
This maddening wait in the freezing cold can be remedied, by this ingenious and simple solution offered in the video you are about to watch. Would you believe that a pair of athletic socks and some cat litter is the answer to your woes?! It’s hard to believe but this little life hack is like a magic bullet for defrosting and dehumidifying that never ending foggy windshield.
Watch to see how he puts together the socks and a particular kind of cat litter. No fuss, no muss. He leaves this great little device in the car until winter’s end. Getting going in the morning, or for that matter anytime of day during the freezing days of winter, will no longer be hampered by frozen windows. Watch carefully to see how it’s done, and why it works!
Watch the video below for the full tutorial:
Please Share This Awesome Tip With Family and Friends


