
After Learning THIS Simple Trick I Won’t Prepare My Sweet Potatoes The Same Way Ever Again!

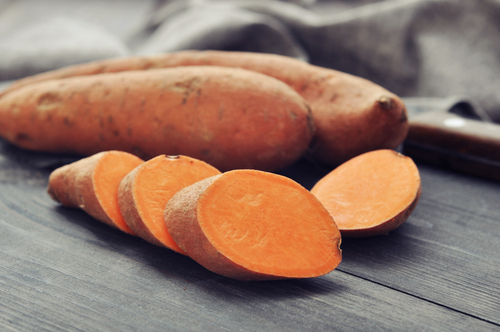
One of the most popular and readily available food items found in the produce section of any grocery store is the potato. There are often several different types that stores carry and one of the tastiest, most healthy varieties is the yam, aka a sweet potato. Sweet potatoes are exactly as their name implies; sweet!
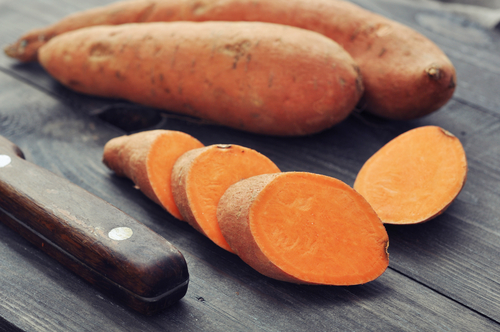
The orange fleshed root vegetables are considered a superfood because they’re packed full of the vitamins and nutrients that our bodies need, such as vitamins A, C, E, and B-6, as well as beta carotene, fiber, potassium, iron, manganese, and copper.
The antioxidants found in them can help prevent cancer and heart disease, strengthen your immune system, and even slow aging. Plus, they’re fat free and cholesterol free, if that doesn’t describe a super food, nothing else will!

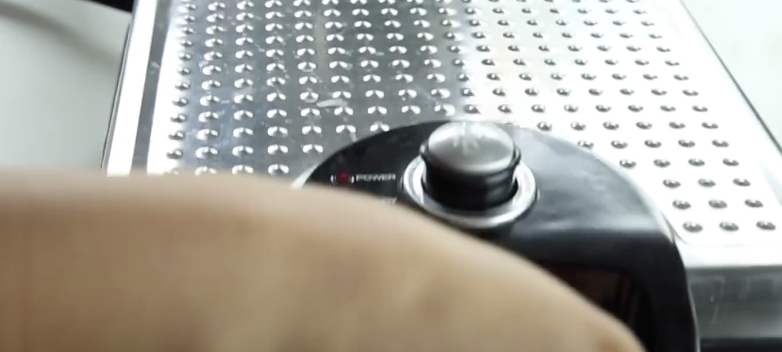
The humble vegetables are easy to cook with and can be prepared in all sorts of different ways. Most people prefer them mashed, baked, boiled. hashed, steamed, fried, or microwaved. Zapping them in the microwave is easily the quickest way to cook them because all you have to do is poke a few holes in the skin, select the preset “potato” button and a few minutes later they’re done.

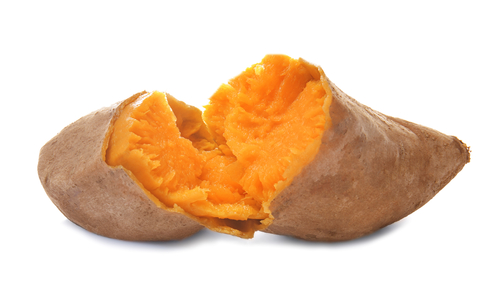
While that’s the fastest way to cook them, it’s definitely not the tastiest, the skin and flesh turn rubbery and becomes kind of mealy. It’s just not the same as a slow cooked, oven baked potato. Instead of microwaving and ruining the taste and texture, try cooking them in a slow cooker.

In the end it’s just as easy, but the potatoes will turn out much more delicious and you can prepare a bunch at once. All you need to do is wash and scrub a few sweet potatoes, trim off any bad spots, and then toss them into a slow cooker with a little water.

For 3 large sweet potatoes use about ½ a cup of water and for a larger batch adjust the water up to about ¾ cup or more. You want just enough water to steam them and there’s no need to poke them with a fork for this recipe. Cook on high for about 2-2 ½ hours for a small batch and 3-3 ½ for a larger amount.

While the potatoes are cooking you’re free to go about your day and when you get back they’ll be all done. The insides will be evenly cooked, fluffy, and tender, which is perfect for this sweet potato cookie recipe that calls for cooked potatoes. The video covers how to make them and a list of ingredients and directions are also listed below:

2 eggs ½ tablespoon nutmeg
2 ¾ cup flour 1 tablespoon baking powder
1 ½ cup apple sauce 1 tablespoon ground cinnamon
1 cup butter 1 tablespoon vanilla extract
1 cup cooked, peeled sweet potato

In a large bowl mix the eggs, vanilla extract, butter, apple sauce, and sweet potatoes together. In a separate bowl place the dry ingredients and combine the flour, baking powder, cinnamon, and nutmeg.

Slowly add the two mixtures together, stirring and mixing as you go, until they are well blended. Spoon the dough onto a baking sheet, pop it into a pre-heated 350 degree oven, and cook for 15-20 minutes. Let them cool before eating and enjoy!

If you use the practically effortless slow cooking method your potatoes will be all set and ready to be added to the cookie recipe, saving you time and energy. Pass this tip along and help add a little more convenience and healthy eating options to the lives of your friends and family!
Please Share This Recipe With Family and Friends 🙂
Apparently I’ve Been Making Grilled Cheese Wrong My Entire Life. I Had No Idea.
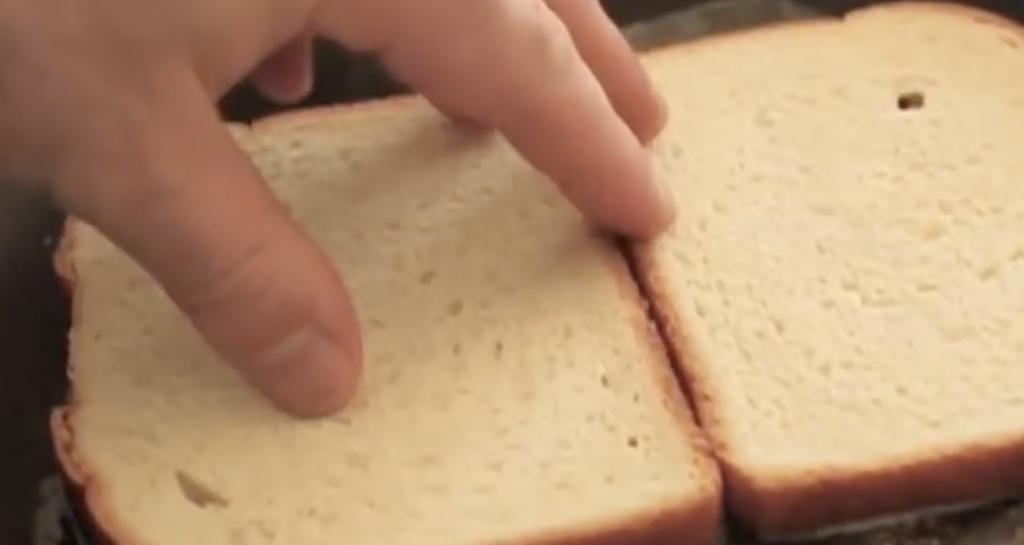
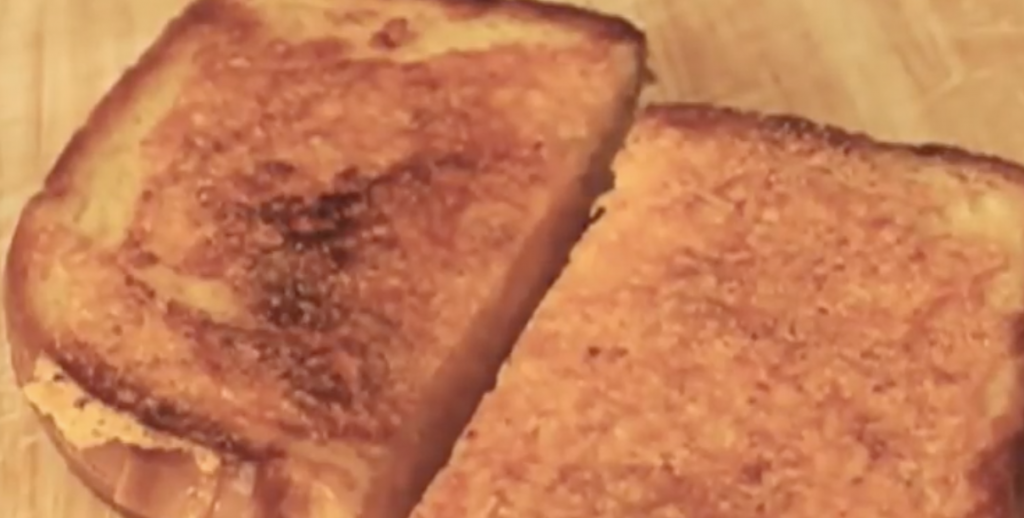
If you’re going to take the time to make a grilled cheese sandwich, you’ve got to do it right or it’s just not worth the effort. You can’t skimp on the cheese or butter and you have to use plain old white bread, it’s the standard and always has been. While those basic ingredients should stay the same, the method of cooking and assembly can change if it leads to a better sandwich overall.
The guy in this Food Wishes video has managed to take the art of grilled cheese making to the next level with his inside-out grilled cheese sandwich creation. The recipe remains simple and traditional, but the outcome is on the next level. This tasty looking sandwich comes out crispy, crunchy, and cheesy on the outside, with melted gooey cheese on the inside. It’s the perfect homemade snack that will hit the spot every single time and it’s super easy to make, here’s how:
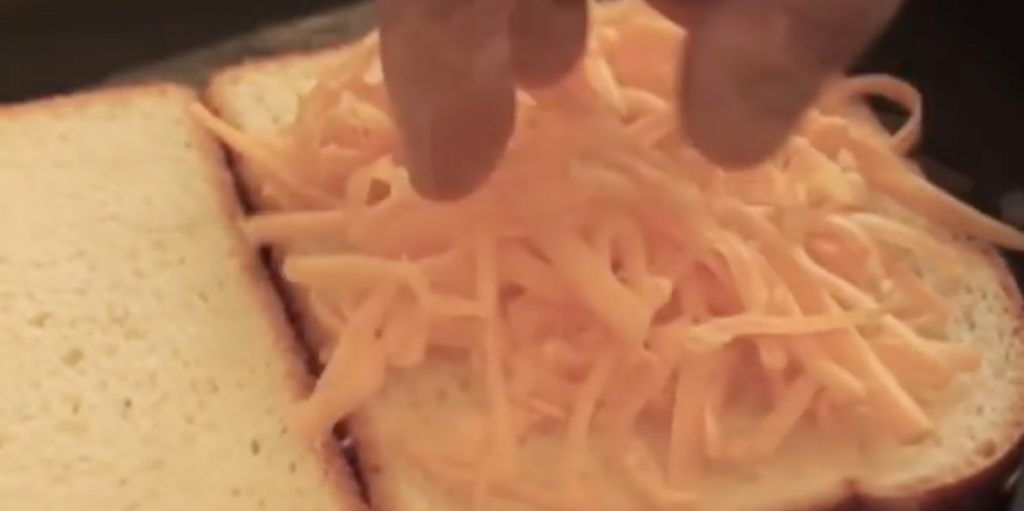
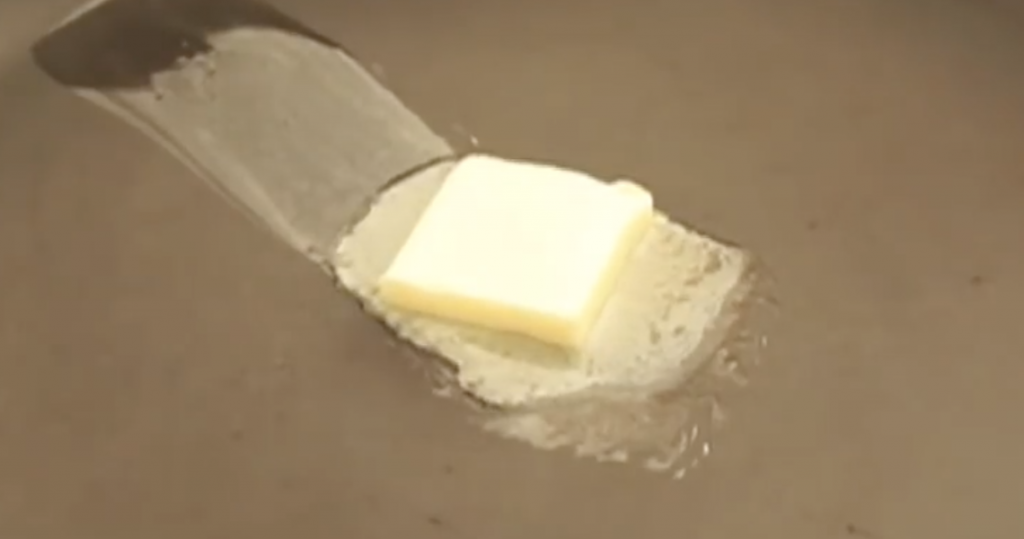
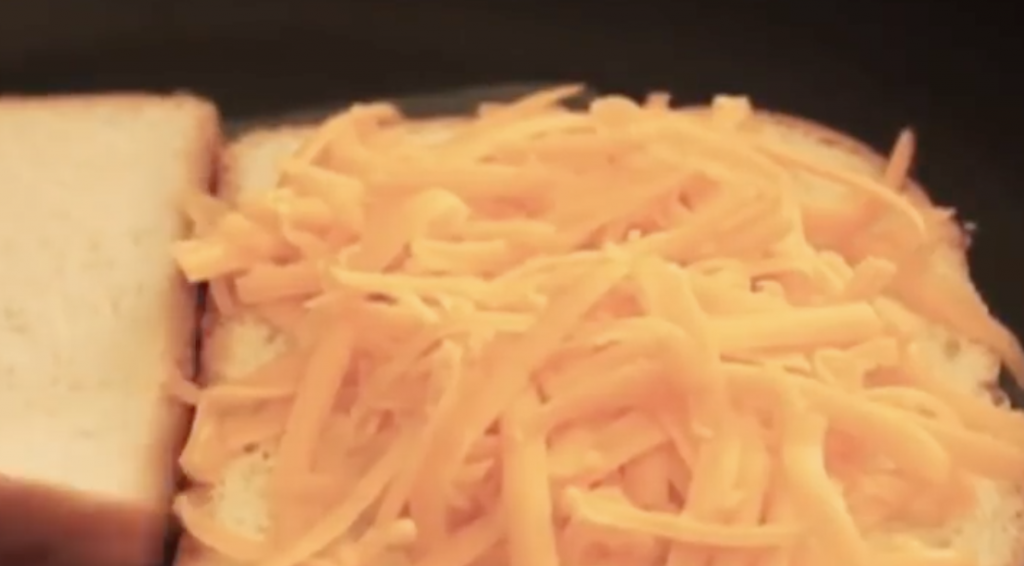
For ingredients all that you need is real butter, white bread, and extra sharp cheddar cheese. In a non-stick pan melt a pad of butter. Place two slices of white bread down in the pan and top one with extra-sharp cheddar cheese. Flip the plain slice of bread over and onto the cheesy one and then top the warm buttery side with another layer of cheddar cheese. Add just a little bit more butter to the pan and then flip the stack completely over so that the cheese is face down in the butter.
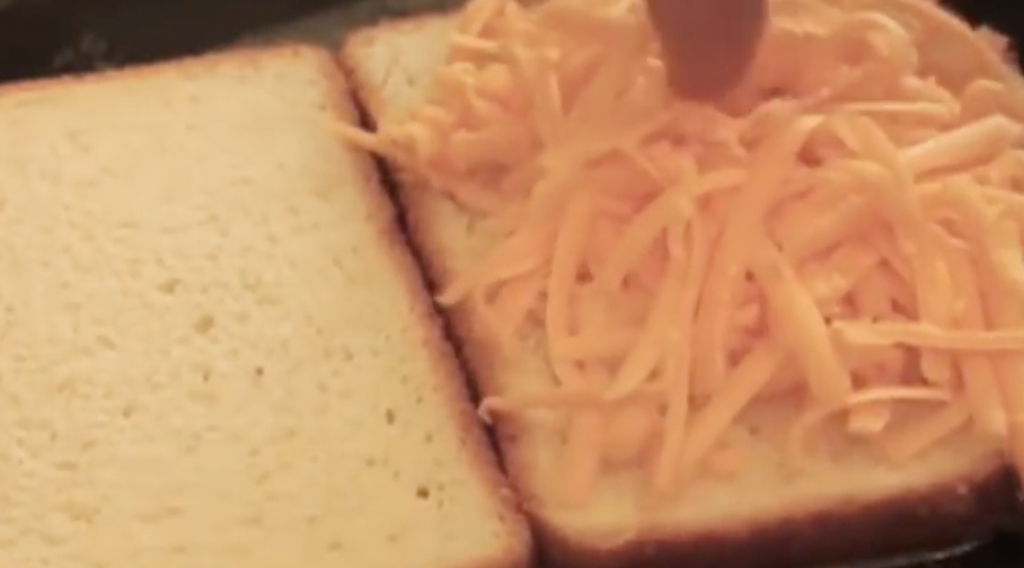
Take some more cheddar cheese and place it on the remaining side. Adjust the heat so that the bread slowly toasts and becomes crispy, medium-low should do the job, and be careful not to burn it. Flip it over once again after about 3-4 minutes, or when the bottom cheese has become caramelized, and crisp up the other side. Now sit back, relax, eat, and enjoy your ultimate grilled cheese sandwich.
After watching this will you try this new grilled cheese technique? Let us know in the comments below
Please SHARE This Awesome Grilled Cheese Recipe With Family and Friends 🙂
She Slices An X Into Some Onions Then Bakes Them. When She’s Done YUM!
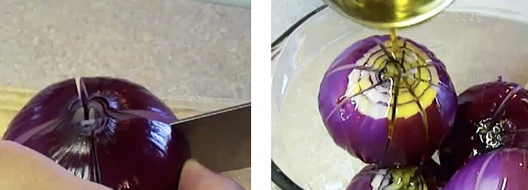
I’m sure you have heard the saying, PRESENTATION IS EVERYTHING…well it may not be everything when it comes to food, but it certainly helps. YouTuber yoyomax shows us how presentation added to a simple and delicious recipe for onions, illustrates how much a beautiful presentation can add to food..
In the video you are about to watch below, she demonstrates a way of cutting, cooking and plating onions, known as the “ONION FLOWER”. The recipe was first published in a Canadian magazine, “Food and Drink”, and has caught on as a way of preparing red onions in a manner that will truly please both the eyes and palates, of your family and guests.
You will need four small to medium red onions, olive oil and balsamic vinegar. In this easy-to-follow tutorial she first shows you how to cut the onion into consecutive quadrants and then eighths. She then tosses them in the oil and vinegar mixture, and then roasts them in a 425 degree oven for 25-30 minutes. When she plates the final result, you will be amazed at the beauty of this deliciously, crispy onion flower. It is a side-dish that will be remembered by all!
Please SHARE This Recipe With Family and Friends 🙂
WATCH: When She First Put Cinnamon Buns On The Waffle Iron I Was Confused. But When She’s Done YUM!
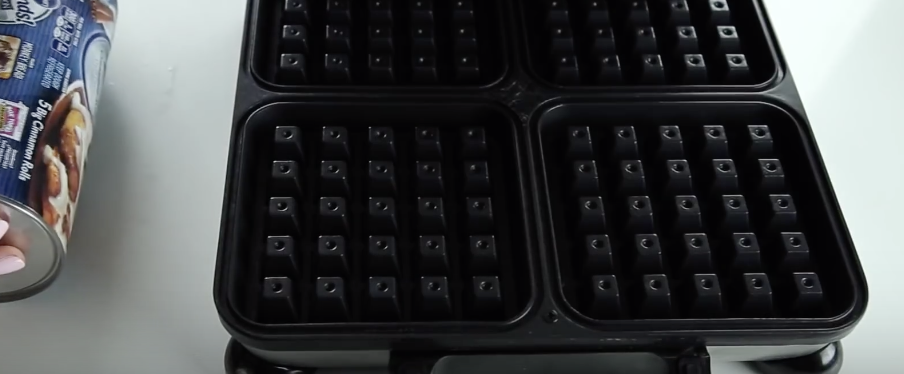
Waffle makers are not just for making waffles. They are actually very versatile machines that can cook up a whole lot more than what they are named after. If you have one collecting dust in the kitchen drag it out and get some good use out of it once again. Check out this video from JumbleJoy that shows delicious recipes anyone can easily whip up. In no time at all you can be enjoying tasty, homemade desserts worthy of any 5 star restaurant.
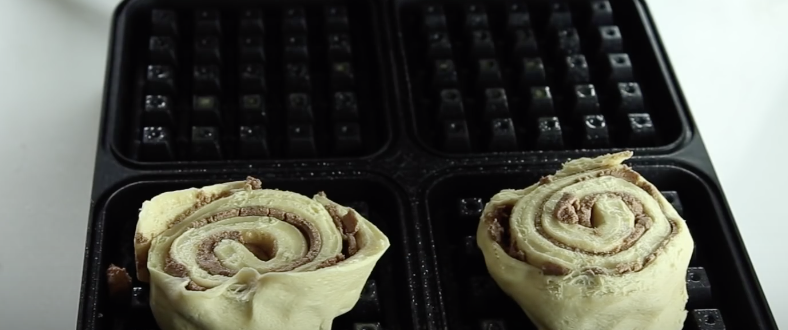
The first recipe is cinnamon rolls. Heat the waffle iron to medium and coat it with a non-stick cooking spray. Break out some pre-made, store procured, cinnamon roll dough and place one in each waffle-section on the iron. Shut the lid and cook for about 1-2 minutes depending on how fast your waffle maker works. Remove the heavenly smelling rolls and serve them with butter, frosting, or whatever else you’d like.
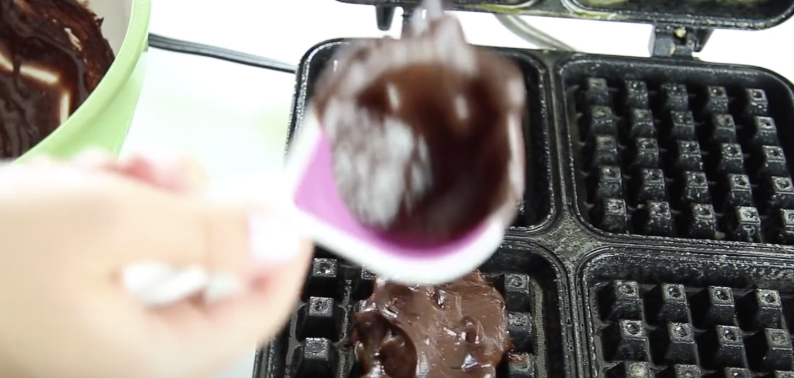
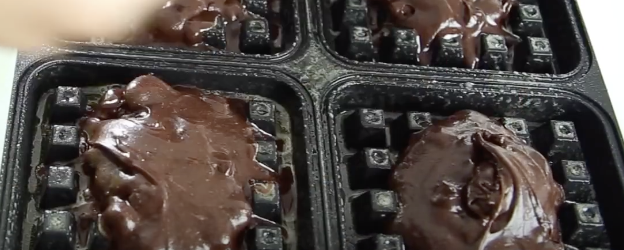
The next recipe is for the chocolate lovers out there. Whip up a batch of brownies from scratch or go the easy way and make the boxed type. Heat iron to medium, coat with cooking spray, and place a small scoop of batter in each section, then close the lid. Cook for 3-4 minutes and allow them to cool before removing.

The last recipe is for a cake batter waffle. Heat iron to medium, spray with cooking oil, then mix up your favorite type of cake, whether it be boxed or homemade, and place a small scoop into each waffle section. Cook for 2-3 minutes and allow them to cool before removing, then serve with fresh fruit, frosting, ice cream, or whatever you fancy.
I made some of these and they turned out very moist and delicious. Best of all they can be made and cooked really fast. The waffle brownies were perfect for making ice-cream sandwiches with. Just toss them in the freezer for a couple of hours, then scoop ice-cream onto one, mush another on top, and place back in the freezer. Check out the video and try this yourself!
Please SHARE With Family and Friends
She Pours A Cup Of Eggs Into Her Waffle Maker! 3 Minutes Later My Mouth Won’t Stop Watering!

image via – youtube.com
Ok, so I’ll be honest, my waffle iron has been pushed to the back of my pots and pans cabinet, for some time now; I just really forgot about it until I came upon this amazing video that you are about to watch below. It’s time to dust off the old machine and start creating these waffle iron masterpieces! The best part about it, is pretty much every recipe covered is super easy to pull off and you don’t have to be a professional chef to pull these off!
If you have a waffle iron pull it out, and if you don’t I can guarantee that you will be getting one, after you see the incredible diversity of things that can be made. What’s so amazing is that each thing is so simple to do, the results are delectable, and cleanup happens in a snap. There is nothing better than a good breakfast, especially when the cleaning after you make your tasty breakfast is easy as ever.
Now, if you are a breakfast person, besides waffles, she shows you how to do omelets and more, right in the waffle iron. If you have a sweet tooth, as do I, you won’t believe how she does Brownies and Cinnamon rolls right in the iron! I tried making the brownies and all I can say is Yummmm! This weekend I will be testing out a bunch of these recipes and having my family and friends do some taste tests!
Let us know how yours turn out! Enjoy, Bon appetite!
Please SHARE This With Family and Friends
She Pours Cream Over These Shredded Potatoes and Puts It In The Oven. Then Reveals THIS Surprise!
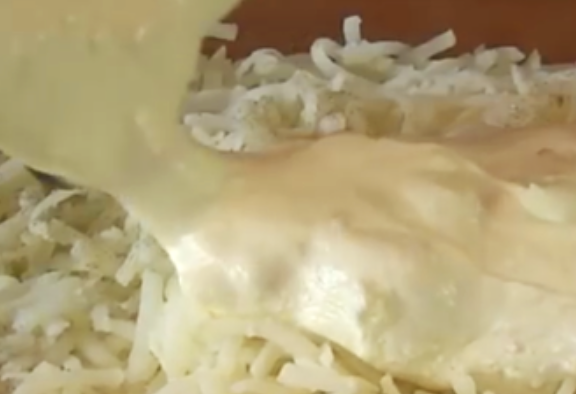
image via – youtube.com
Sometimes you just need some decadence for a family meal that isn’t a dessert; this is a “party-in-your-mouth” dish that will become a family favorite. I love all the ingredients of Cracker Barrel’s Hash Brown Casserole, that when combined is simply out of this world delicious.
The video that you are about to watch below teaches you to make this crowd pleaser on your own. When I made it for my family, I found it to be incredibly easy to make, and it took no time to have it on the table
for a complete meal.
The recipe shows you how to prepare the potatoes that get placed in a greased pan. I, myself, like the simple seasoning of salt and pepper that the recipe suggests, but you certainly can add other spices.
Separately you will combine: Cream of Chicken Soup, Sour Cream, Melted Butter and Onions. This gets poured over the potatoes, and is finished off with a good amount of shredded Cheddar cheese.
The video will give you the rest of the baking directions. The end result is a golden masterpiece! Enjoy!!
Please SHARE this DELICIOUS RECIPE with your friends and family 🙂


