
At First I Thought It Was An Old Decayed Tree. But When The Camera Zoomed In WOW!
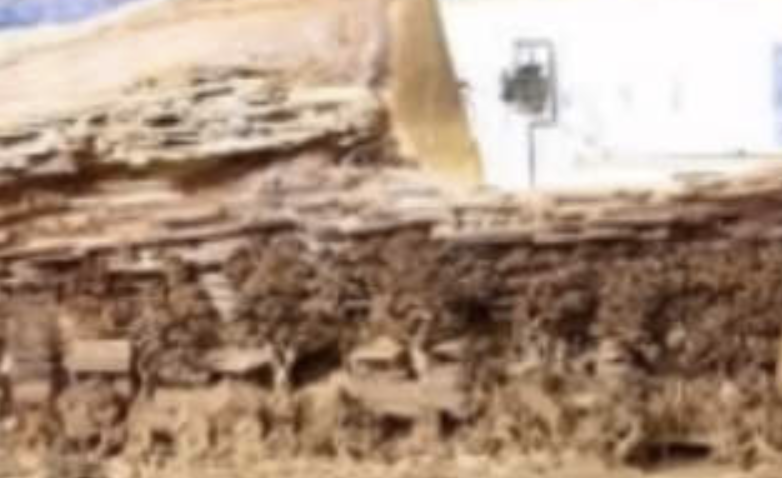
The oldest living things on earth are our source for wood in all aspects of our lives. Trees are used for building, tools and in many forms of artistic expression. For many centuries, China’s wood carving tradition, has been a dominant art form that has continued to present times.
The awesome and majestic work of art, “Along The River During The Quinming Festival”, carved by Zheng Chunhui, its a prime example of the very best of Chinese carving mastery. This mind-blowing, intricately carved “world” utilized a 12-foot long tree!
It is renowned as the longest wood carving in the world, according to the Guinness Book of World Records. As you watch the video below, which tours the entire 39-foot long piece, you will feel as if you have been transported into a world that contains 550 individually carved characters, buildings and vehicles that bring this village setting to life!
The content of Chunhui’s masterpiece was derived from Zhang Zeduan’s painting from the Song Dynasty era, named “Along The River During The Quinming Festival”. It is believed that it was created at some point between 1085 and 1145. The painting’s depiction of life in the Song dynasty was so astoundingly intricate, that it has inspired many artists through the centuries to artistically reinterpret it.
The masterpiece you are about to tour in the footage below, took Chunhui four years to create. The Quinming Festival is still celebrated to this day on the 15th day of the spring equinox. As you watch this video you will understand the sheer wonder of the renewal of life that is at the essence of this festival. It will take your breath away! Enjoy the tour!
Please SHARE This Story With Your Family and Friends 🙂
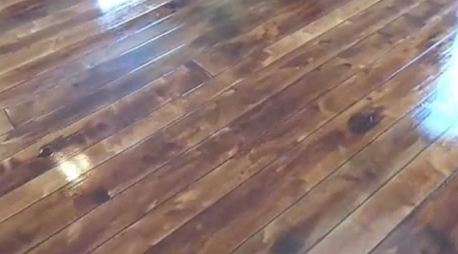
Take A Close Look At This Floor Because THIS Is Not Hardwood. Prepare Yourself To Be Blown Away!
Home designs are often quite expensive no matter what you do and there is no easy way to save money. Whether you are remodeling or building from scratch, projects can add up fast. When it comes to houses and interior designs it’s never a good idea to sacrifice quality and integrity for a lower, cheaper cost.
One particular area that can be very expensive is flooring. It’s something you absolutely have to have, and the options vary greatly, along with the costs. Many people prefer hardwood floors over all the other types.
Wood floors are beautiful and come in many different styles, colors, finishes, and grains. The same goes for fake wood floors like Pergo, but the downside is the higher cost that comes with purchasing, installing, and maintaining them. A much cheaper alternative is concrete flooring, which sounds dull and blehh.
However, there is a way to instantly upgrade a classic concrete floor into faux bois, which is French for fake wood. Sounds fancy, right? With a few extra steps you can take your ugly duckling concrete floor and transform it into a rich, warmly textured, glowing hardwood-esque surface.
The design is called wood concrete and this video shows all the main stages of such a floor being installed from start to finish. The video description says that the process isn’t hard to do, so long as you have the right products and techniques. It’s an excellent way to get more bang for your buck when it comes to interior design and the end results look remarkable.
This is a wonderful technique that seems ideal for basements, play rooms, mud rooms, and so on. In comparison to hardwood, concrete stands up much better to water, animals, kids, and all the scratching and wear and tear that comes with them. Plus, it’s way less expensive!
At first glance it looks like a normal wood floor to the average untrained eye, and only upon closer inspection do you realize it’s not. Check out the video to see what I mean.
Let us know what you think!
Please Share This With Family and Friends
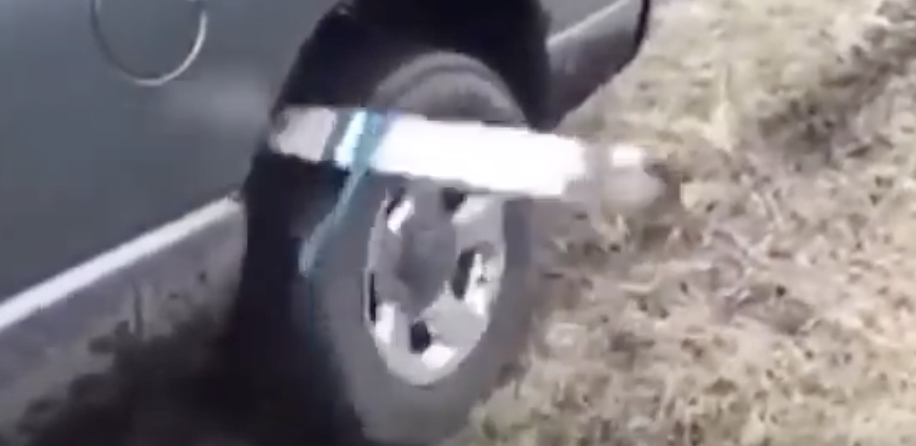
He Straps A Piece Of Wood Onto The Tire Of His Truck. But The Reason Is Actually Brilliant!
By definition, when things get “stuck” it usually means they are not going anywhere anytime soon. Unless, of course, something is done to get them un-stuck. When it comes to freeing a car or truck trapped in mud, the process of getting out can be a really messy pain in the rear.
If you have ever experienced this yourself then you know the scene and it isn’t pretty. Mud gets kicked up every which way, while people trying to push the vehicle out get covered in it, and tires end up spinning even deeper into a rut. But it doesn’t have to be like that…
If you ever have the misfortune of having your car ending up bogged down in mud or snow try this simple trick. Take a piece of wood and secure it to a tire. In the accompanying video they used a tow strap to secure the board to the tire but any other similar type of cord, rope, or strap will do so long as you are able to tie it tightly.
When you go to move the car, slowly inch forwards or backwards until the tire grips the board, and then resume a steady, slow pace. When a car gets stuck it is because the wheels have no traction. Thus, when you press on the gas the tires just spin around without going anywhere and dig the car deeper into a rut.
Snow, ice, and mud all reduce the amount of traction on car tires and when the traction is super low the car won’t go anywhere. The best thing you can do when you notice your car is stuck is to stop pushing your foot on the accelerator because rapidly spinning wheels reduce traction even further and will cause your car to slide.
Instead, try moving the tires as slowly as possible, press gently on the gas and see if that helps. You can also dig out the area around the wheels. If your car is front wheel drive dig out the front tires because they are the ones that move when you press the gas.
Cover the ground in front of each tire with stuff that can provide traction, such as gravel, stones, dirt, branches, a car mat, boards, or kitty litter. It’s best to wedge certain objects, like the car mat and board, under the tire a little so that the tire can better grip it when you start to slowly drive.
Finally, if you have a rear wheel drive car, or a lighter one, try putting heavy objects like rocks, bricks, or bags of cement in the trunk to weigh it down. That automatically gives better traction to the rear tires, which are the ones that spin when you press the gas.
Also, if you use cat litter make sure it is the type that stays hard when wet. Certain kinds of cat litter break down and become pasty when they get wet and won’t be of any help. They just end up making a bigger mess, create more mud, and further reduce the traction and increase tire slippage.
Overall, the board method shown in this video is one of the cleanest and most effective ways to get a car or truck out of mud. If used in conjunction with some of the other points mentioned above, it can work even faster and more effectively.
Hopefully your car will never get stuck in a rut, but if it ever does, make sure this video sticks in your head and you’ll be good to go!
Please Share This Car Hack With Family and Friends
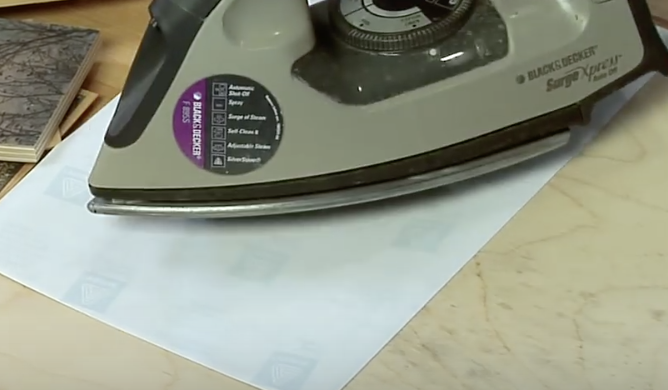
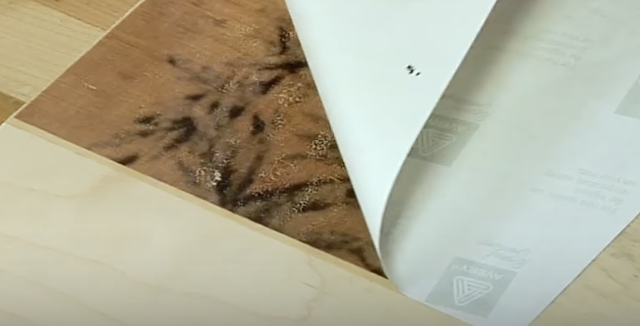
Woman Irons Paper On Top Of This Piece Of Wood. When She Lifts The Iron Up It’s STUNNING!
With Mother’s and Father’s Day on the horizon it’s time to start thinking about thoughtful ideas to give to our loved ones. Nothing is better than a heartfelt homemade gift directly from the heart. The following is an awesome DIY tutorial on how to cover wood with your favorite photos. This is the perfect gift that will be unique, creative and your friends and family will truly cherish and appreciate!
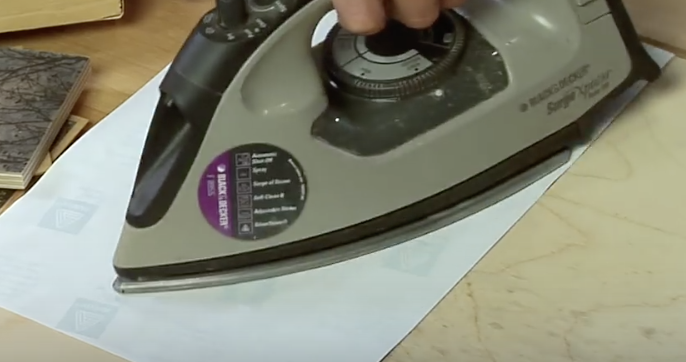
The people at toolgirl.com have figured out a way to get any photo off your computer onto a piece of wood. Depending on what your goals are you can design all different types of wood motifs. The best part is, it’s fast, easy, cheap and anyone with a computer and some wood can do it. I totally can’t wait to try this awesome DIY.
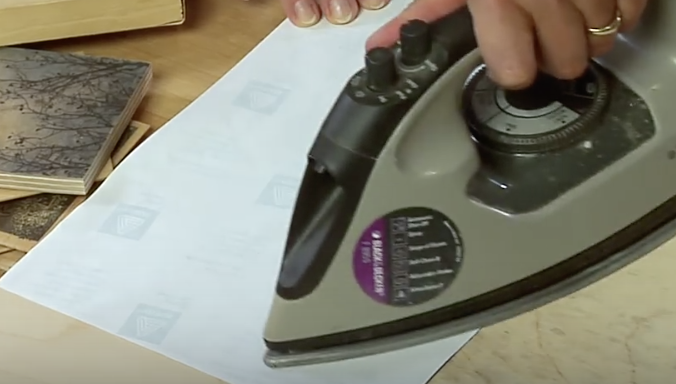
You will need a computer, t-shirt transfer printer paper, an iron, and a nice piece of wood. Then it’s time to begin your very own creation. Follow the instructions in the video below and post your finished products! This would be the perfect gift for Mother’s or Father’s Day. Are you going to try this awesome project?
Please SHARE With Family and Friends
He Puts a Block of Wood In Boiling H2O. 2 Days Later An Awesome Unexpected Surprise!
Have you ever looked at something and wondered how the heck is it possible? Lots of things puzzle our brains and cause us to stop and think about how they were accomplished. Whether it’s through means of magic tricks, optical illusions, or even alien intelligence, the explanation is often much more simple than originally thought to be. The seemingly impossible nail through wood trick falls under this optical illusion/puzzle-type of conundrum.
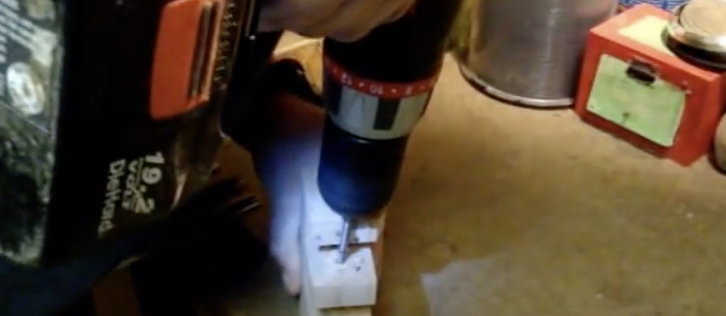
If you’ve never seen the visually confusing puzzle before it features a nail which appears trapped within a block of solid wood. The piece lacks any drill holes and there is no physical way that the nail could have been hammered through the wood. The question it makes us ask ourselves is this; how did the nail get there?!

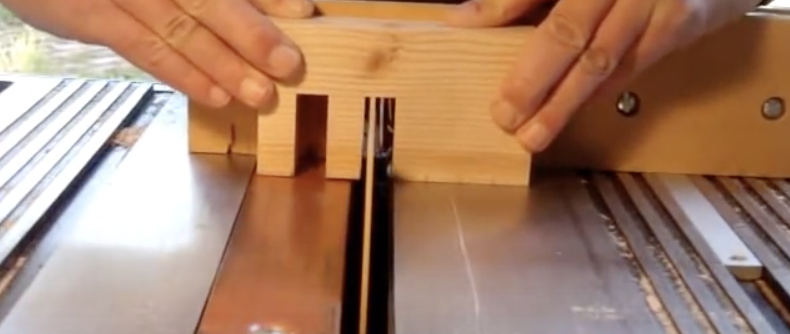
You no longer have to wonder because it’s been covered by Steve Ramsey on his YouTube channel where he shows exactly how it’s done. He gives us a comprehensive behind the scenes glimpse at the entire process from start to finish and it’s quite awesome.
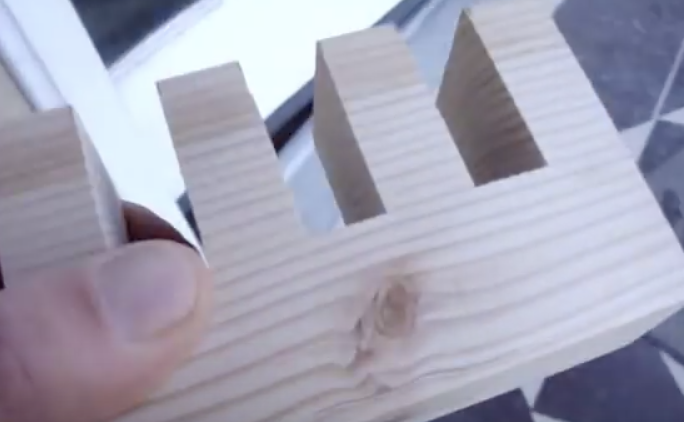
He begins with a solid block of pine wood and cuts three evenly spaced slots halfway down into one side of it. After heating up a large pot of water to a boil, the wood is placed in it to simmer for about 10 minutes and then removed. Immediately after that the block is transferred to a wood clamp where it’s tightly compressed and sits for two days.
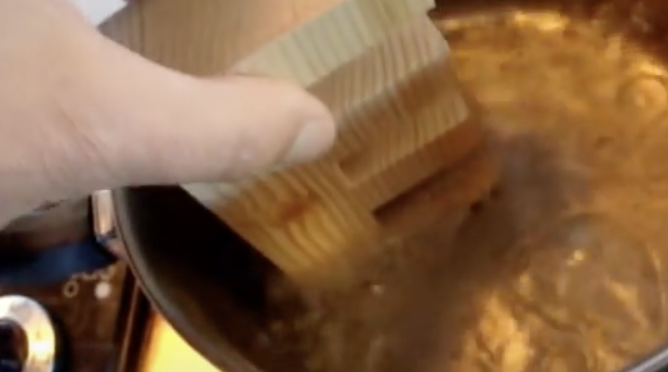
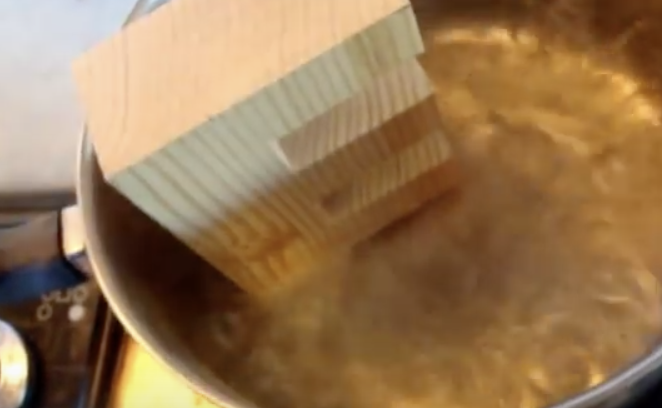
The force from the clamp causes the boiled portion of the wood to warp and mushes it down enough for a nail to be easily inserted through the inner slot pieces. Once the nail is in place the wood is boiled yet again for about ten minutes. The hot water causes it to expand back into it’s normal shape, and in the process the nail becomes entrapped within the sides of the block.
Simple science can explain the whole “trickery” at work here as the heating and cooling of the wood caused it to expand and contract. That, in conjunction with a little extra force from the clamp, allowed just enough room to insert the nail through the middle slots, while bypassing the end portion. It’s pretty cool that something so seemingly impossible turns out to actually be very possible indeed!
Please SHARE This With Family and Friends 🙂


