
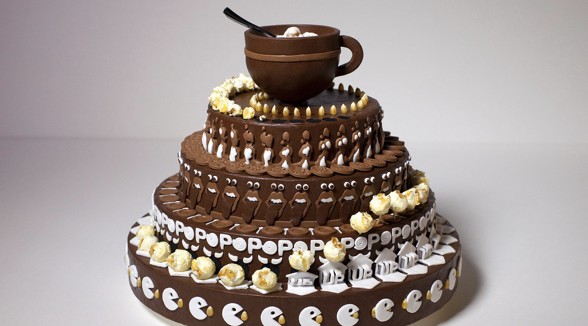
She Only Uses 2 Ingredients To Make This Chocolate Cake. But When She’s Done YUM!
Have you ever wanted to bake up something delicious but didn’t make it to the kitchen because you really did NOT want to clean up the mess afterwards? Baking often has messy side effects to it, with all the powdery flour and sugars, sticky butter coated bowls and blenders and spoons, and batter that too often ends up being whipped out of the bowl it was mixed in.
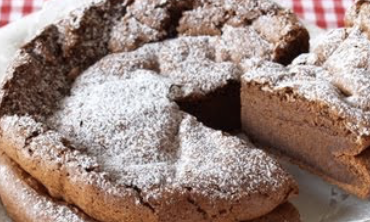
Set those unpleasant memories aside and replace them with thoughts of this incredibly simple and easy to make 2 ingredient chocolate cake. It’s a whipped, meringue-type of cake that ends up tasting rich and decadent yet also light and sweet. In other words, it’s basically perfect, and it will leave you with minimal mess to deal with.
This recipe makes 6 servings and each one contains 200Kcal. It takes about an hour total to prepare and bake. You can serve this right away once it’s cooled off from being in the oven, chill it in the fridge for later, or keep it in the freezer for up to a week. The ingredients are easy to remember, 3 eggs and 3 bars of chocolate, or enough to total 165 grams or 5.8 ounces. Preheat your oven to 338 degrees Fahrenheit then separate the egg whites out into a large bowl.
Refrigerate them so that they’re cold for when you later use them, which will make the meringue much more stable. Break the chocolate into pieces and melt it in a large bowl using a double boiler over hot water, then allow the chocolate to cool and whisk in the egg yolks.
In a separate bowl whip the egg whites with an electric mixer until firm peaks form and you can turn the bowl upside down without any of it sliding out. Add about 1/3 of the meringue to the chocolate and blend it together well with a whisk. Add in half of the rest, mix well, and follow with what is left.
Take a round cake pan, line it with parchment paper, and pour the batter into it. Before you put it in the oven pick it up and lightly drop it on the counter to get any air bubbles out. Bake in the preheated oven for 30-40 minutes, remove and allow it to cool completely before serving.
To finish off the cake you may want to brush it with syrup. It’s highly recommended that syrups or liquors such as brandy, rum, or kirsch are used, along with a light dusting of powdered sugar. Serve a slice of it alongside ice cream, fresh fruit, or with a dollop of whipped cream and a cherry on top. Pass on this recipe with friends and family, so they too can enjoy the tastiness and joy that this cake can bring them.
I tried and made this myself and got rave reviews from everyone who tried a piece. It was worth the mess and the extra mile I’m going to walk tomorrow.
Please Share This Recipe With Family and Friends 🙂
She Places Fondant Over This Cake. When She’s Done A STUNNING Surprise!
Watch this lifelike 3-D cake come to life before your eyes! What takes 4 days is shown in 4 minutes. Anyone can try their hand at crafting a sculptured cake at home. The ideas and possibilities are limitless. Any occasion can merit a personally created cake that is sure to be a crowd pleaser.
Some helpful insights into the process include starting with a quality, moist cake as your base. Try to avoid any mix-ins like chocolate chips or nuts as they make the carving process difficult. Next, whip up a smooth ganache or buttercream for your cake layers. The smoother the better for when the sculpting part comes.
Depending on your design the next step may involve inserting doweling rods down into the cake to ensure the structure stays secure. Once the cake layers have been assembled, the carving begins.
Try and have a selection of knives for this part and experiment to see which ones work best for the creation your working on. Another helpful tip is to place the cake on a turntable. It will make the shaping and moving of the cake much easier.
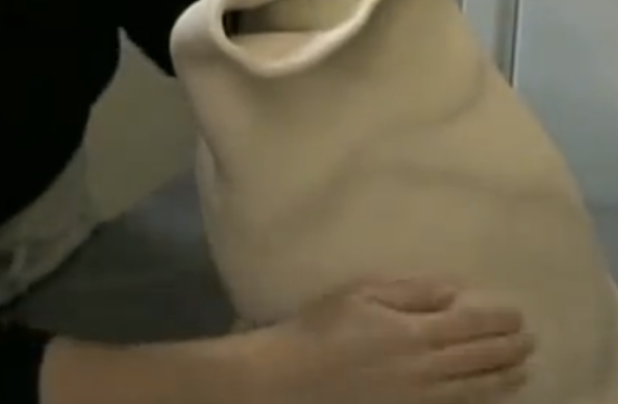
Once your cake has been designed and shaped it is time for the icing. Many professionals use fondant, an edible type of icing that molds to your cake and is easy to shape. Typically it is smoothed out with a rolling pin and then draped over and fitted to the shape of the cake, with the excess being cut off.
You can also make shapes out of it and add further details by painting it as well. When your done it is time to store your cake in either a safe place or the refrigerator. Lastly, it is time to eat your cake!!
Remember, there is no one way to carve a cake. Trial and error are inevitable and overall just have fun with it. Get creative and add candies, decorative touches and personalized messages with piped icing. People will love that you even tried, so go forth and carve cake!!
Please Share With Family and Friends
This Woman Starts Poking Holes In THIS Cake. But When She’s Done YUM!
There is nothing better than a delicious dessert DIY that not only makes an impressive presentation, but is super easy to make and is actually DELICIOUS! This recipe presented by DIY Projects in the video below swiftly gives you the ingredients and 3 steps to make this incredible cake.
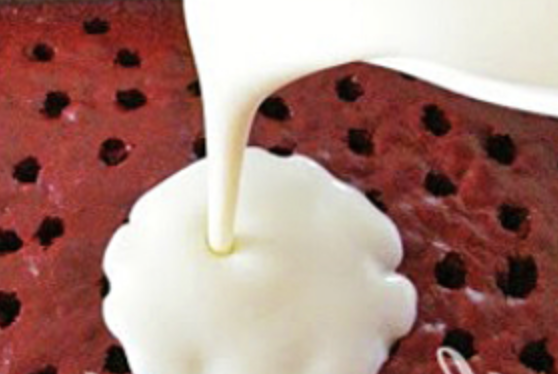
All that you will need for this yummy dessert is: Red Velvet cake mix, cheesecake-flavored pudding, crunchy, crushed Oreos, and Light whipped topping. Bake the cake according to the directions, and then the magic begins!
After the cake is baked, you take a large straw and poke holes evenly across the cake and all the way through. Watch the video below to see how the pudding is mixed and spread, chilled in the frig, and followed with whipped topping and smashed Oreos.
This looked so good and actually fun to make, that I tried it…cakes don’t get better than this one! Let us know if you’ll try it.
Please SHARE this Fun and Delicious DIY Cake Recipe With Your Family and Friends
This Woman Trims The Edge Of Her Pie With Pearls. The End Result Is An AMAZING Surprise!
It’s never a bad time to cook a pie! Pies can make an easy and delicious home made dessert…that is, if you have a great crust. Not only is the taste of the crust critical, but as we all know “presentation is everything!”
So if you have a great recipe, the next step is addressed in the footage you are about to watch, below. The video presented by YouTuber Libbie Summers is simply mesmerizing. She makes you want to make your own pie by showing us 20 different ways to crimp the edges. She turns pies into works of art.
Most of the designs are really simple to replicate, and a few are a little more elaborate for the more creative and adventurous among us. Using everyday items she shows us how to dress up our pies. I can guarantee that you will be as inspired as I was, after watching this.
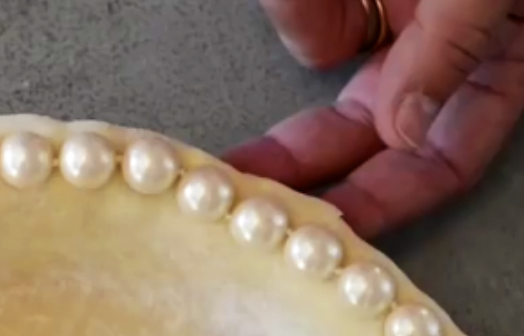
Using a string of Pearls, a small measuring spoon, a fork, two pairs of thumbs, and a scissor, Summers has devised the easy-to-follow beautiful edges for your pie.
Sit back and enjoy this magical video.
Please SHARE This With Family and Friends 🙂
This Cake Doesn’t Just Sit There Looking Pretty. When It Starts Moving It’s The Most Unexpected Surprise!
All I can say is WOW! What you are about to see is nothing short of amazing, both to watch and listen to. It appears to be an animated cake with a crazy amount of action. In fact, this visually awesome footage is not the result of animation.
What makes this appear to be moving is a device called Zoetropes. They were used before actual animation came about in film making. What you are watching in this footage is called a ‘zoetrope cake’. A Zoetrope is made of a cylinder with slits cut into the sides.
Inside the cylinder are drawings that appear to move when the cylinder is spun. Much like flip books, that made it seem like you were seeing movement, the zoetrope drawings take on the animated feature. When spun rapidly, it results in the little film you are about to enjoy.
Alexandre Dubosc has created this amazing imagery, with zoetrope cakes being his artistic focus. His work is wildly imaginative and, I have to say, has got my sweet tooth going. Let us know what you think of this tasty piece of magical art!
Please SHARE this with family and friends
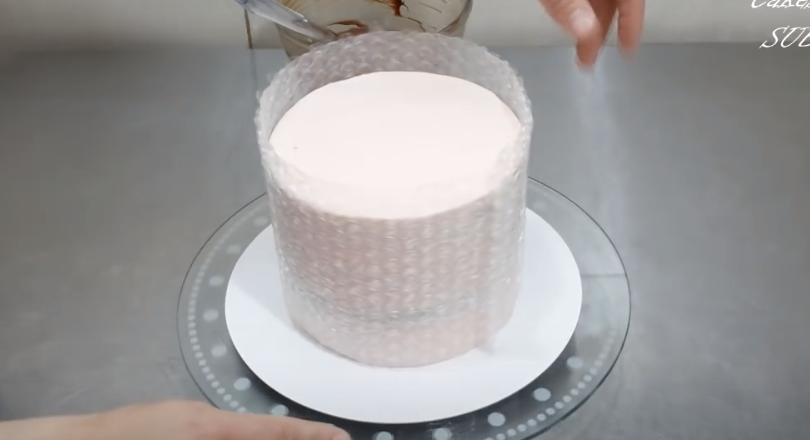
This Woman Wraps Bubble Wrap Around This Cake. But When She’s Done STUNNING
When you bake a cake at home it usually ends up being slathered in frosting and maybe some sprinkles, candy, or fruit gets thrown on top of it. The average home baker simply does not have the knowledge or specialized tools to make fancy cakes.
However, with this simple chocolate tempering decoration technique you can take a boring run of the mill cake and turn it into a work of art! All you need is a piece of clean bubble wrap, pastry chocolate, a microwave, and an already baked cake. Read on to see how you can take a cake from blah to WOW with a little finesse and patience, and be sure to check out the video to see how it’s done.
In a microwave safe bowl break up pastry chocolate into pieces, place it in the microwave, and cook for 1 minute on medium heat. Remove the bowl, stir the chocolate, and resume heating it for an additional minute. Depending on your microwave, you may have to keep heating it in short stages, and you can stop once the chocolate is completely melted and smooth.
Take a clean, washed piece of bubble wrap that has been fitted to match the size of the cake you’re decorating and wrap it around the cake. Leave about ½ an inch of the edge to overlap where it meets, as well as an inch that extends over the topside of the cake (see video). Lay the bubble wrap flat with the bubble-side facing up and pour the melted chocolate onto it.
Working quickly, smooth the chocolate evenly over the wrap with a flat knife or spatula, covering the piece to the edges as best you can. Allow the chocolate to dry and harden up a bit for about 10 minutes, at room temperature, before you go on to the next step.
Once it’s ready, carefully pick up the chocolate bubble wrap and apply it to the outside of the cake. Make sure the chocolate covered side faces in, touching and resting against the cake, then wrap it around while smoothing it on and pressing firmly against the cake. Pay careful attention to the seam where the edges meet and make sure it’s evenly aligned. Wait about 10 minutes while it sets, then you may remove the wrap.
Starting at the edge that overlaps at the seam begin to slowly peel back the bubble wrap away from the chocolate. Once you get started it should come off easily and you’ll be left with a honey-combed chocolate enveloped cake that looks amazing and super tasty!
The chocolate part that extends over the top edge of the cake makes an excellent holder for any additional topping you may wish to add on, like fruit, candies, cream, or whatever other creative things you come up with.
Please Share this with family and friends


