
7 Simple Natural and Unexpected Home Remedies That Will Get Rid Of Armpit Odor Instantly With No Chemicals!

Underarm odor is one of life’s stinky little problems. The unpleasant smell is often attributed to sweating, but there is more to it than just that. Of course, sweat plays a major role in it and we often sweat in response to stress, anxiety, hormones, and as a way to regulate our body temperature.
When our sweat glands release their poison it comes into contact with bacteria on our skin. Every single person has all sorts of different types of bacteria covering their body. This bacteria breaks down the protein and fatty acids that are found in sweat, and that is what causes smelly body odor.
Generally speaking sweat alone, in and of itself, doesn’t smell all that bad. It’s only when it gets broken down by bacteria does it begin to stink.
Most people reach for a stick of deodorant or antiperspirant to combat the unpleasant smells, but those products tend to mask the problem rather than actually help to eliminate it. There are some effective, alternative things that you can do to cut down on the root of the problem, i.e. bacteria causing sweat. They are covered below:
1) Skip Shaving- It seems counter-intuitive, but shaving underarm hair with a razor causes skin irritation. The lotions and creams often used in conjunction with a razor can further irritate sensitive underarm skin and that allows bacteria to grow even more, thus leading to a smellier armpit.
2) Tea Tree Oil- Tea tree oil contains anti-bacterial and anti-fungal properties. When you apply it to your armpits the oil naturally works to kill bacteria. Plus, it smells good in and of itself.
3) Lime- The citric acid found in limes is naturally antimicrobial and can kill up to 99% of bacteria it comes into contact with. Rub a little lime juice under your arms and you’ll smell fresh and wonderful.
4) Baking Soda- People often place a box of baking soda in the fridge to eliminate funky food smells in there, but you can also use it on underarms. The powder keeps you dry, naturally deodorizes, and is strong enough to last all day long.
5) Use Natural Soap- Natural soaps, such as castile and goats milk varieties, work well at killing odor causing bacteria. By simply washing and cleaning your underarms regularly with a bar of the stuff you’ll smell better.
6) Hydrogen Peroxide- Many people use hydrogen peroxide to clean out minor scrapes, cuts, and burns, but you can also use it to kill underarm bacteria and the odors it causes.
7) Apple Cider Vinegar- When you combine apple cider vinegar with a squeeze of lemon juice and apply it to your underarms you are effectively killing the odor causing bacteria in that area. Just make sure you wash the mixture off your skin with warm water afterwards, and you’ll be lemony fresh.
For more information WATCH the VIDEO Below:
Please Share With Family and Friends
She Starts To Pour Glitter On This Glass Of Wine. When She’s Done It’s Unexpectedly Stunning Surprise!
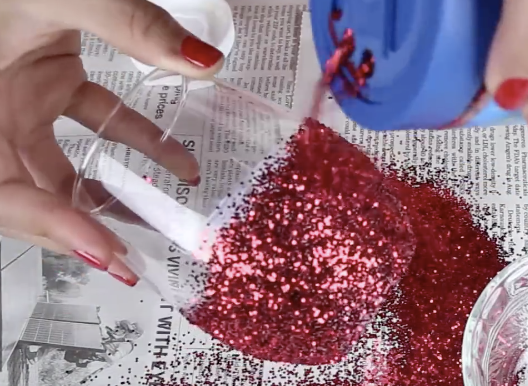
If you find buying festive dinnerware to be a bit pricey and a waste of money, but want or need some decorative pieces to dress up the table this holiday season, try making some yourself! You can custom make beautiful drinking glasses out of a few simple and inexpensive products, and chances are you already have a few of these items on hand.
This easy to follow and replicate project involves creating sparkly and expensive looking drinking glasses. You can use any type of glass you’d like, whether it be a tumbler, shot glass, beer mug, wine glass, or more. This project will turn those boring old glasses into fun, beautiful, glittery pieces that are perfect for all of the upcoming winter holidays, or everyday use!
While the general how-to information is distilled in the description below, for optimum results watch the video for the step by step method used. The items you will need for the glitter glass project are mod podge, glitter, a paint brush, and some drinking glasses.
Start by putting down some pieces of old newspaper to protect the area you’re working on and to make the eventual clean up much easier. Pour a little bit of mod podge into a container and then dip the brush into it and start painting the bottom of the glass.
Evenly coat the area of the glass you wish to cover in glitter. The video shows the bottom half being painted but you can do any design, anywhere on it, that you’d like. However, you should avoid painting near the rim or you’ll risk getting glitter on your mouth!
Now the fun part. Slowly pour glitter onto the painted portions of the glass, making sure every bit is covered and coated in sparkles, and allow it to sit and dry overnight. The next day, paint on a second coat of mod podge over the dried glitter and allow it to again dry for at least 24 hours.
Now you can use and drink out of the pretty, beautifully decorated glasses!
Please Share This With Family and Friends
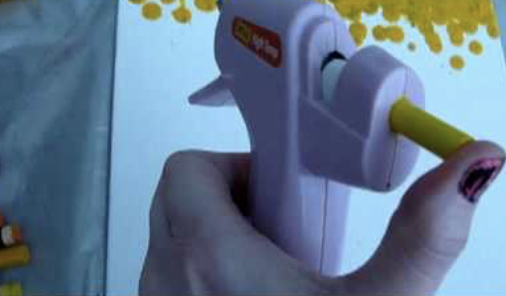
This Woman Places Crayons In a Hot Glue Gun. The End Result Is Surprisingly Awesome!
If you have ever had kids, or even just lived with them, then you likely have an abundance of crayons somewhere in the house. The colorful wax sticks are a childhood staple and it’s easy to see why. They are inexpensive, widely available, non-toxic, and less messy or permanent than paint and markers.
They also never become unusable or dry up, and that’s part of the reason why they usually end up in a box that is put away and forgotten. But not anymore! This fun art project will give you a reason to pull those old crayons out of storage and put them to good use again.
It involves making a cool, vibrant, colorful work of art out of melted crayons. All you really need is a cheap hot glue gun, a sturdy piece of canvas or paperboard, and some crayons of your choosing. Don’t use a nice or expensive glue gun because it will end up ruined and won’t be salvageable.
Also, make sure the canvas material you use is not flimsy because it needs to be able to hold up thick, melted crayon wax and if it bends the wax is more likely to break off of it. Before you start any painting set up a work area and put a drop cloth down because this can get very messy.
Plug in the glue gun and when it’s nice and hot feed a crayon stick into it. Pull the trigger to release the melted crayon and squirt it onto the canvas wherever you’d like it to go. You can drip the melted wax on, spray it, flick it, or try to paint with it in a more controlled fashion.
When your done with one color, grab another stick and repeat the process until you are satisfied with your masterpiece. This fun project is the perfect activity to do with kids, family, and friends. However, make sure to supervise young children at all times and don’t allow them to handle hot glue guns because it can be very dangerous.
The possibilities are endless with this type of project and you can make custom art for any room in the house. Go a step further and add on additional touches to make it even more fun, such as glitter, different paints, a picture or collage background, and so on. It’s not only a great way to use up old crayon pieces, but also a nice way to spend an afternoon making art and bonding with your kids!
Please Share This With Family and Friends 🙂
She Places Mason Jar Lids On A Pan For Breakfast. The Result Is An Unexpected Delicious Surprise!
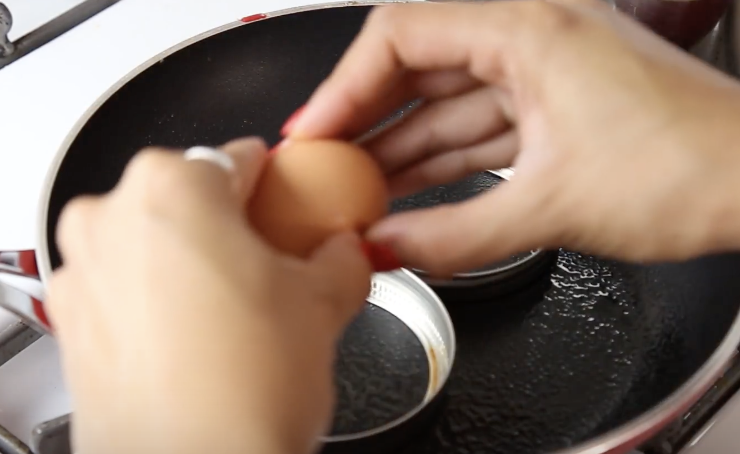
“Everything in life is presentation”, the saying goes. If you have kids who are finicky eaters, or you are just the kind of cook who loves to present your food with just that little extra bit of perfection, this video is for you. Most people love the McMuffin, which has those perfectly round eggs.
This easy DIY can make that happen at home. All you need are mason jar lids to form these perfectly round sunny side up eggs. With 2 eggs, cooking spray or butter, tongs and those lids, you can surprise everyone with your own McMuffin at home.
After you crack each egg inside each mason jar lid, you will season to taste, and watch the video to see how incredibly easy it is to flip and have those english muffins or toast ready for your mouth-watering presentation of breakfast at home. Let us know how yours come out if you try this.
Please SHARE this simple and satisfying DIY with your friends and family 🙂
She Begins To Draw A Line Across Her Cheek. But When She’s Done It’s The Most Unexpected Surprise!

Over the years more and more adults have really gotten into the whole costume extravaganza. Each year so much money is spent on costumes to outdo what you came up with the year before. This woman who does this makeup tutorial to create creepy, trippy illusions is just amazing!
What she can teach you to do is not only amazing, but can save you a lot of money. Today’s tutorial is on how to create a creepy mouth. Clearly she is a makeup artist, and is brilliant at what she does, but she illustrates each step to really make it doable, for those of us who may not be as artistic.
Get ready for her latest innovative makeup illusion, that will leave you astounded and wanting to give it a try. If you are able to recreate this creepy, sexy look, you can be sure that you will really stand out as unique at any costume party!
This is one of my favorite ones that I have seen on the internet. Step-by-step she will show you how to create this sexy creepy mouth to perfection. She adds a purple wig at the end and, Voila! This is really one of the most creative make-up images I have ever seen!
You will definitely be a hit at your next costume party if you can pull this off. Watching her create this face is really magical!
Please SHARE This With Your Family and Friends
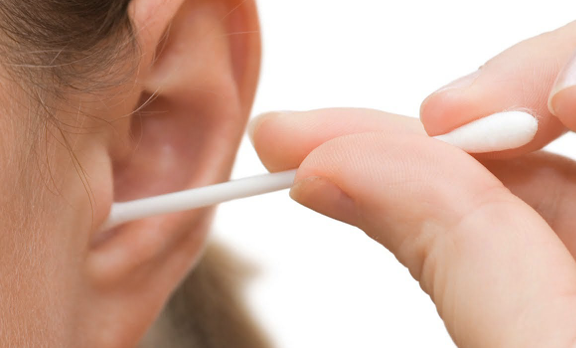
After You Read This Article You Won’t Clean The Inside Of Your Ears Ever Again!
People often think that earwax is a sign of uncleanliness because it looks gross. It’s natural to automatically assume that ear wax is nasty and view it in such a negative light, after all it’s a what comes out of our ears, there is nothing sexy about it whatsoever.
That is why people the world over stick all sorts of cleaning solutions, Q-tips, and even automatic ear cleaner gadgets into their ears in vain attempts to remove the offensive substance. If you are guilty of doing any of the aforementioned things, you should probably re-think your ear-care routine.
Whenever you stick anything into your ear you are simply making them dirtier and increasing the odds of developing an ear infection, or worse. Every year countless numbers of people injure and damage their inner ears because they stick Q-tips and whatnot too far and forcibly into them.
By far, the most common way in which people go about cleaning their ears is with Q-tips. Doing this is the wrong way to clean them, it’s ineffective and just pushes the wax further into the ear canal thereby increasing the potential for build up and blockage.
Whatever you do, don’t use Q-tips to try and clean your ears. Instead, gently wash the outside area with a washcloth. That’s it, nothing else! The bad reputation that ear wax has developed is not based on anything but false information and it’s totally without merit. The yellowish waxy substance is naturally produced by the human body and is beneficial to our health in more ways than one.
It helps to protect our inner ears from all sorts of nasty stuff, like infections, dust, dirt, bacteria and other germs that would otherwise enter into them. Furthermore, the wax forms a protective barrier on the surface of the very delicate skin in our ear canals which prevents it from becoming irritated when water gets inside.
It also moisturizes and keeps that skin from becoming dry, flaky, and itchy. Ear wax is produced by the teeny tiny hair follicles that line the ear canal. It normally makes its way out of the opening of the ear naturally and on its own, but sometimes wax can build up and cause blockage problems.
If you feel that there is a blockage due to wax build up in your ear, you can try a natural remedy or go see a doctor if the issue is potentially more serious. Watch the video below for more information. I wish I knew this earlier!
Please Share With Family and Friends


