
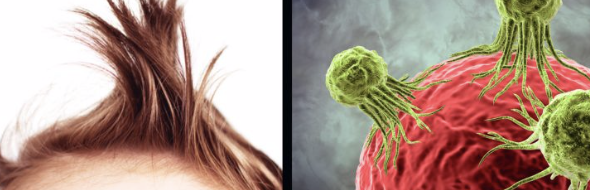
If You Have An Annoying Cowlick In Your Hair It Could Actually Save Your Life
I’ve always worn bangs, in part because I have this annoying cowlick in the front of my hairline. Somehow it has helped me to manage the awkward angle of hair growth, that is always a challenge to hair styling. Cowlicks just seem to have a mind of their own, that is oppositional to the way the rest of your hair grows..
Why is it called a cowlick you may ask? Apparently when cows lick their calves, it causes the hair to swirl in an unruly manner, thus the coining of the term “cowlick” for unruly human hair. They are extremely common; in fact Brad Pitt is famous for his. Who would ever think that the frustrating cowlick would have an incredible silver lining…in fact a blessing in disguise. Amazingly, a recent study has discovered that the genes linked to cowlicks may have THE POWER TO SAVE LIVES!
The researchers at Michigan State University have discovered that the “polarity genes” that are linked to cowlicks, may hold the key to finding a CURE FOR CANCER! The video you are about to watch below goes into a deeper explanation of how polarity genes are vital for proper cell operation. The polarity genes also cause parts of the body to grow in oppositional patterns, such as the unruly hair growth in a cowlick.
So, what in the world does this have to do with fighting cancer? Polarity genes are organized in the body by a protein that has been known to suppress certain tumors. Strangely enough, the DNA of humans and fruit flies is almost identical, so the researchers at MSU used fruit flies to make the connection between the polarity gene protein and cowlicks.
Because of the genetic similarities between humans and fruit flies, these researchers will be able to test the theory that people who don’t have this protein or too little of it, puts them at risk, for their cells not being able to fight off the viruses which cause cancers. Restoring this protein in patients lends hope to a new kind of chemotherapy which will lead to a much higher cure rate across many types of cancer. The video below will help to connect all these dots, that may be a breakthrough discovery in the fight against cancer.
Please SHARE this fascinating discovery, which may bring hope to millions of cancer sufferers, with your family and friends
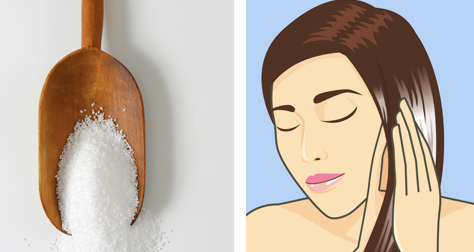
She Massages Epsom Salt Into Her Hair. But The End Result Is STUNNING!

There is nothing better than beachy looking waves in your hair. Of course, salons and pharmacies sell sea spray hair products that are pricy. I have used them, but have always found that I need to play chemist, adding other products to achieve the look I’m going for.
When I came upon this great DIY video , for achieving that beachy, cool,sexy looking hair at home, I couldn’t resist trying it. Sure enough, it worked better than the store bought ones! So, for those of you who love having this look, the video below is for you.

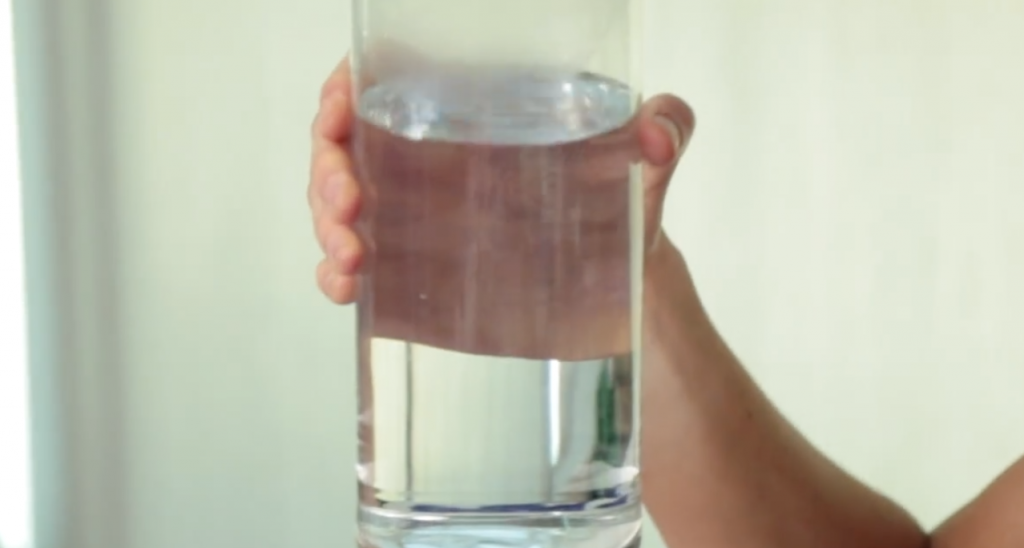
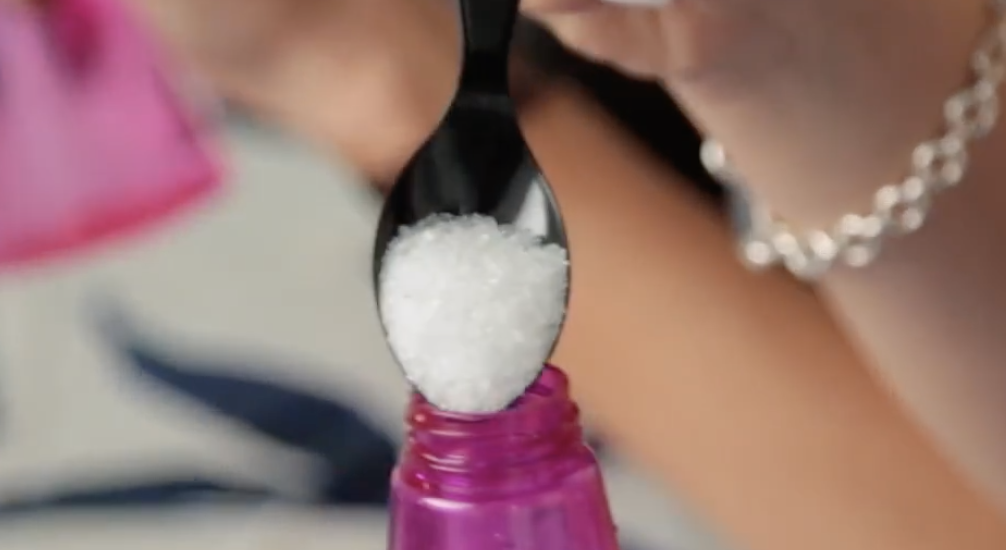
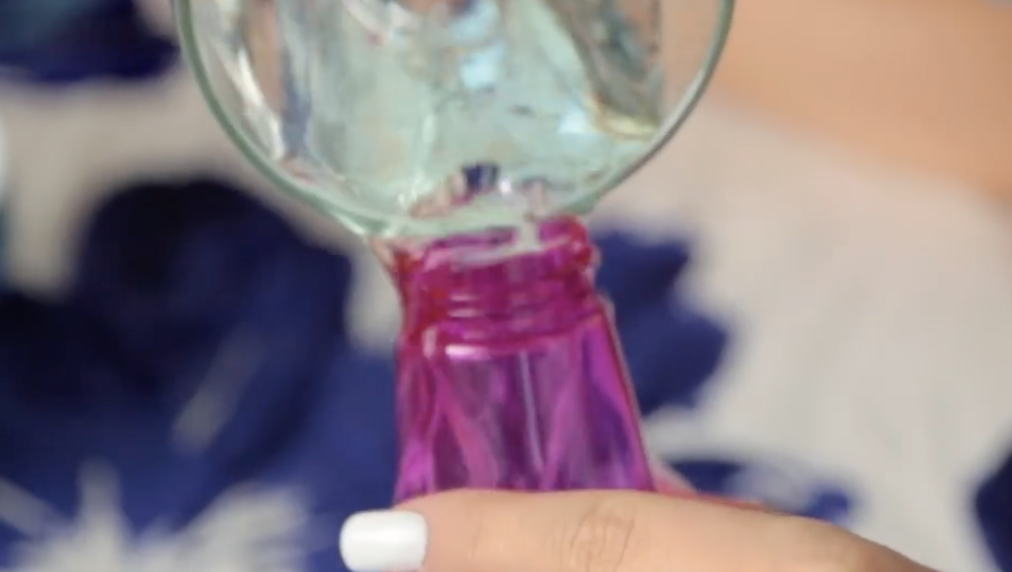
The key to making a DIY SEA SALT SPRAY to produce easy beachy waves, is using EPSOM SALT. Common table salt doesn’t do the trick. All you will need is an empty clean SPRAY BOTTLE, WARM to HOT WATER, EPSOM SALT and HAIR GEL.
Watch the entertaining video below to see how they combine and prepare the ingredients, and then test it out on their model. I can testify, that it works amazingly to get just the right texture and look, for what you’re going for when the beach just isn’t available! Enjoy!
Please SHARE this great HAIR DIY with your friends and family
She Rubs Epsom Salt All Over Her Hair. But When She’s Done STUNNING!
Summer hair is best worn loose and natural, you want a style that’s easy to manage and pull off. When the weather gets hot, cool beachy waves are the go-to look for many of us. Nothing looks as pretty and summery as beautiful wavy hair does. The style is perfect for every type of event or occasion you may find yourself at and it transitions seamlessly from day to night. With soft, tousled waves you’ll look great whether you’re at the beach or a fancy wedding!
While a lucky few were blessed with naturally wavy hair that doesn’t require any styling, the rest of us weren’t, and this simple beauty trick is for those who need the help! The key to attaining bouncy beautiful waves lies in a simple sea salt hair spray. Many stores and salons sell name brand versions of the basic spray, but why buy it at a drastically marked up premium when you can make it yourself at home for a fraction of the cost?
The girls in this AwesomenessTV video show you how to create your own sea salt hair spray that’s guaranteed to work because they tested it out as well on their hair model. You only need a spray bottle, hot water, hair gel, and Epsom salt, nothing more, nothing less. It’s essential that you use only Epsom salt for this and not pink Himalayan, Celtic, table, or any other type of salt, because they are not nearly as effective. Epsom salt will add body to the waves without building up or harming your scalp, so don’t skip it!
Check out the video for approximate measurements and the correct combinations, then try mixing up a bottle of it yourself at home. You can look and smell like you’ve spent the day at the beach even if you never left your couch!
Please SHARE This With Family and Friends 🙂
This Simple Effective And All Natural Recipe Will Permanently Remove Unwanted Hair On Your Face!
There is not a woman alive who has not had to deal with unwanted facial hair. At different points in the developmental cycle, and post-menopausally, most women find this hair distressing, and want to get rid of it. Depending on your hair color, some women have more facial hair than others.
Most women have it above the lip, peach fuzz on the sides of the face, and dark hairs under the chin. Some women wax, for temporary removal, which can be irritating. Chemicals in the wax can have long term bad effects on the skin.
I have stopped waxing for this reason, and have just been plucking, which doesn’t really take care of the whole problem. I was really happy to come across this natural, at home remedy for unwanted facial hair. YouTube User Homeveda offers a solution that has been used by middle-eastern women for centuries.
Not only do these two different remedies do the trick, but they utilize ingredients that have nutrients and vitamins that are actually good for the skin! Harsh chemicals be gone!
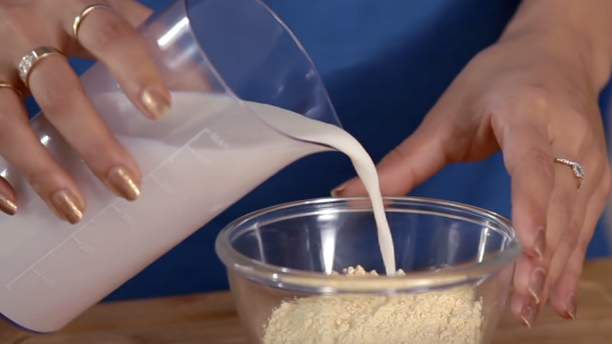
No one wants to absorb chemicals into their bloodstream, when they can mix: chickpea flour, milk, turmeric powder and fresh cream for Remedy # 1; Remedy # 2 requires mixing: peeled and crushed potatoes from which you extract the juice, crushed yellow lentils, lemon juice and honey.
The exact amounts and how to apply each remedy to the face, is beautifully illustrated in the video below, for maximum benefit. I am definitely going to try both of these to see which works better. I love the idea of using natural ingredients on my face that have been time-tested.
The good news is that after a month the hair will be gone completely!
Please Share This Recipe With Your Family and Friends
She Coils Her Hair Around This Regular Straw. When She’s Done An Unexpected Stunning Surprise!

Do you love curly hair, but lack the time and patience it takes to attain it? If you’re short on time in the morning and have flat or unruly hair, then you know how much of a pain it can be to try and style it into the perfect look. Most of the time people just throw their hair up in a bun or let it fall as it may. When it comes down to it, achieving beautiful looking hair is hard to do outside of a salon, especially well defined and perfect curls.
It takes time, patience, and a lot of heat and styling products to get frizz free curls, at least that’s what most of us commonly assume. However, there is a much easier and less expensive alternative to traditional methods of curling hair. Best of all, you can do this yourself at night right before you go to bed.
When you wake up all you need is 5 minutes or less for your hair and that’s it! There is no heat, irons, or dryers necessary for this, you don’t even need to shower, but you will need a brush, plastic drinking straws, a spray bottle with water, and some bobby pins.
First you should brush your hair to get any tangles out and make it easier to work with. Take a section of hair and damp it with the spray bottle and water. Then take a straw and wrap the hair around it, starting at the top near your scalp, and working down to the ends. Once the section of hair is completely wrapped around the straw, take a bobby pin and secure the top part to your scalp.
Take another bobby pin and fold the bottom portion of the straw back, so that it naturally seals the lower end of the hair, and pin it into place. Repeat these steps for the rest of your hair until all of it has been sectioned off and secured in place. At a minimum, wait a couple of hours or longer until you’re positive that all your hair has completely dried before taking it out.
The longer you keep the straws and bobby pins in the better, and you can leave them in overnight. When you wake up, or are sure that your hair is dry, simply take a section of hair and remove the bobby pins before sliding the straw out. You can tussle it up and disarrange it for a messier look and add a little hairspray to better hold the curls.
For a quick volume boost try flipping your hair over and spritz some hairspray near the roots, wait a few seconds for it to dry, then flip your head back up. All in all, it’ll only take about 5 minutes to style your curls and you’ll look great.
It really is easy to master and this technique can give you bouncy, frizz free, beautifully defined curls. There’s no need for any products or gadgets, and since it can be done overnight you’ll free up a lot of time in your morning routine, yet still look great.
This video will show you exactly how to curl your hair with straws and it provides a lot of great tips on the process. Check it out and try it tonight!
Please SHARE This With Family and Friends
Her Hair Seems Normal At First But It Is Hiding A Crazy Secret!

People love to try out different hair colors, as an expression or their creativity and desire to see themselves in different ways. The video below will show you the end result of using a “home remedy” for changing hair color, without the expense and damage of using harsh chemicals, and being left with a color that you have to live with for ages.
Believe it or not using a mixture of Kool-Aid drink mix powder and hair conditioner you will be able to achieve the really cool look that hides under your natural hair color. Or, if you care to be more flamboyant with your look, you can dip the ends in the mixture or apply it all over. Whatever your choice may be, no worries, because the color will only last for a few days.
It is advisable to use plastic gloves to prevent staining on your hands, and wrap yourself in an old towel to avoid staining your clothes. Mix the Kool-Aid packages in a bowl; be sure to use only the traditional version, because the unsweetened or artificially sweetened kinds will cause your hair to be sticky and the chemicals may burn your eyes.
Just a few tips for Kool-Aid colors: Cherry makes the hair a deeper red; Tropical punch results in a brighter red; Mixing strawberry and grape will give you a purplish red and experimenting with different combinations will give you a more rainbow effect. Now comes the conditioner.
Adding a few drops of conditioner and some water is key to aiding the Kool-Aid to be absorbed into the hair more evenly. The conditioner also changes the texture of the Kool-Aid into a thicker solution, making it easier to apply.
Make sure the combination of the Kool-Aid, water and conditioner are mixed to be completely smooth before applying; any lumpiness will prevent effective coloration. Now comes the fun part of using a brush to apply your mixture! If you want to dye your whole head, start at the roots and work your way down and under until all of your hair has been treated.
If you only want your tips dip them in the different colors. To get the incredible look you are about to view in the footage below, pin up the top layer of your hair and just apply your colors to the under part of your hair.
Your hair should be damp and sticky during the process, otherwise the powder will just wash out of your hair. Wrap your hair in sandwich wrap, securing it with tape, and sleep with it to get the best results. After awakening remove the plastic wrap.
Make sure to rinse your hair completely with lukewarm water ONLY. If you use shampoo all the color will wash out!! Secondly, you can apply conditioner, and then rinse again. Comb out your hair and wait to dry.
Let us know what look you go for and how the color comes out. I, myself am going to go for the look in the following video…you can go for the surprise effect while maintaining your natural look for work.
Whether your hair is short or long, I think the surprise color is getting the best of both worlds!
Please SHARE This Story With Family and Friends


